I’ve been prototyping models of a weave as a continuous thread, with some Haskell code. Here’s a quick demo which makes a plain weave, turns it into a 2-2 twill, then extends the weft to turn it into a warp, through which I then weave a plain weave:
Month: October 2015
Warping a 4 shaft table loom
The next stop on my exploration of loom technology for the weavingcodes project (after building a frame loom and learning tablet weaving) has been learning how to use a 4 shaft table loom. This has been kind of daunting to me, as it’s a much more modern weaving device than I’ve been working with up to now (frame looms and tablet weaving can be considered to be both neolithic digital tech). I also couldn’t really figure out much from books on the warping techniques, as it’s difficult to get the idea through images – so I had to just kind of jump in and try it.
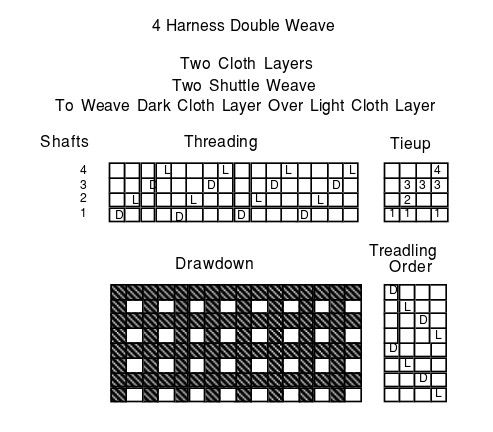
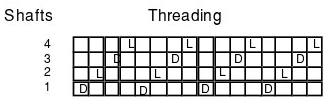
I decided to use the double weave draft plan to start with from my last post – partly as I want to try this technique, but also it’s pretty simple warp threading for a first attempt.
The next step was to choose the material. A while back I bought 200gms of good quality 8/2ne cotton/linen mix which I’ve been saving for something like this. In order to calculate the amount of fabric the yarn will produce you can wrap it lightly around a ruler:
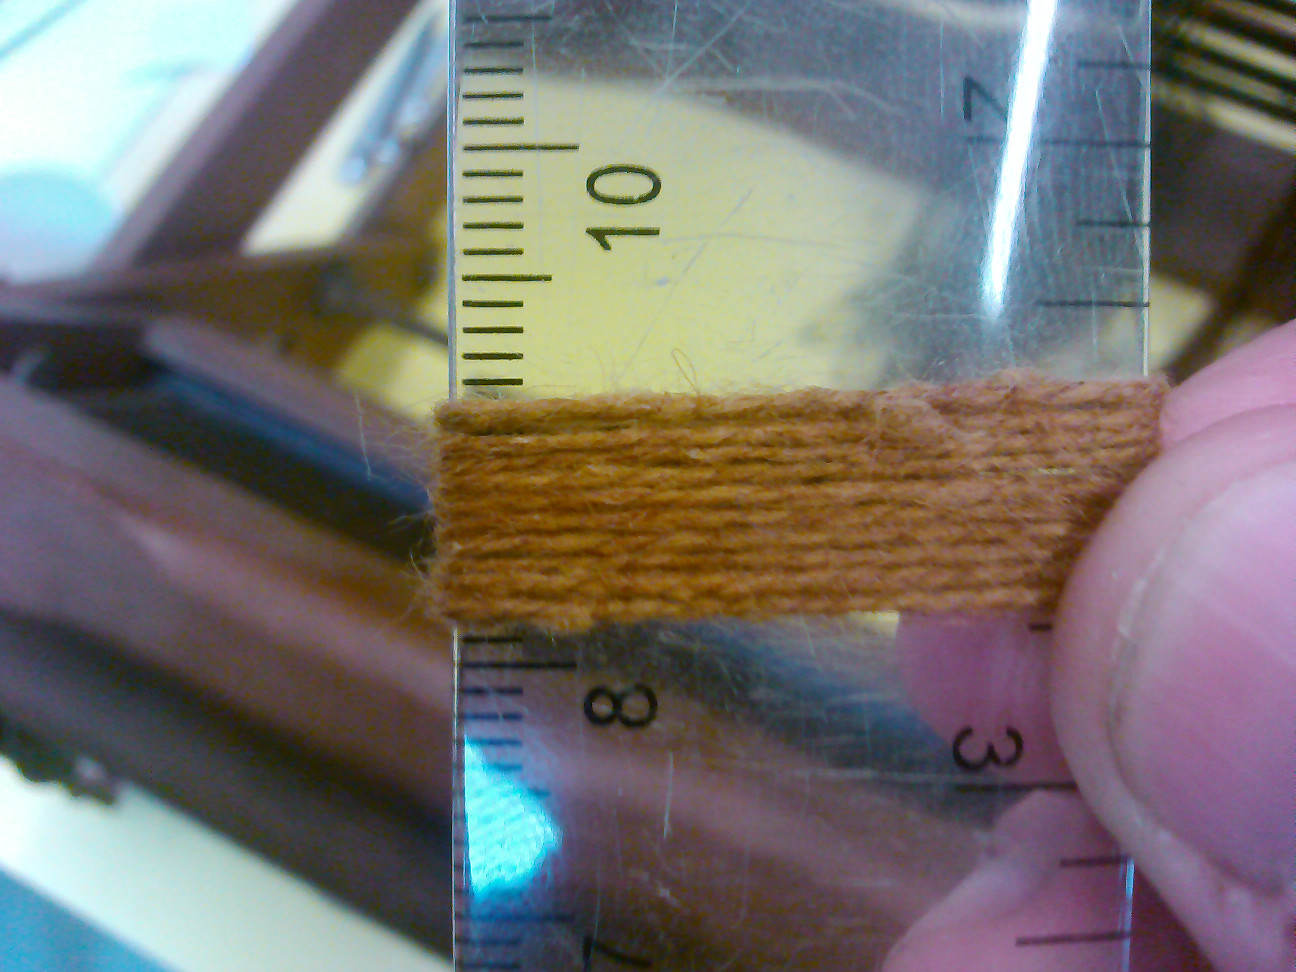
This yarn is about 10 threads per centimetre, so we can use that to figure out roughly how many warp threads (or ‘ends’) to use – I decided on 160 ends in total (so ~16cm wide) comprised of the two alternating colours. I wound out two sets of 80 threads over a couple of metres, doing both colours at once to make it easier. I then attached each one to the back roller and wound them in a bit – this would have worked better later if I had used more bundles of fewer threads.
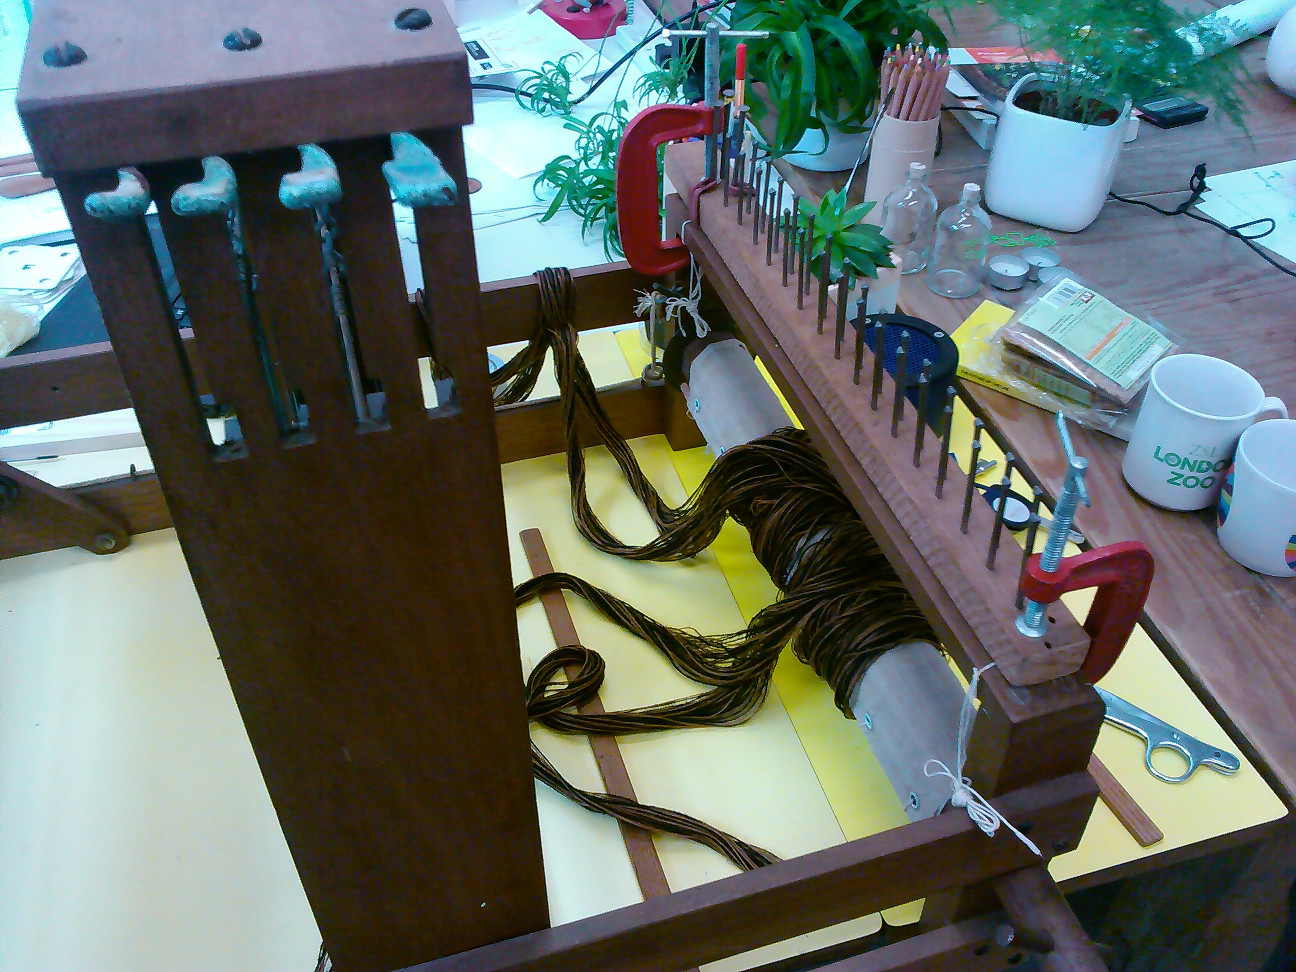
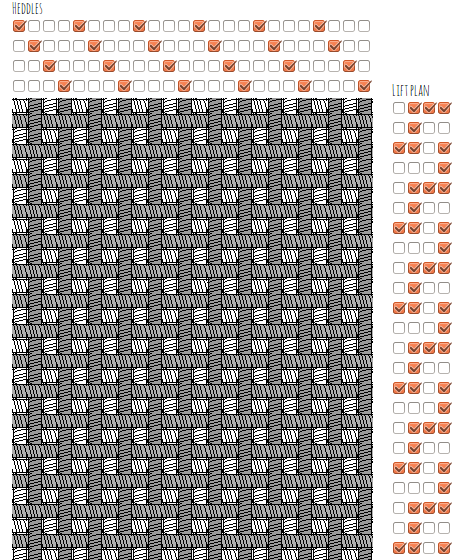
You can see in the picture I’ve also bolted a “raddle” (thing with nails) on the back beam of the loom to help space out the warp threads – this is important later on. Now we come to the heddles. The threading chart is what programs this part of the loom, which in turn forms a fixed instruction set of pattern possibilities for the weave. You can see the 4 levers that operate the frames in the photo above – these essentially give us 4 bits per weft of information. 2 of the 16 possibilities are invalid – as all frames raised or lowered doesn’t provide a working fabric. Using different sequences of these 14 combinations for each weft thread, the possibilities become mathematically huge – even with a fixed warp like this.
Reading the frames and warp colours from the chart to provide a sequence, you hook each warp end through the eye of the heddle – this was the most time consuming part of the process.
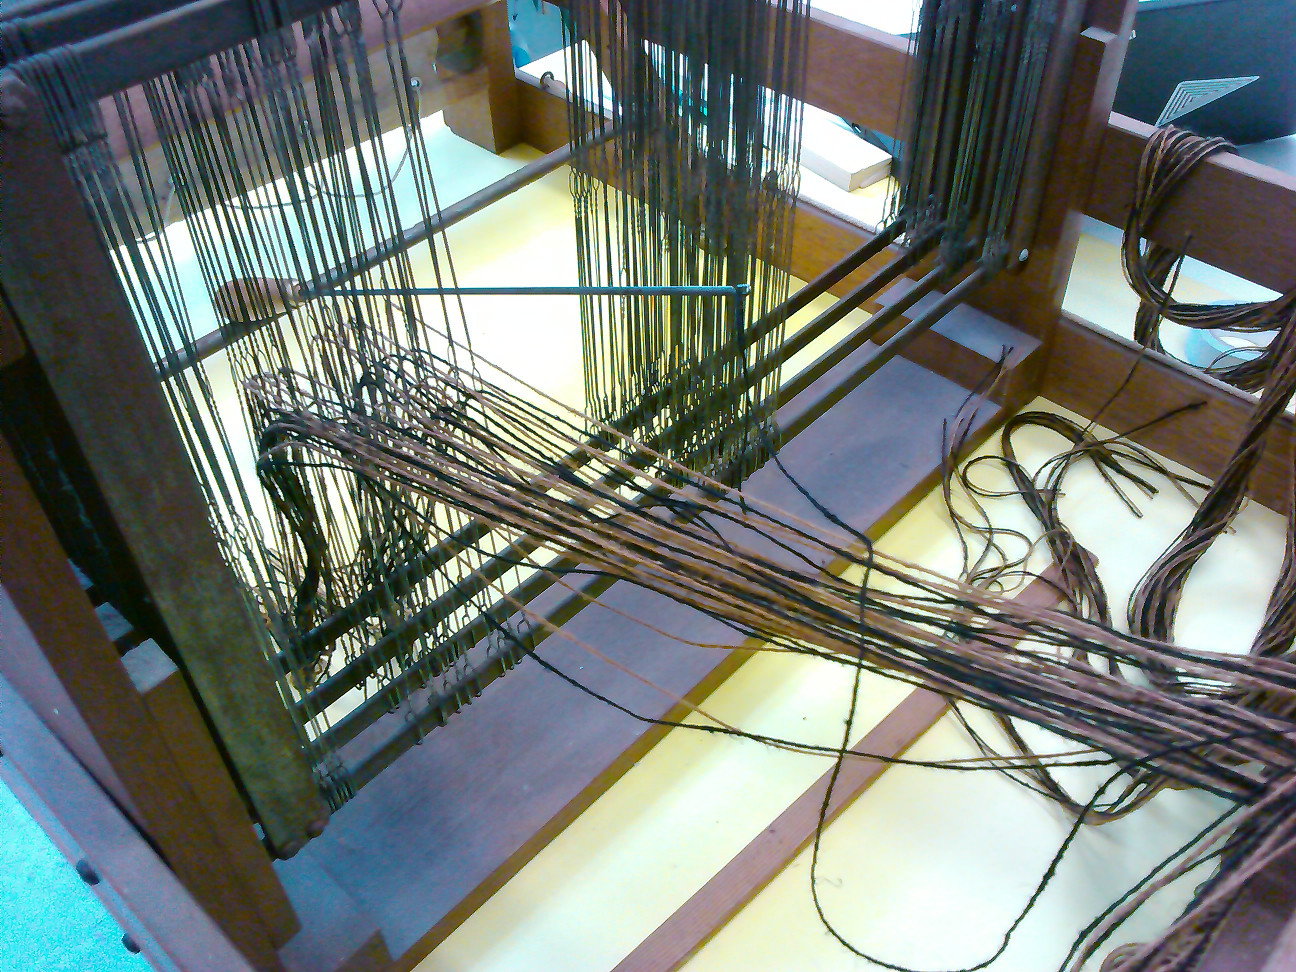
Once that is done, the reed – which is attached to the beater and used to pack down and keep the fabric evenly spaced, is threaded (or “sleyed”). The reed I used was a bit too course so I used two threads per gap – this could have done with being a bit more as it turned out.
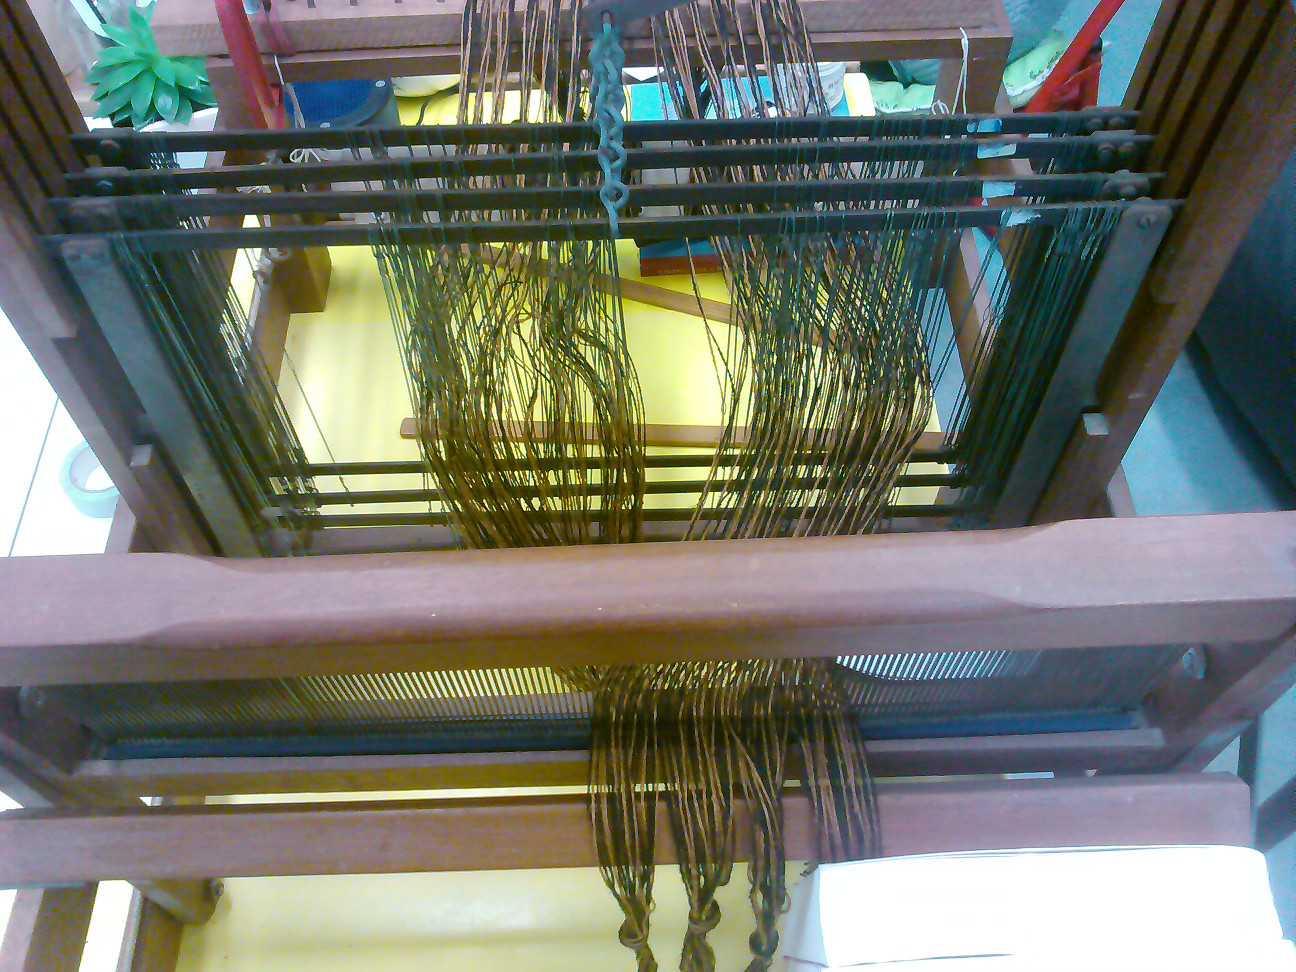
With all this done the warp ends can be attached to the front roller and the whole warp can be wound on through the heddles and back again to check the tension. Of course in practice (and as it was my first time) it actually involved a lot of tangles and swearing, and two broken warp threads, fairly easily knotted back together. The raddle was essential in helping untangle the warp threads, but I also had to fiddle around with the tension a lot, retying the knots attaching them to the rollers and using plenty of sticks (it seems you can never have too many sticks when warping a loom). This is a test that the warp is threaded correctly, with all black threads (frames 2 and 4) lifted – phew!

After that we could try a little test weaving, going freestyle on the heddles.
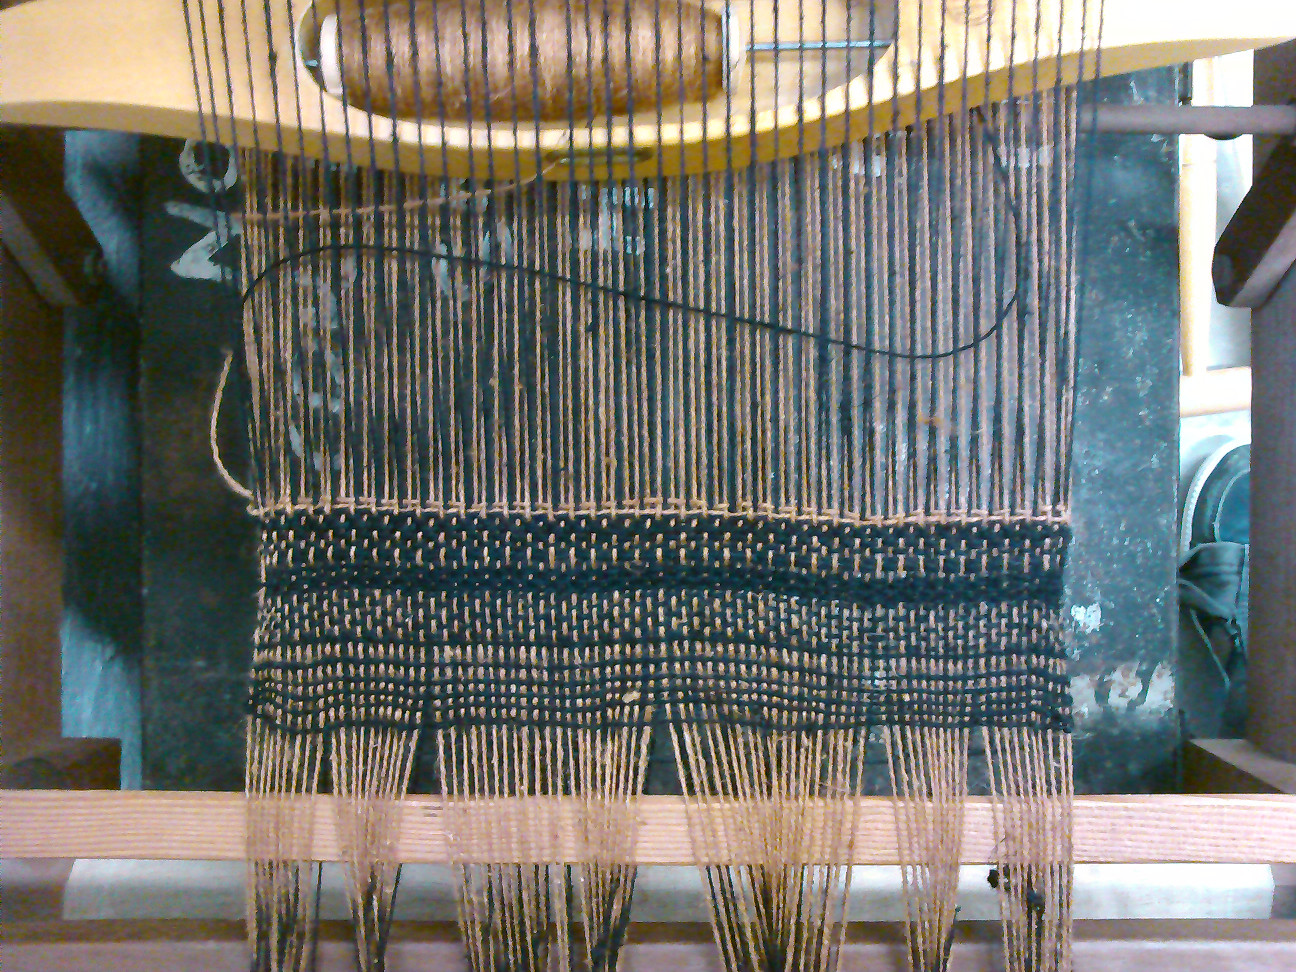
It turns out the reed is a little too wide, meaning it’s stretching the warp out as the woven fabric finds it’s true width – switching to a new one is possible without needing to do the heddles again, so we’ll see how it goes. Compared with tablet weaving, this is far more mechanised and efficient in terms of fabric production, but the flipside to that is that you lose a lot of flexibility, and the loom is less responsive to particular material properties like this.
“The mystery of the drawdown”
Double weave has intrigued me since first figuring out how it works with tablets – it shows how weaving is a 3D process, and is an example of shape making from code. It’s the starting point for more advanced methods for creating strong woven composite materials and structures. I’ve been reading this document by Paul O’Connor to understand the process for a 4 shaft loom. He includes this critique on current methods for visualising weaving:
The traditional method for creating the drawdown shows all the warp and all the weft threads in one layer. What is needed is a way to make two drawdowns, one for the top cloth layer and the other for the bottom cloth layer. Most of the commercially available computer weave programs display the drawdown in this same fashion, as a single layer.
This is a draft plan (the traditional notation technique) for double weave which contains the drawdown he’s talking about:
Drawdowns are designed for thinking about weaving as 2D pattern, and like any notation system they abstract a situation so we can reason about it, with the trade-off that they make it impossible to understand different aspects. This is a big problem we have in programming too – and is the reason we need to have many levels and hundreds of different languages to describe problems. I’ve noticed that if people (or organisations) stick with one too long, the specialisation starts to hinder ability to even recognise certain issues. It’s interesting to see such a clear analogy here.
In order to see what’s really happening with double weave, we need to switch to a different notation and look at the structure more closely:

Hopefully you can see that all of the black threads are sitting on top of all the white threads, and forms it’s own plain or tabby weave fabric. The same is true for the white threads underneath. Below is the same structure rendered in the weavecoding dyadic device – this shows the heddles that need raising to create the sheds in the lift plan, and you can see a repeating zigzag pattern. As an aside, I’ve noticed that there seems to be some kind of underlying categorisation of lift plan patterns which I’ve not found mentioned anywhere yet – something else to look into at some point.