The AHRC Weaving Codes, Coding Weaves project has drawn to an end. But happily, the work continues on within the ERC funded PENELOPE project. We may well update this blog in the future, but for now we are sharing our progress on the PENELOPE blog, please join us there!
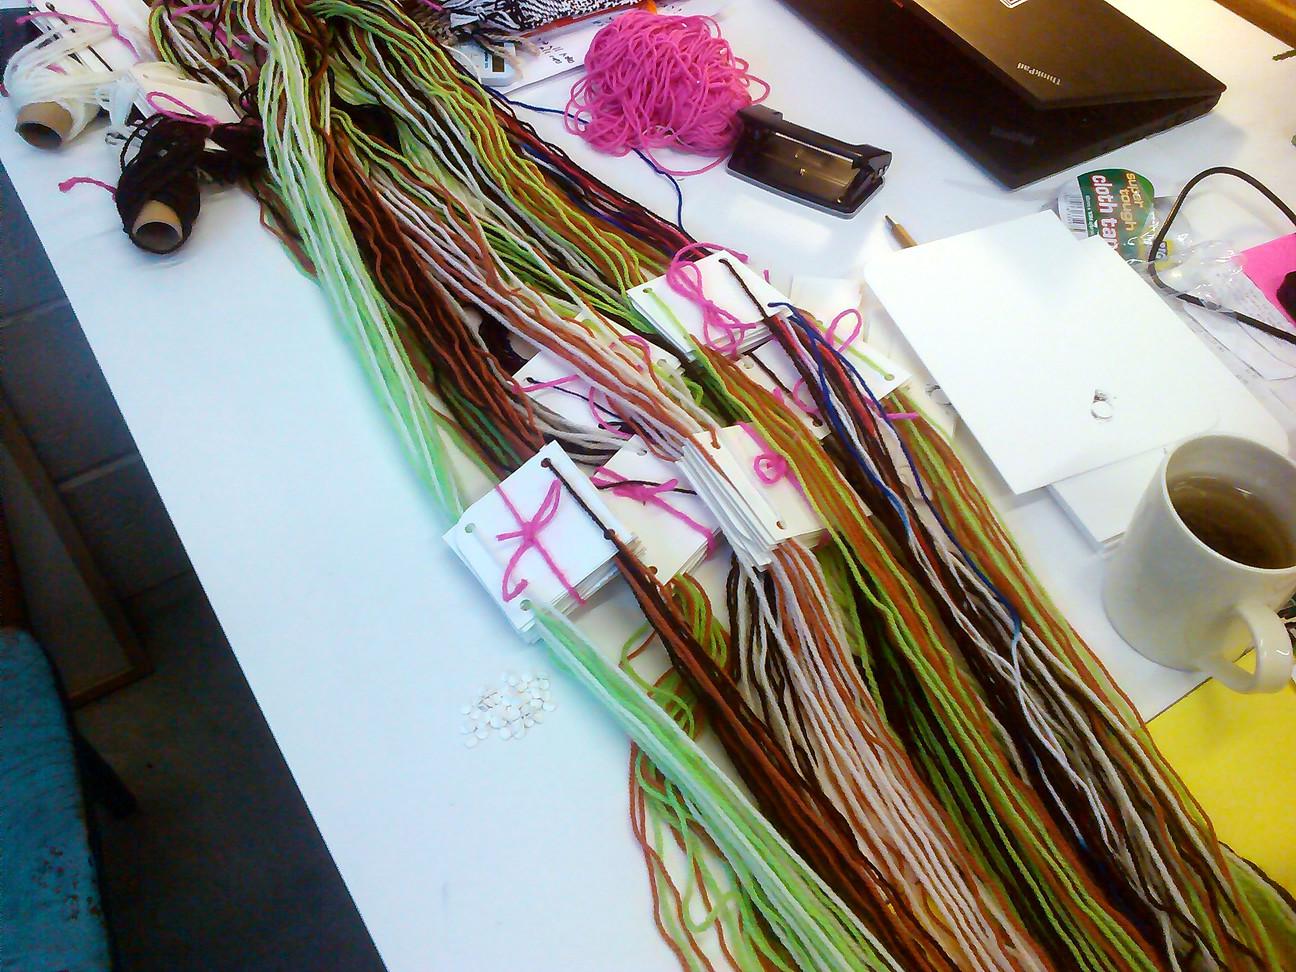
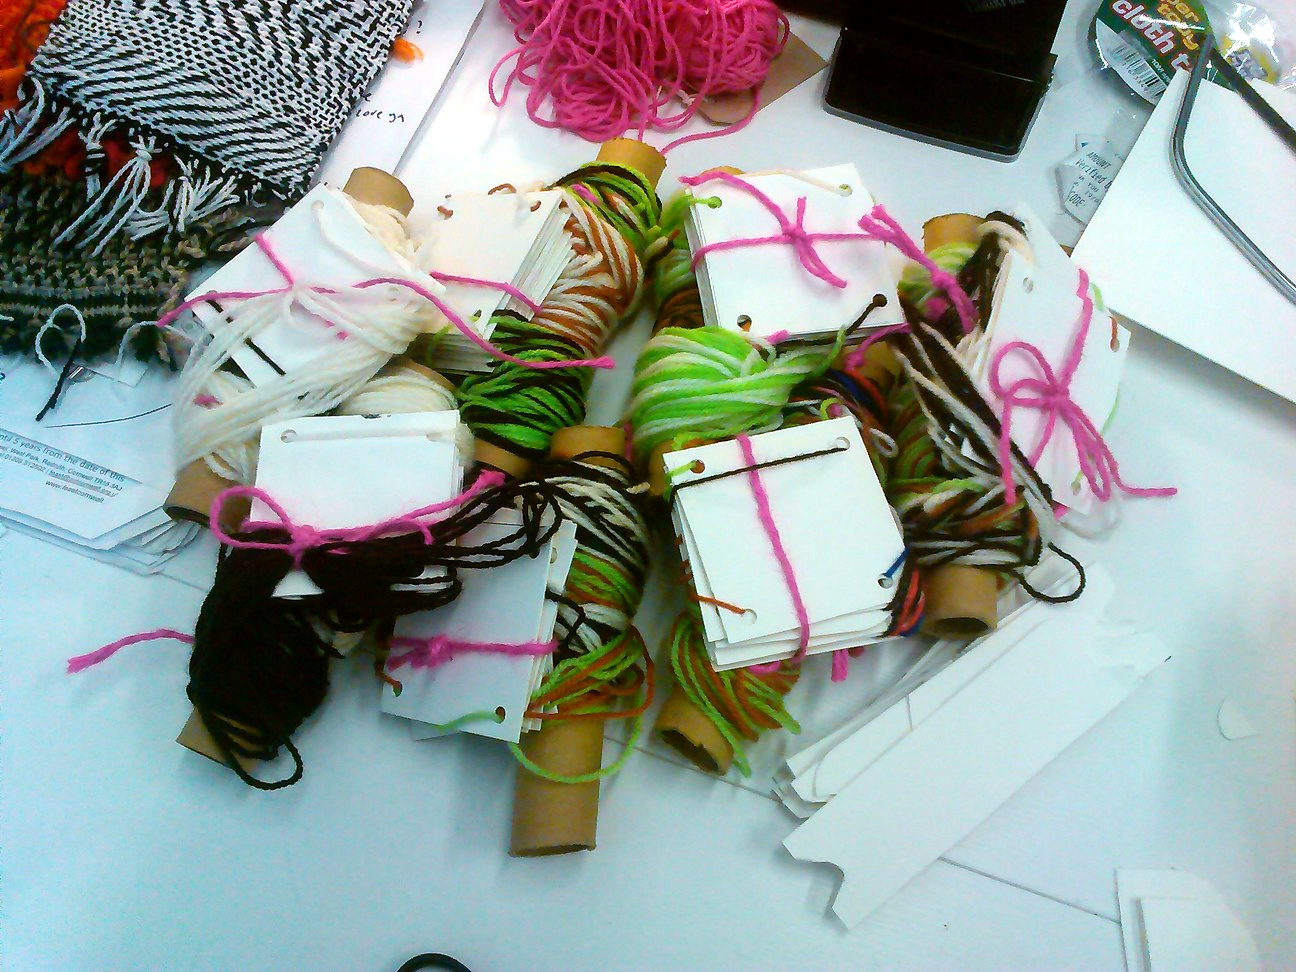
A tanglebots workshop report
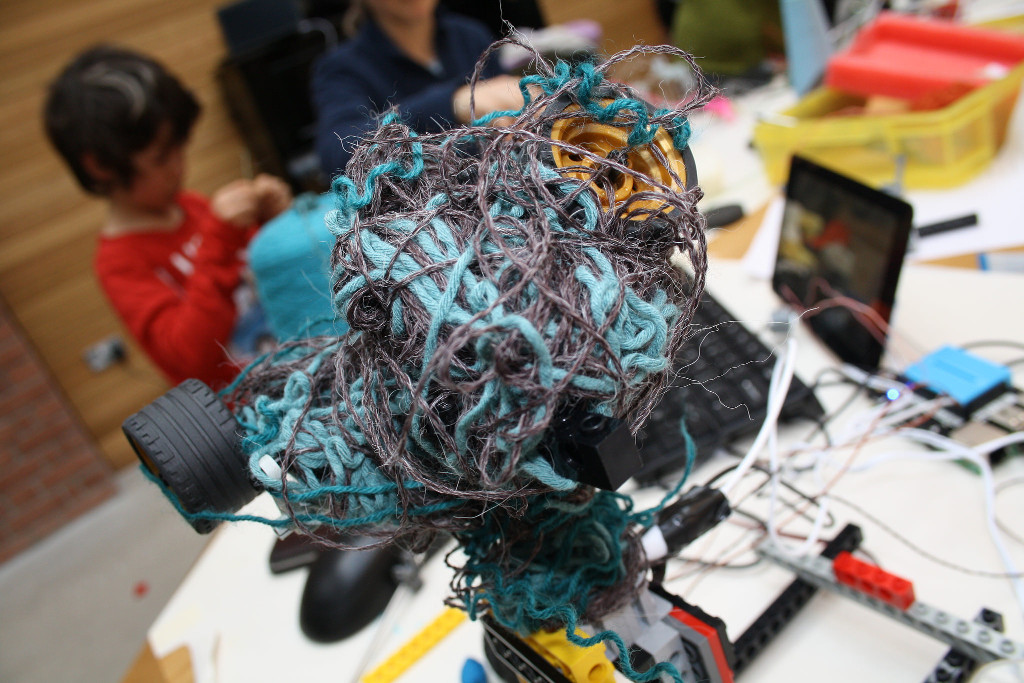
For the finale to the weavingcodes project we are trying a new approach to technology education inspired by the project, teaching families about code, robotics and thread by building “tanglebots”.

The concept is to combine programming with physical objects, concentrating on sensor input and movement as output. It’s important that we incorporate our weavingcodes research process, so deliberately setting goals we don’t yet know the answers to.
Knitty tangle #tanglebot pic.twitter.com/qrnsu2HIi1
— Weaving Codes (@kairotic) March 20, 2016
The weaving focus allows us to ground the workshop in loom technology and demonstrate the challenges of manipulating thread, with its enormous history of technological development. For the first Cornwall workshop, Ellen started us off with an introduction using FoAM Kernow’s Harris loom and the fundamentals of weaving. We were also joined by Janet and Jon from lovebytes who are helping us to run these events. When first talking about possible workshops with children, we’d discussed the impossibility of making a functional loom in a couple of hours with only broken toys and lego – and so the focus on tangling was suggested by Alex as a way to turn these difficulties to an advantage. Similarly we created a series of prizes for different categories such as “Most technical effort with least impressive result” – inspired by hebocon events.
The workshop format we used is also influenced by Paul Granjon’s wrekshops – wherever possible we’re recycling by pulling apart e-waste, making use of electronics, motors, gears and ideas from the surprising complexity of what’s inside things people are throwing away. This turned out have a powerful implicit message about recycling, parents I talked to had tried taking things apart to learn about them, but the next step – making use of the parts discovered as we were doing here, needs a bit more help to do.
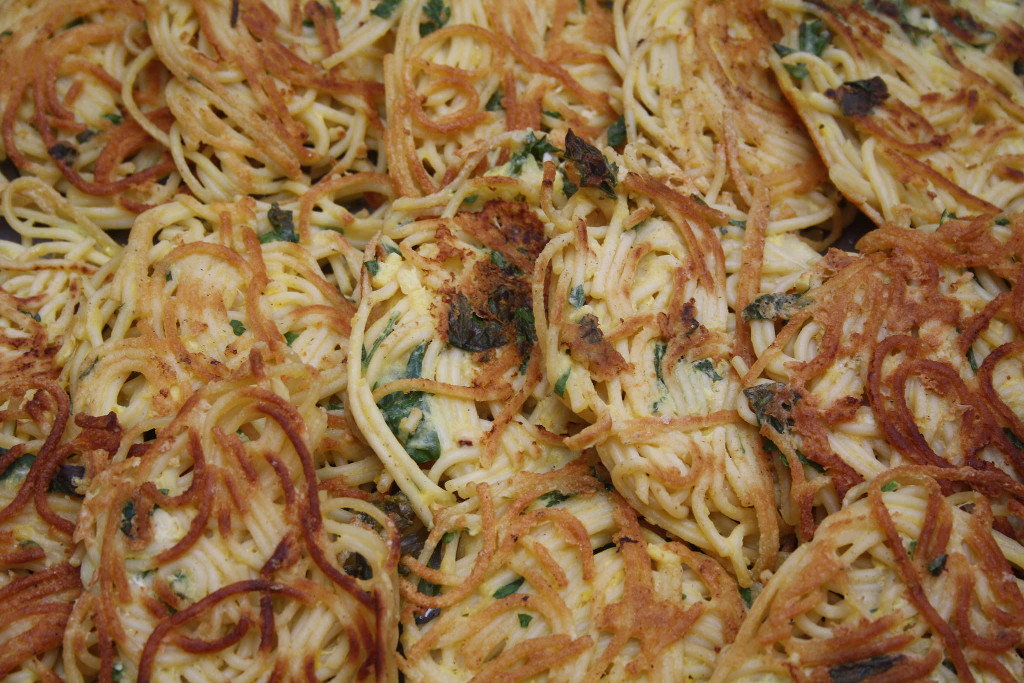
Also as normal for FoAM projects was the importance of the food, in this case tangled by Amber and Francesca to both provide sustenance and inspiration with cardamom knots, spiralised courgetti and tangle fritters.
The groups ended up a bit lopsided, so in future we plan to pre-arrange them as we did on the machine wilderness workshop. In order to do that we need to ask for more information from participants beforehand such as family ages and backgrounds.
We tried using the small Pi touchscreens – these were a bit too fiddly to get away without a mouse, but are much less oppressive somehow than larger PC monitors – as they are so small, they became incorporated into the tanglebots themselves.
Crocodile clips were the best way to connect to random/plundered electronics as well as the lego motors. These removed the need for soldering (which we had set up anyway, but in a separate space).
A selection of other notes we made:
- Start with a manual tangling exercise (weaving with rope, tablets etc)
- Lego has a strange all or nothing effect, once you start using it – everything has to work that way, avoiding it may lead to more creative options than including it
- A first aid kit is needed for these sorts of things
- The Pimoroni Explorer Hats are good but needed periodic resets in some cases – the motors seemed to get jammed, not sure if this is short circuits interrupting the i2c comms?
- The Raspberry Pi docs are riddled with minor errors, e.g. the Scratch GPIO section on the explorer hats has a lot of sometimes confusing typos.
All our resources are being uploaded to the kairotic github repository so other people can make use of the materials.
As well as being supported by AHRC Digital Transformations, this project was part of British Science Week, supported by the British Science Association.
Tanglebots workshop preparation
As a finale to the weavingcodes project we are running a series of Tanglebot workshops for all ages to provide a messy introduction into weaving, robotics and coding along with the artifacts and discoveries we’ve made on this project. Tanglebots are prototype/failed weaving robots (weaving is quite hard as we’ve discovered, so we are starting with tangles and seeing what patterns emerge).
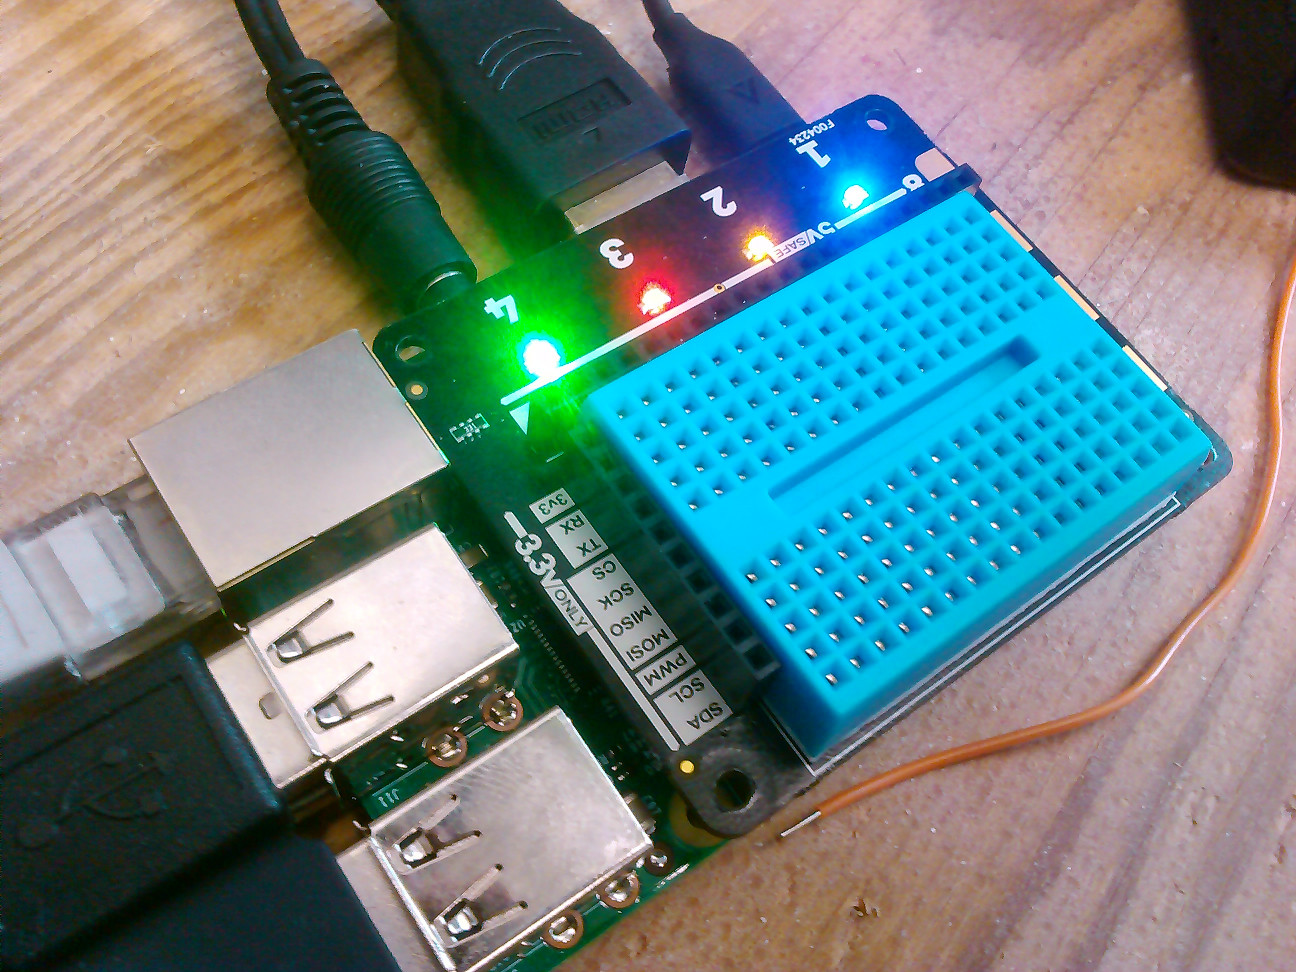
We’re using recycled e-waste, Raspberry Pi computers and electronics and the Foam Kernow workshop is part of British Science Week.
Instead of using my cobbled together homemade interface board, we’re using the pimoroni explorer hat (pro) as our robot controller. This comes with some nice features, especially a built in breadboard but also 8 touch buttons, 4 LEDs and two motor drivers. The only downside is that it uses the same power source as the Pi for the motors, so you need to be a little careful as it can reset the Pi if the power draw is too great.
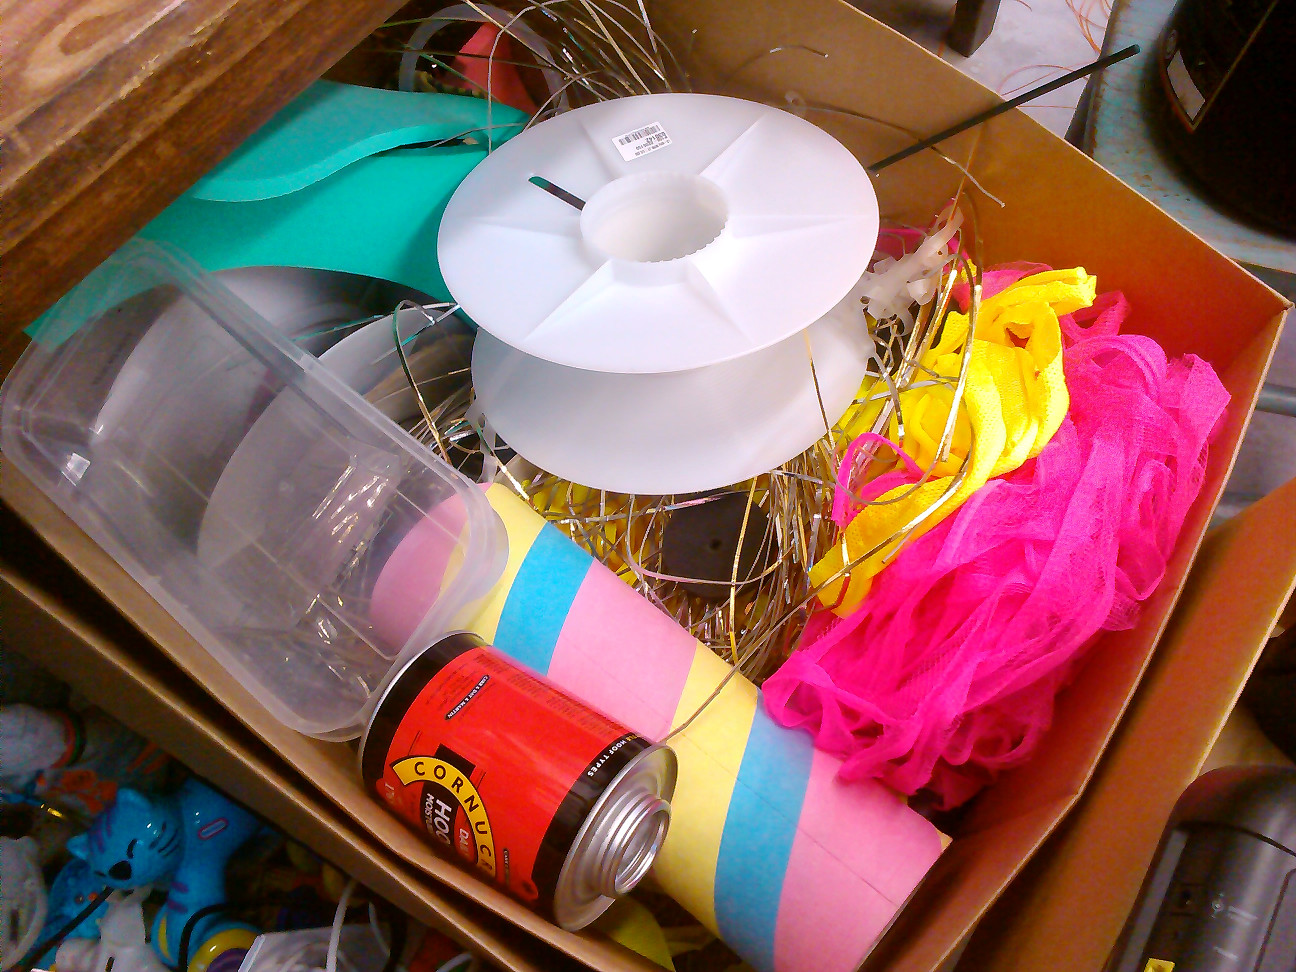
We have a good stock of recycled e-waste robotic toys we’re going to be using to build with (along with some secondhand lego mindstorms):
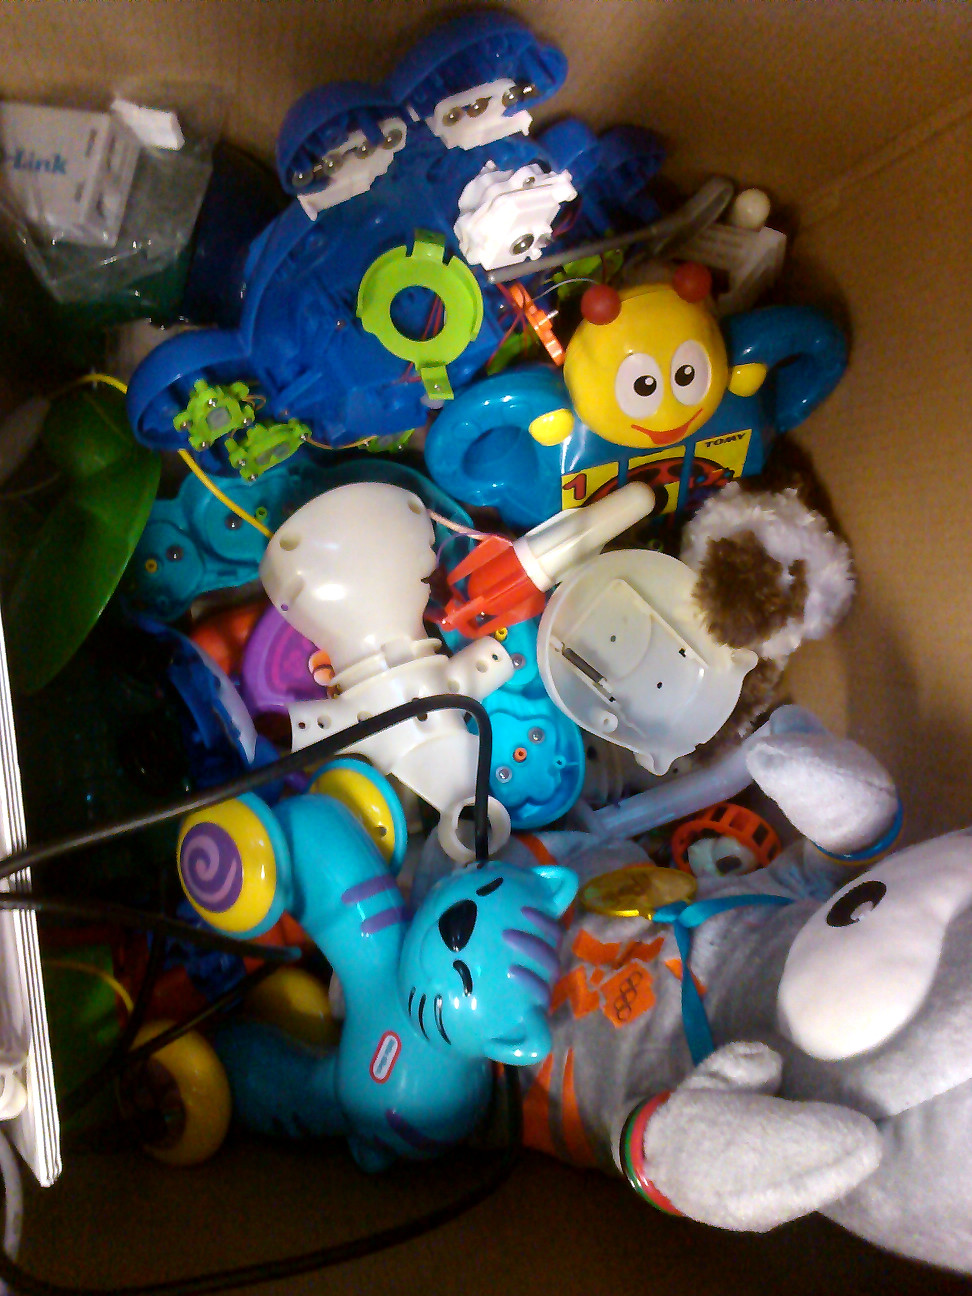
Also lots of recycled building material from the amazing Cornwall Scrap Store.
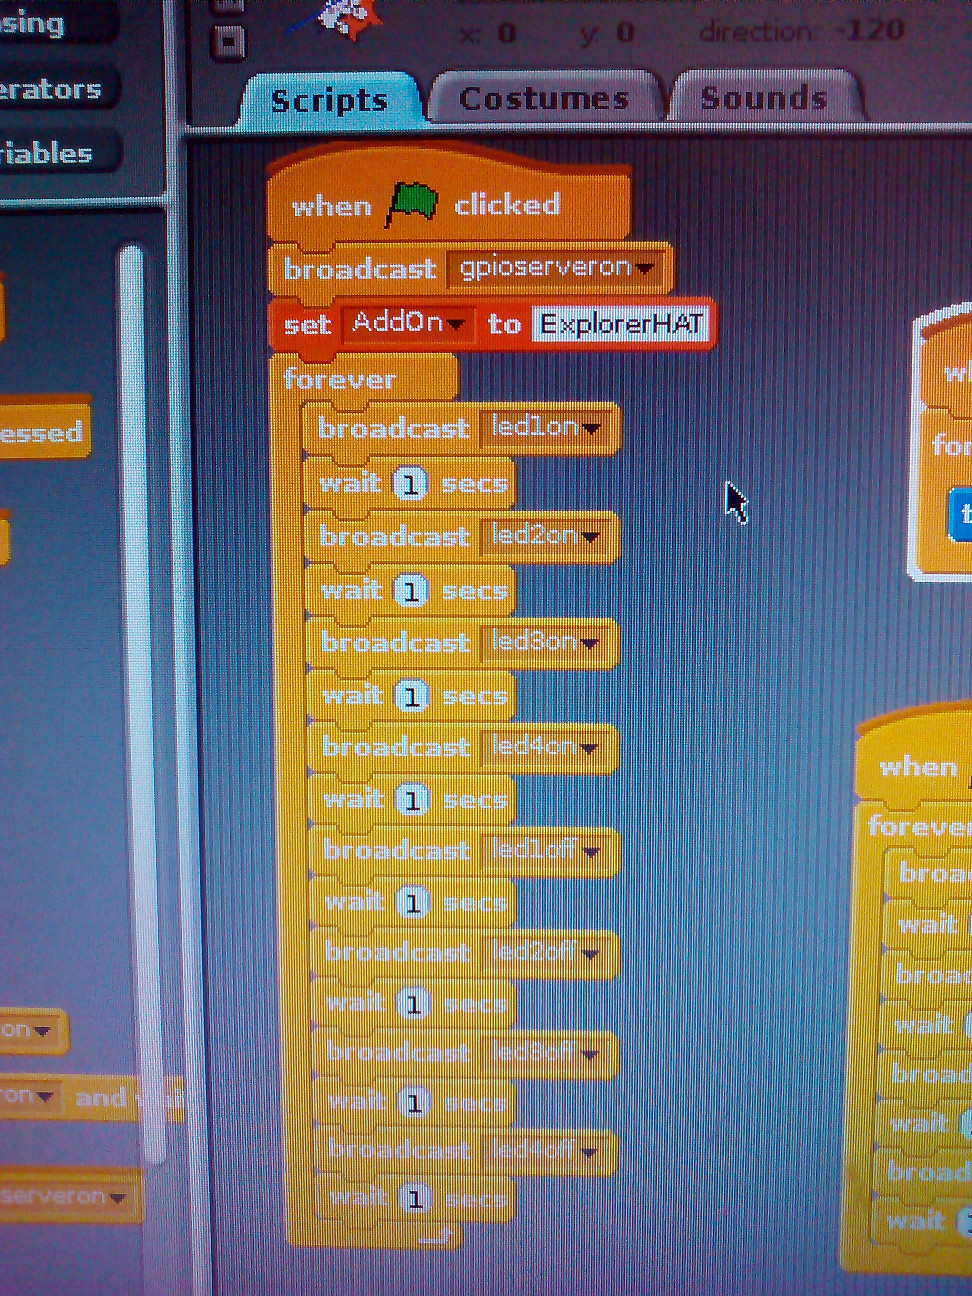
In order to keep the workshop balanced between programming and building, and fun for all age groups, we want to use Scratch – rather than getting bogged down with python or similar. In a big improvement to previous versions of the Pi OS, the recent raspbian version (jessie) supports lots of extension hardware including the explorer hat. Things like firing the built in LEDs work ‘out of the box’ like this:
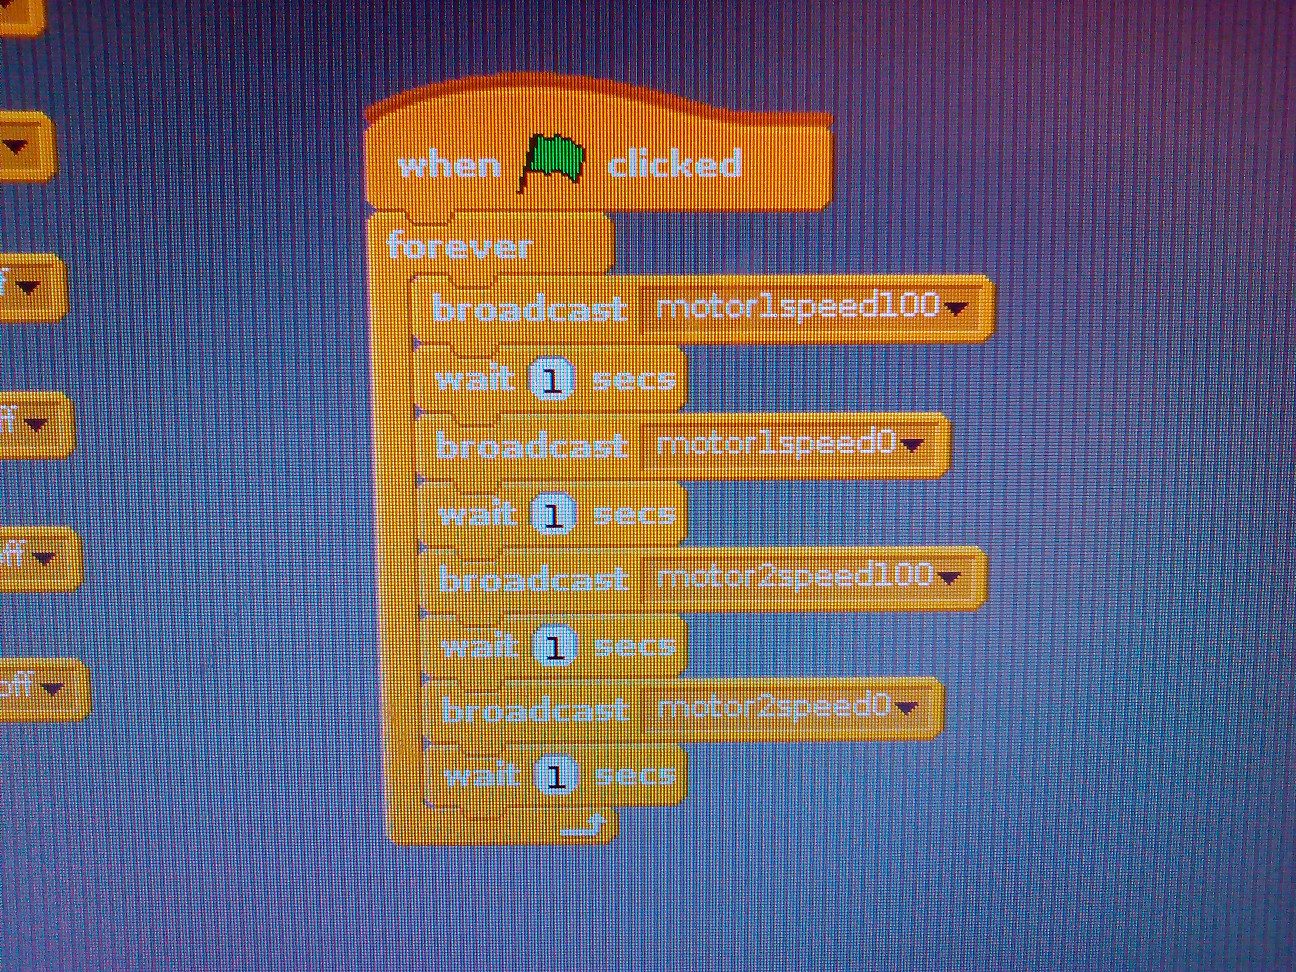
While the two motor controllers (with speed control!) work like this:
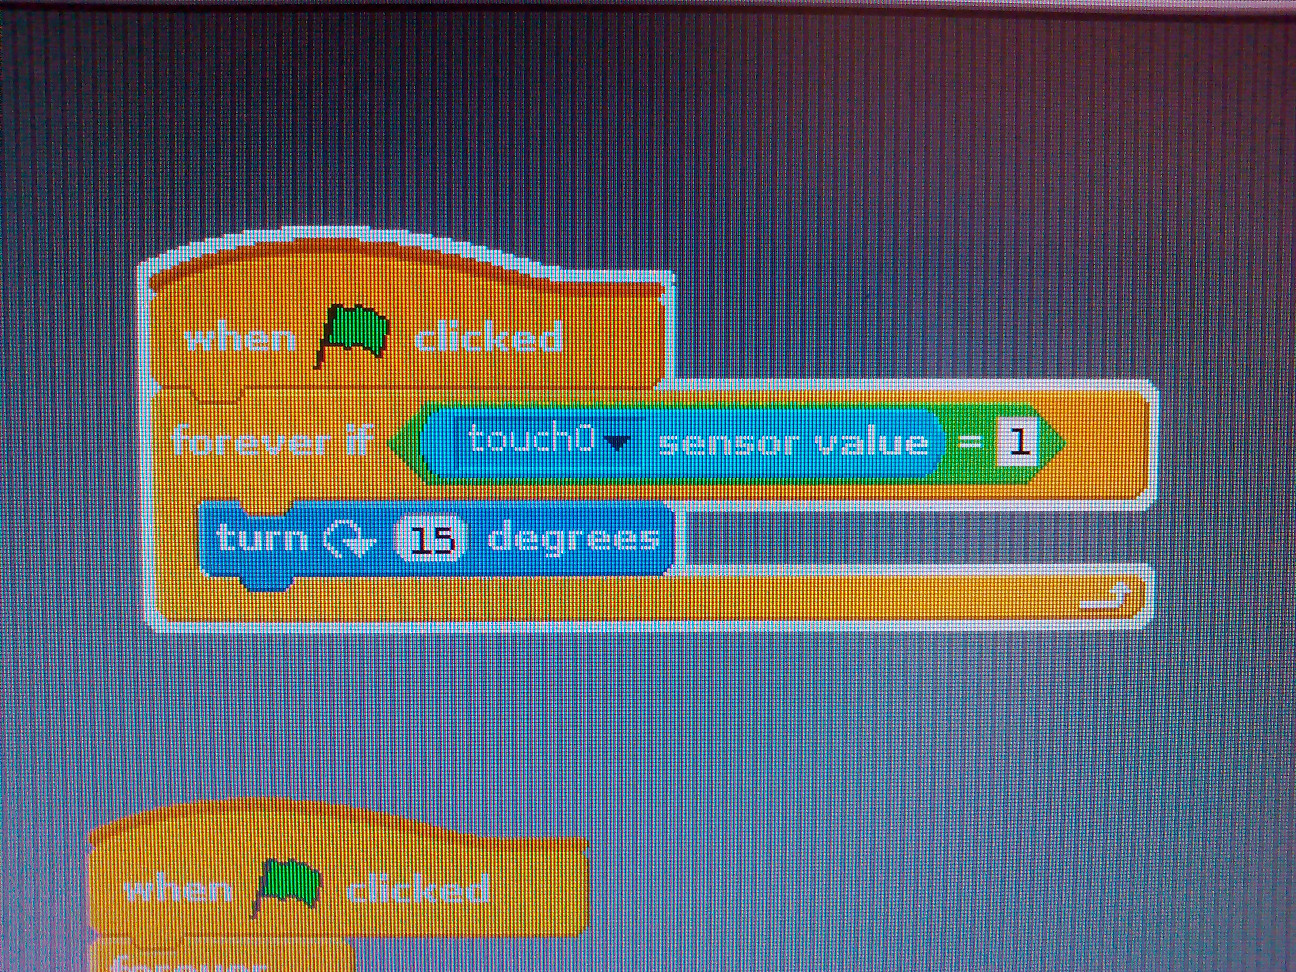
The touch buttons were a bit harder to get working as they are not supported by default, so I had to write a scratch driver to do this which you can find here. Once the driver script is running (which launches automatically from the desktop icon), it communicates to scratch over the network and registers the 8 touch buttons as sensors. This means they can be accessed in scratch like so:
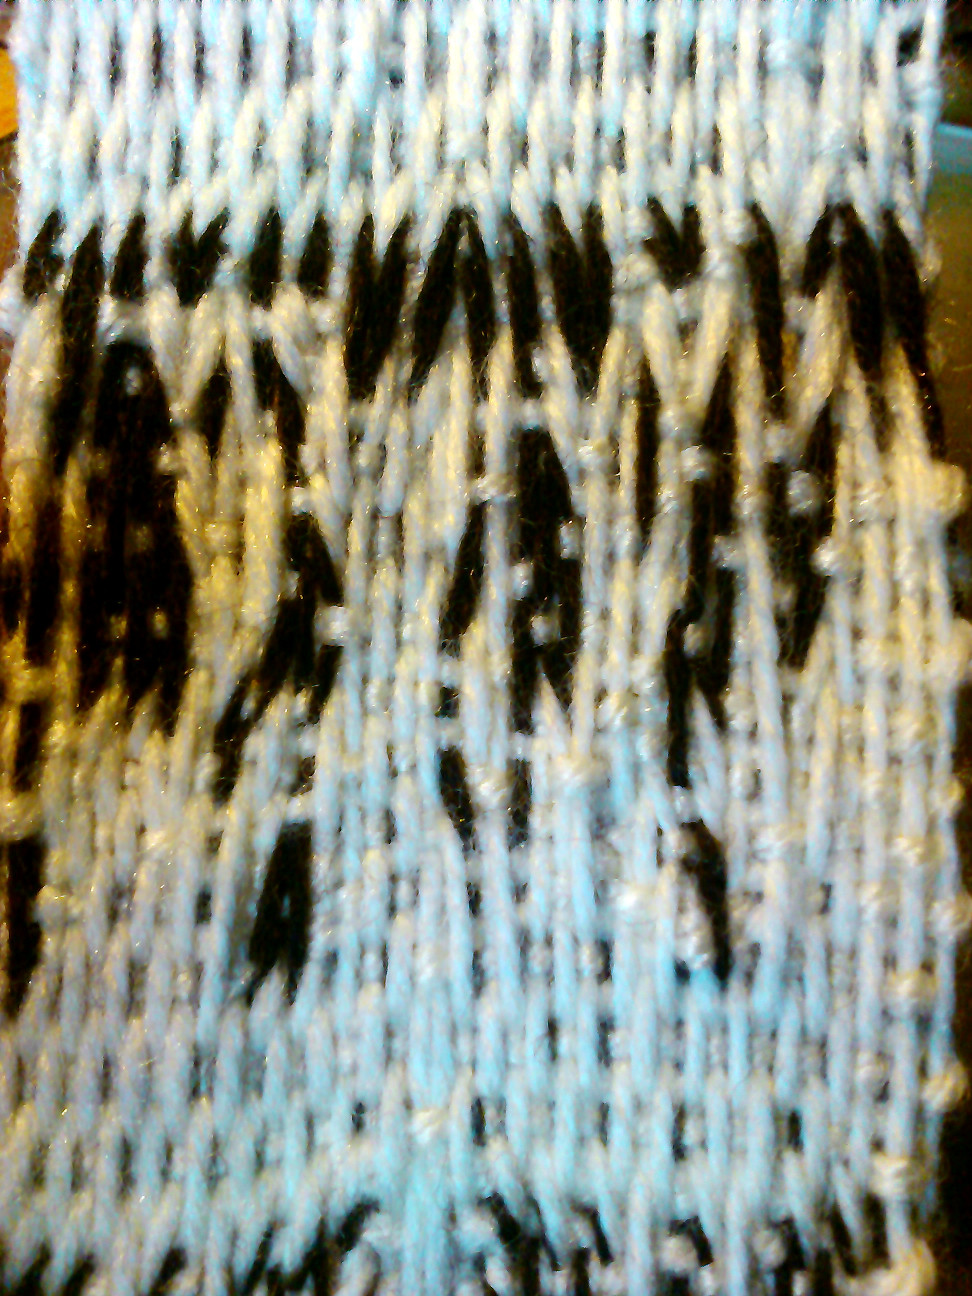
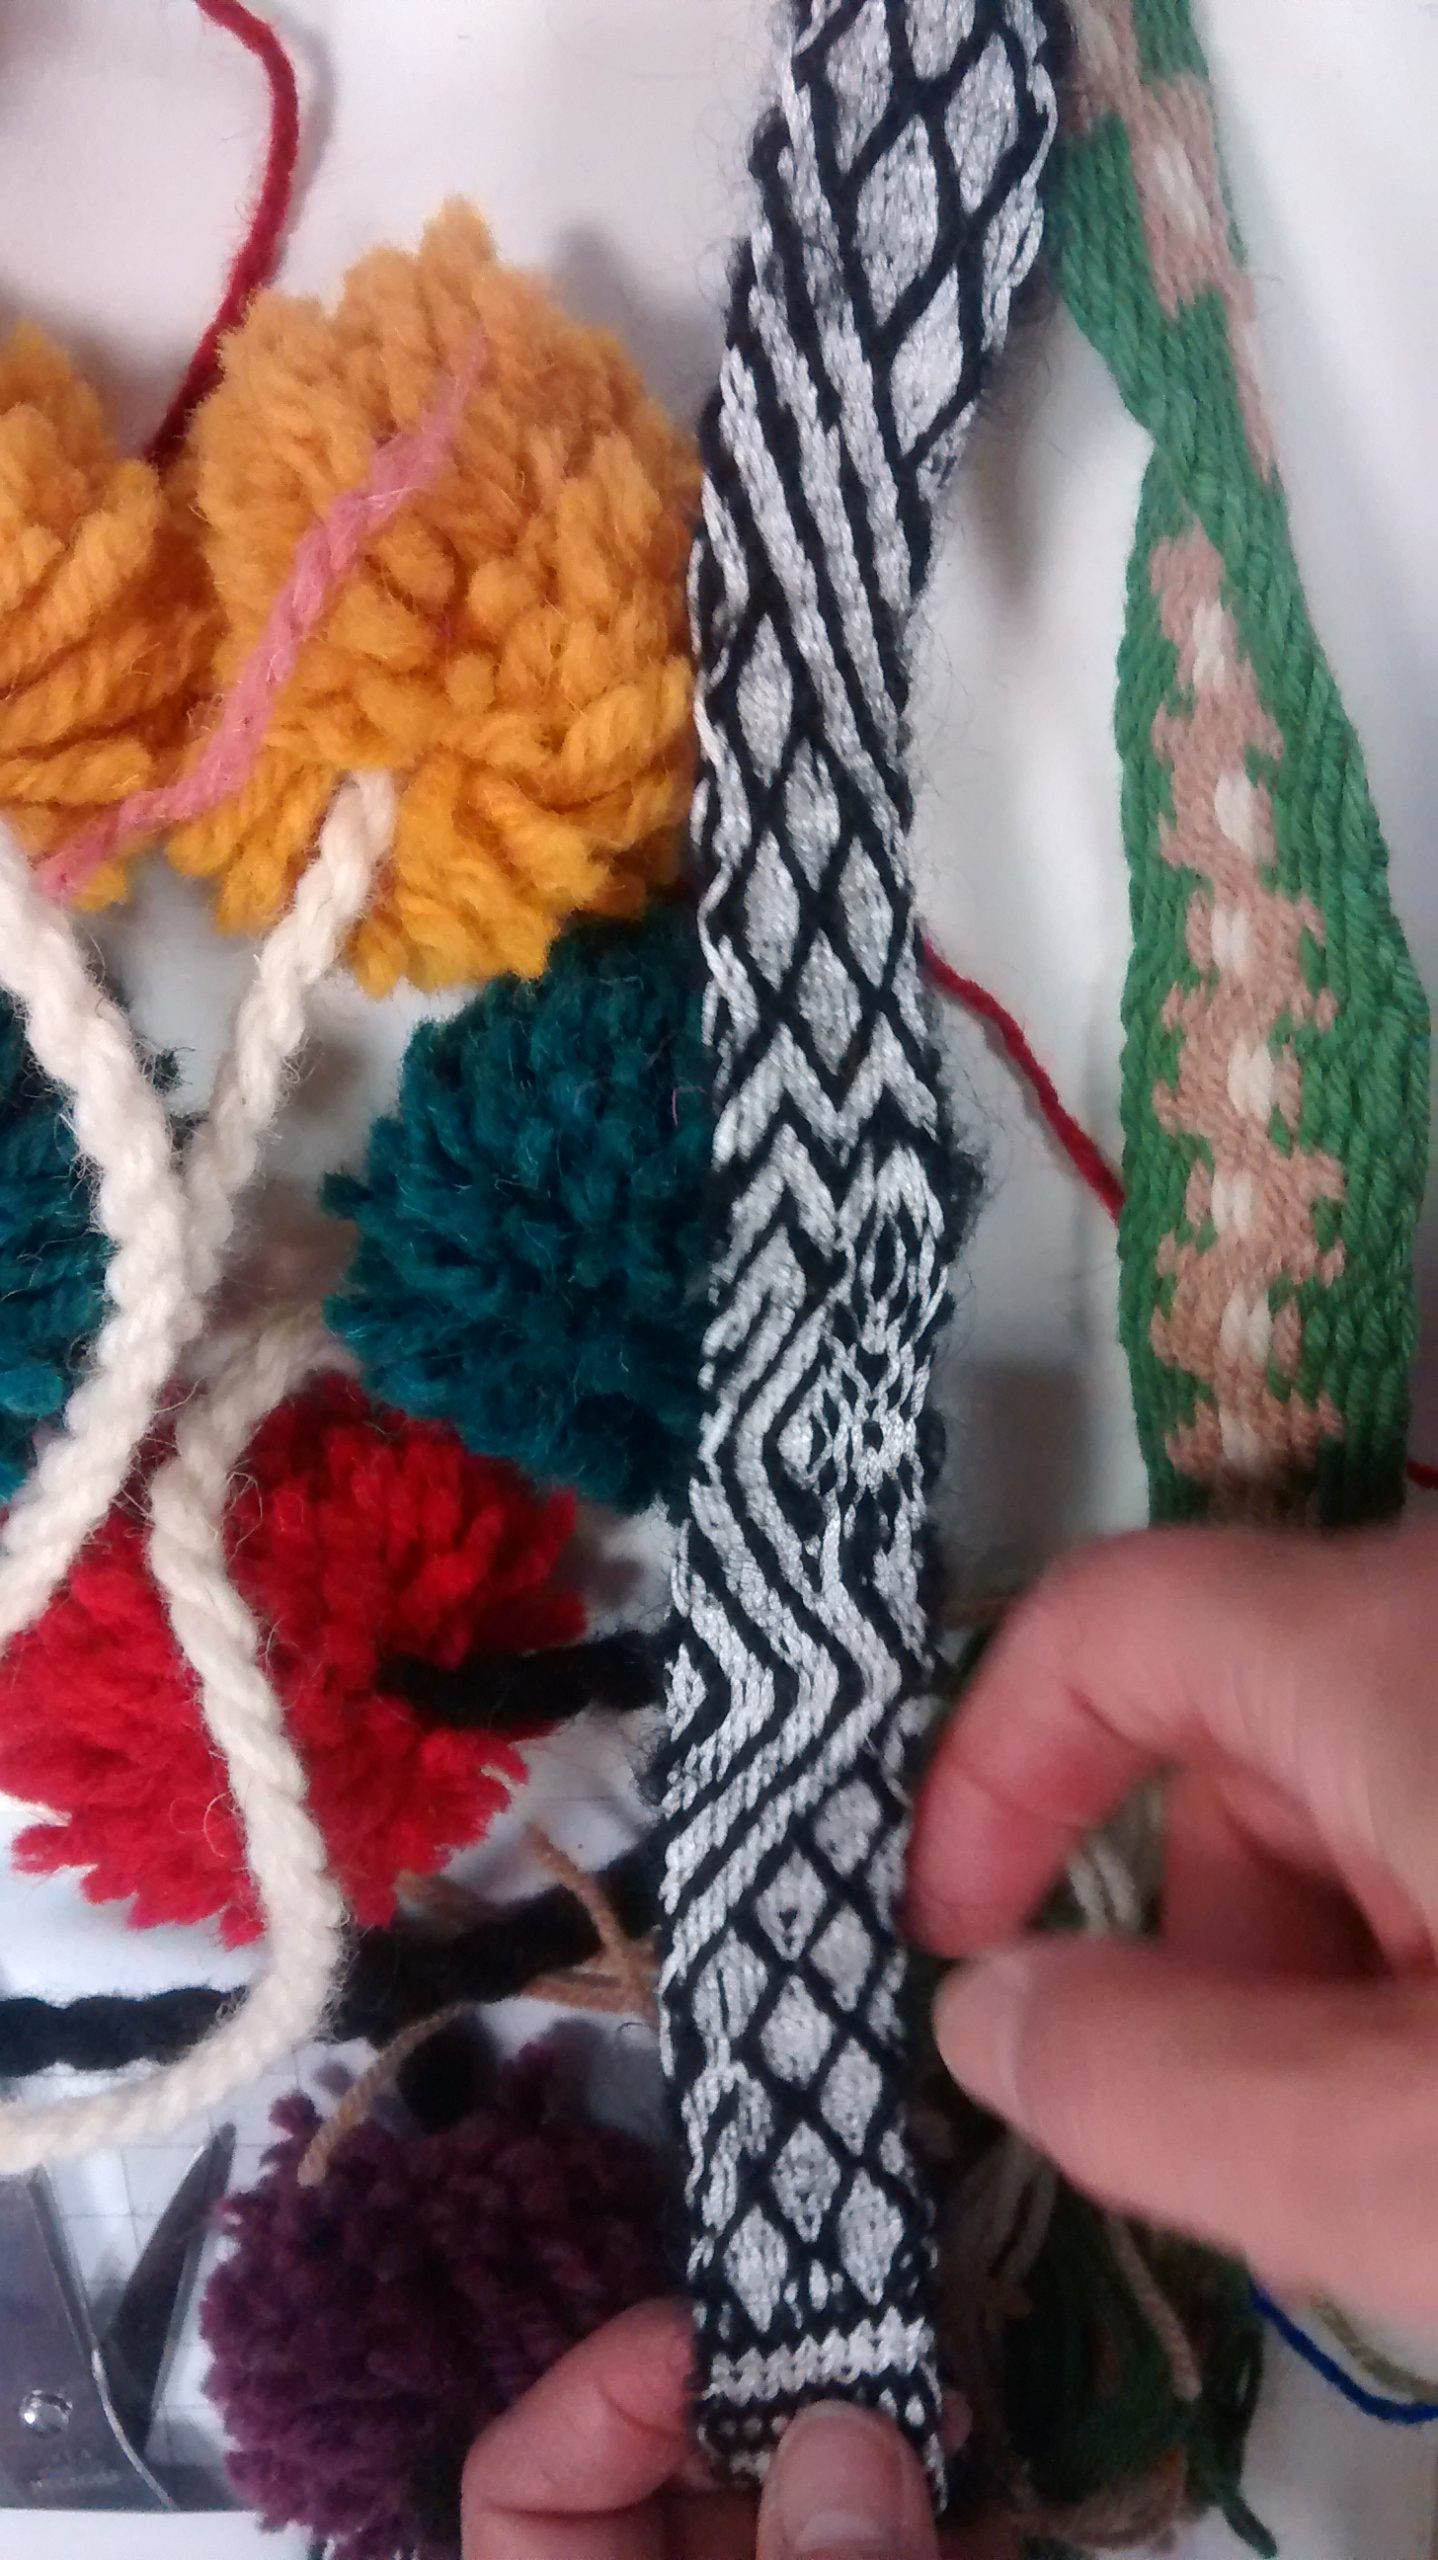
How to warp a tablet loom (/neolithic digital computing device)
Tablet looms have some interesting properties. Firstly, they are very very old – our neolithic ancestors invented them. Secondly they are quite straightforward to make and weave but form an extremely complex structure that incorporates both weaving and braiding (and one I haven’t managed to simulate correctly yet) – they are also the only form of weaving that has never been mechanised.
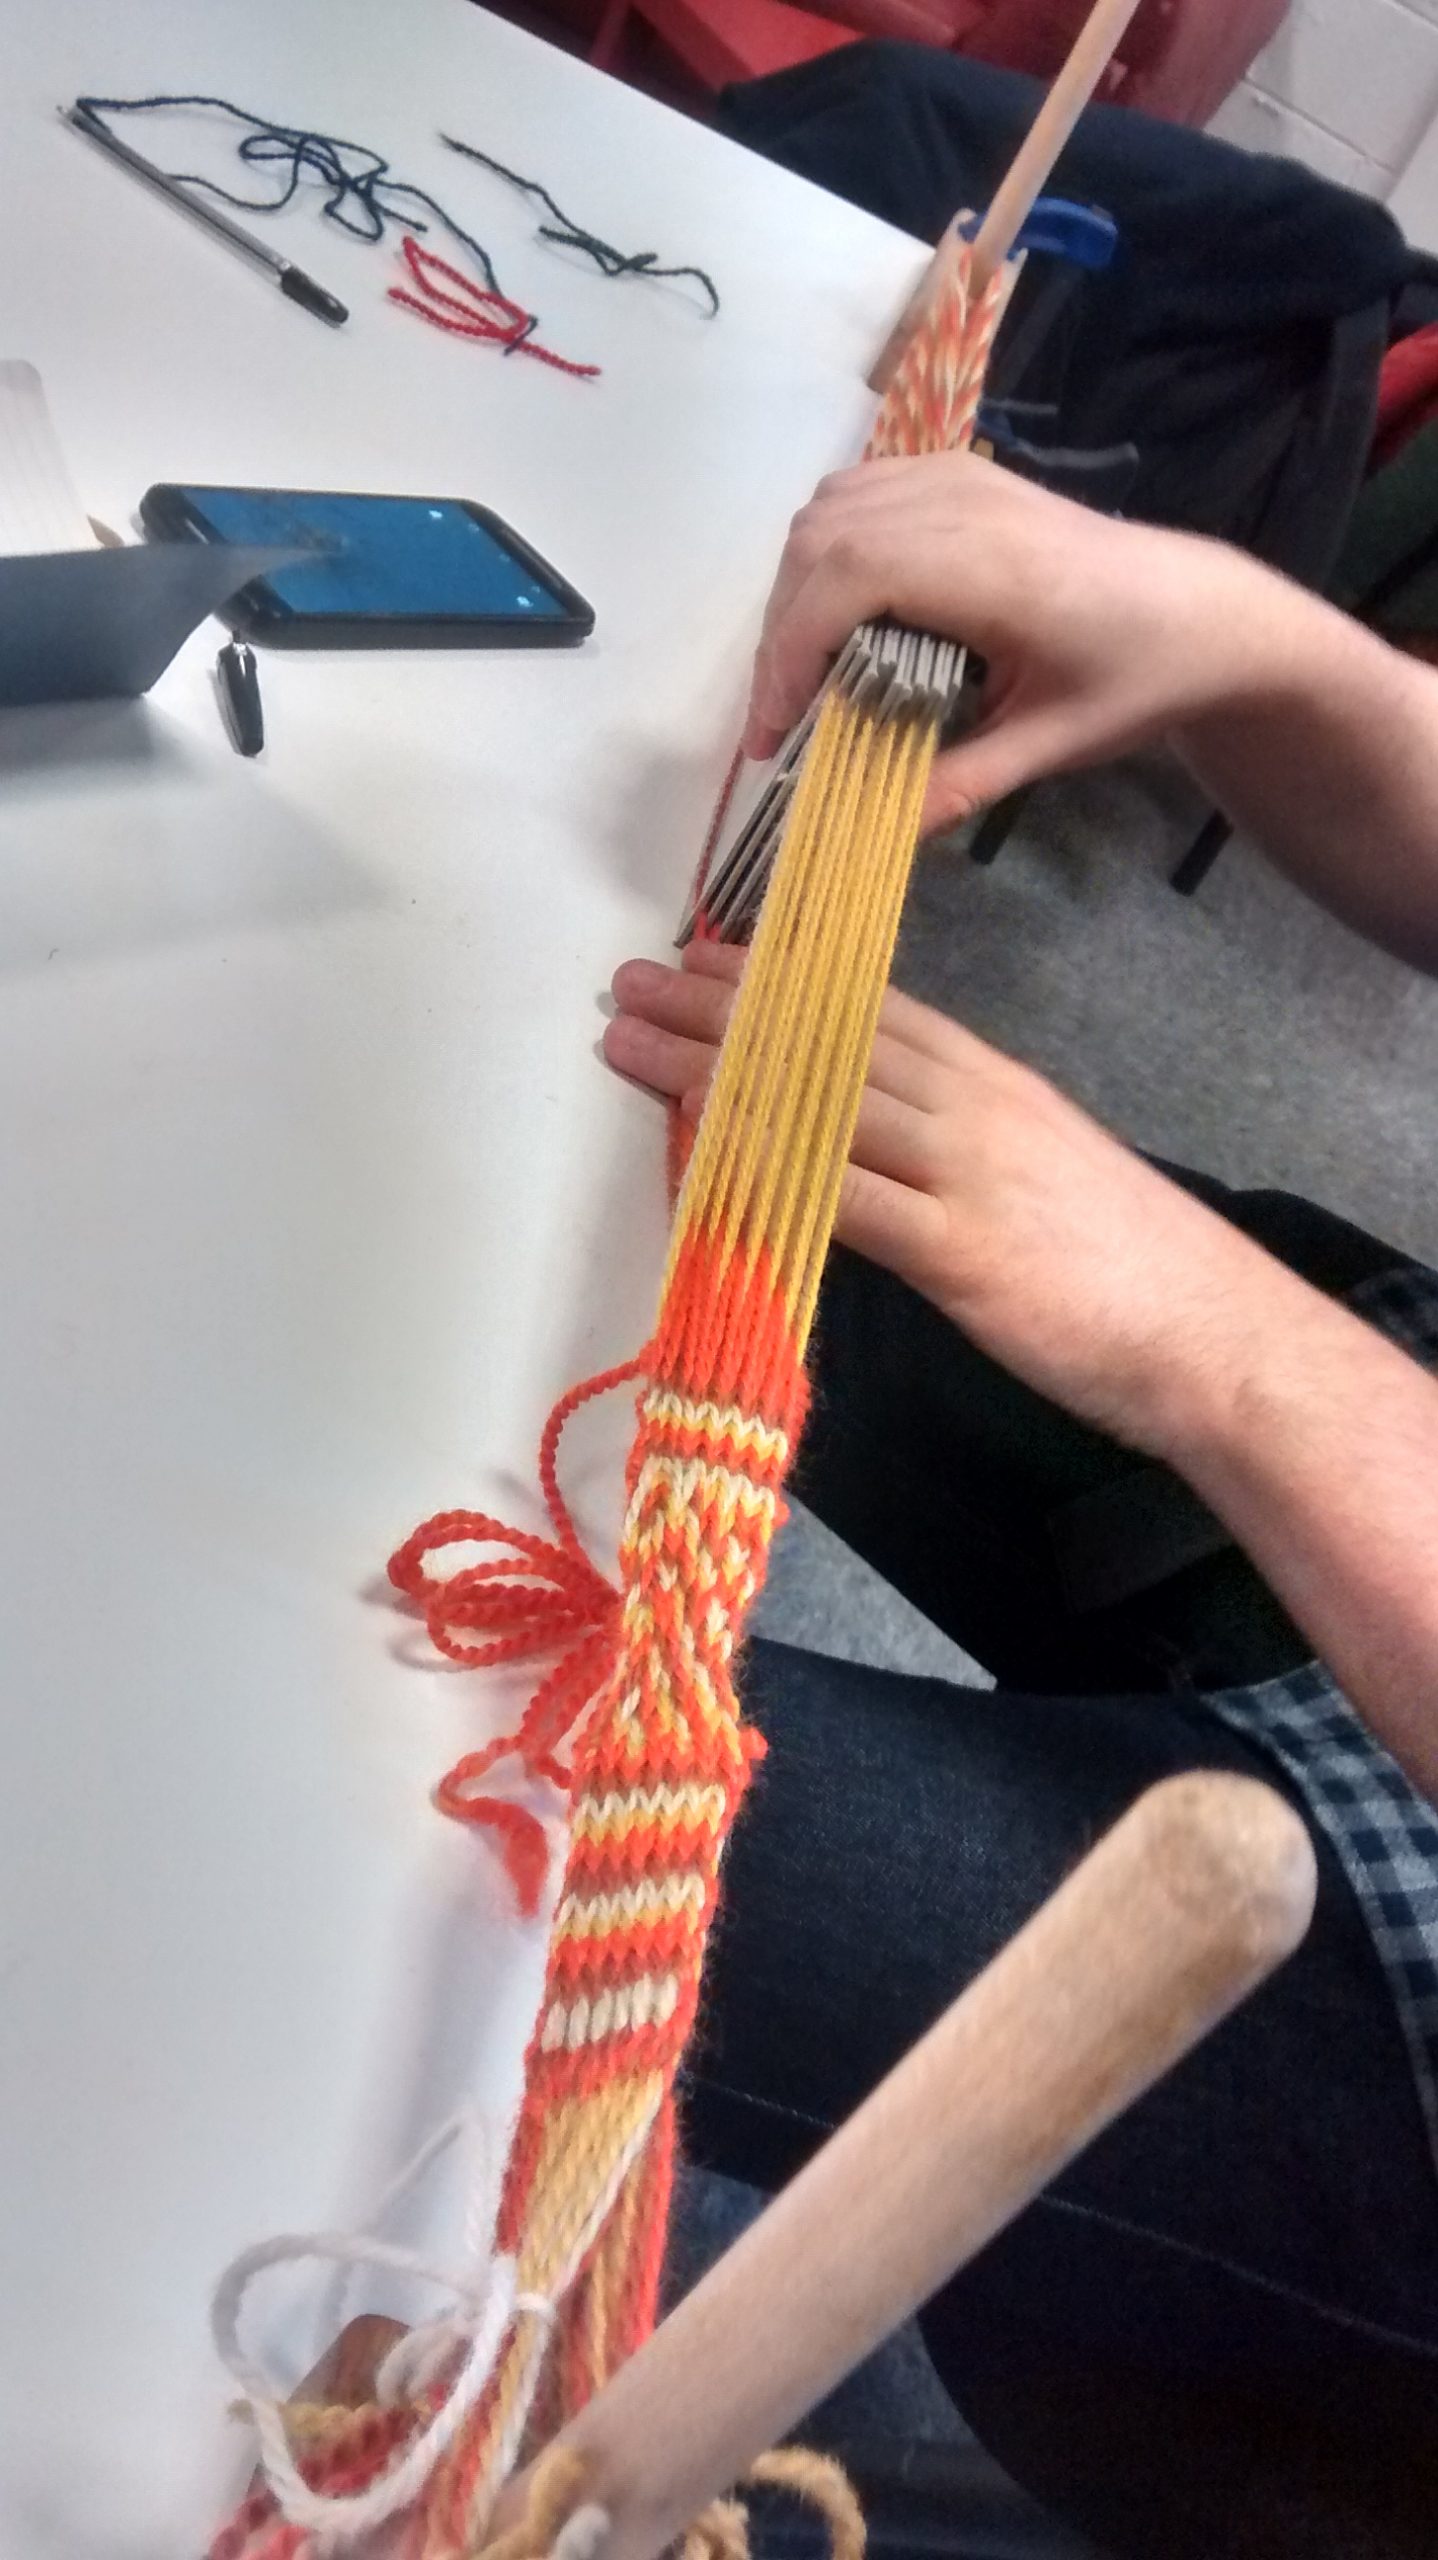
I’ve learned to warp tablets very much by trial and error, so I expect there are many improvements possible (please let me know), but as I had to warp a load of tablet looms for the weavecoding workshop in Düsseldorf last week, I thought I’d document the process here.
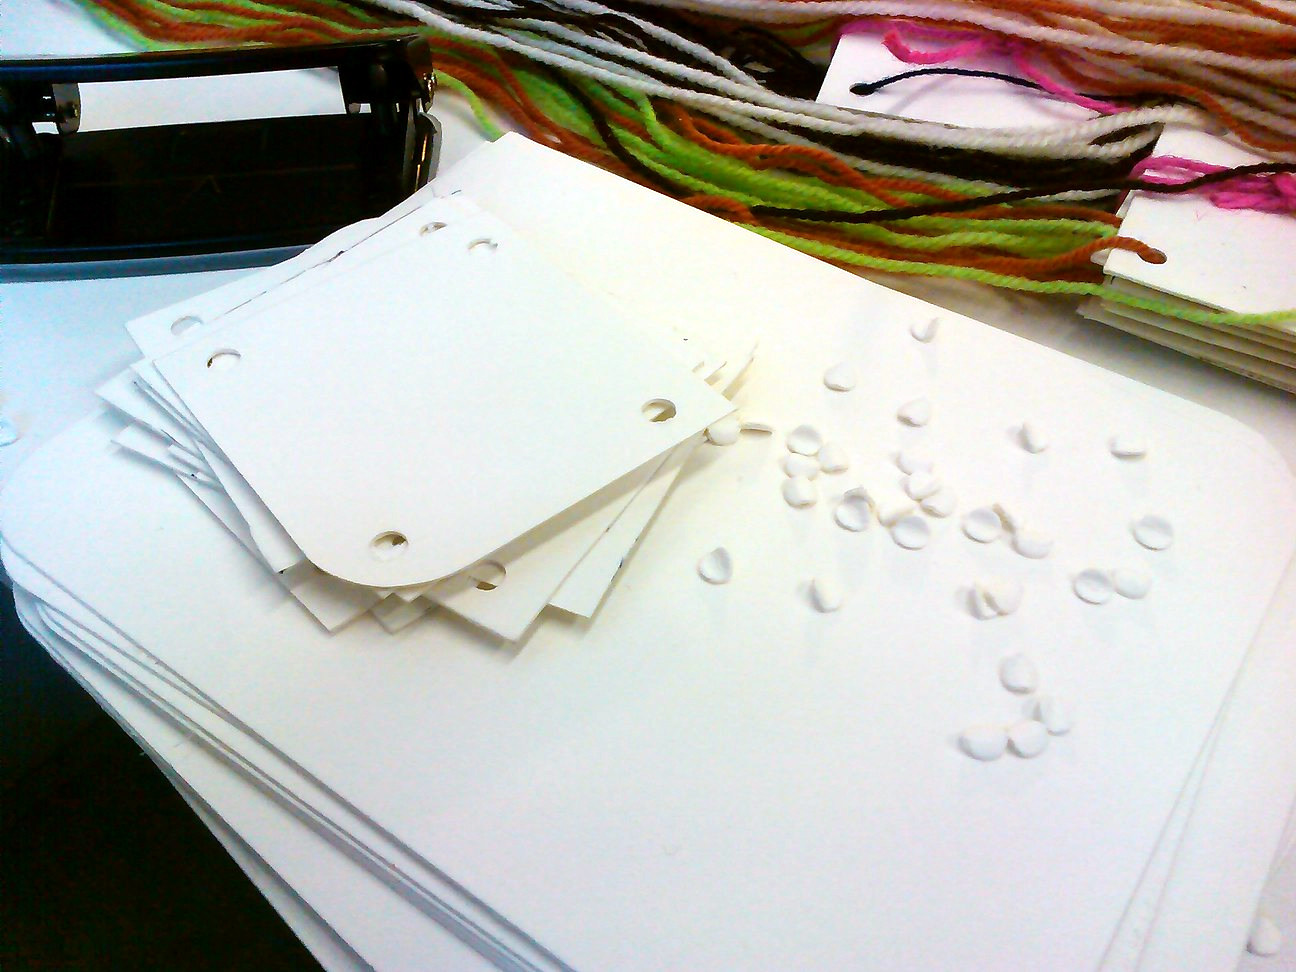
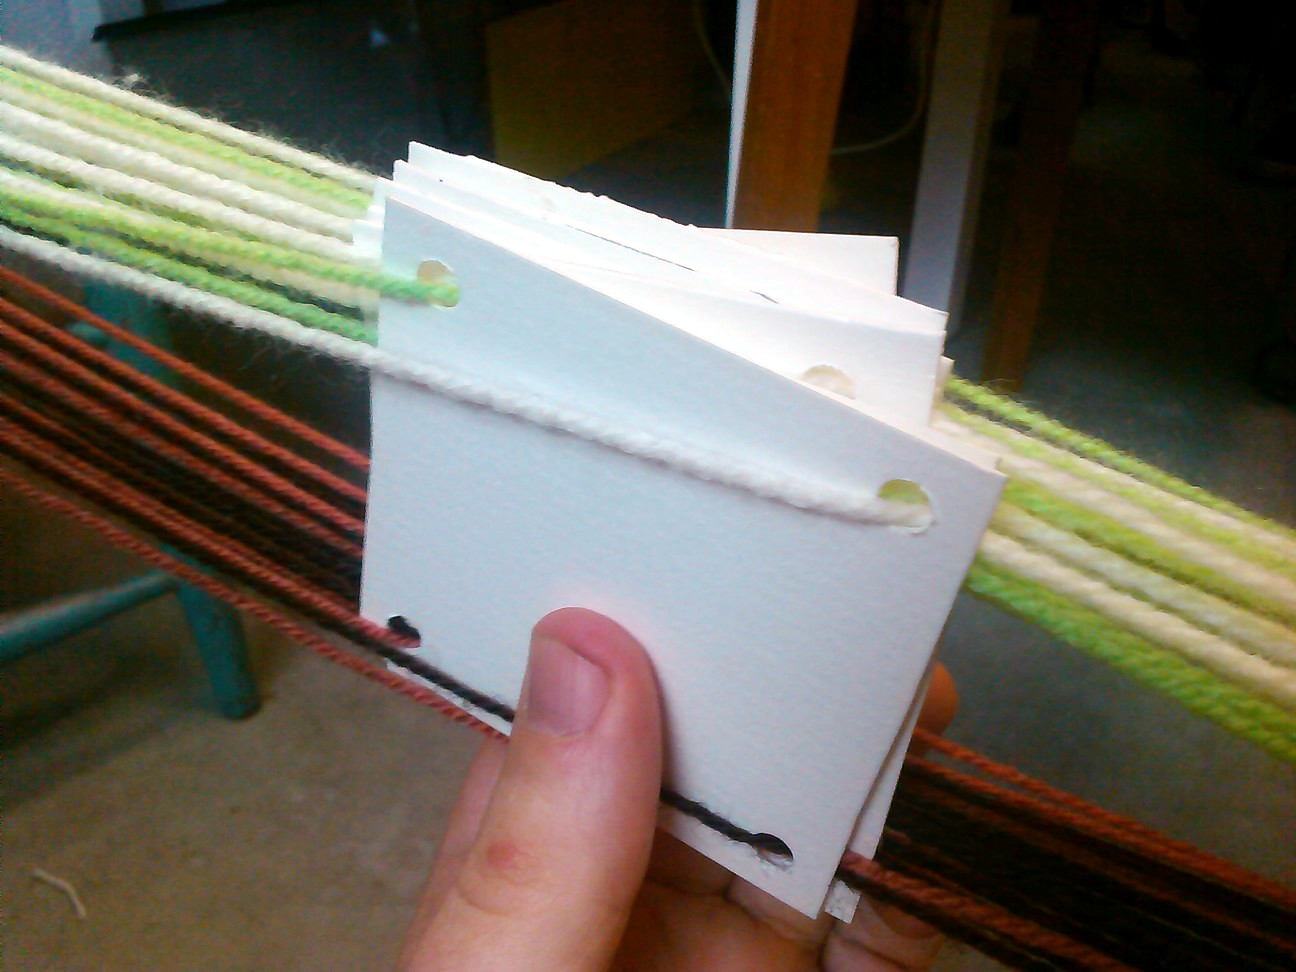
The first thing you need to do is make the tablets themselves from fairly stiff card. You need squares of about 5cm, and holes punched out from the corners. Beer mats or playing cards are good, I’m just using recycled card here. It saves a bit of time later if you can get the holes lined up when the tablets are stacked together – but I’ve never managed to do this very well. A good number of cards to start with are 8 or 10, fewer in number are easier to manipulate and use less yarn – if you don’t have
much to spare.
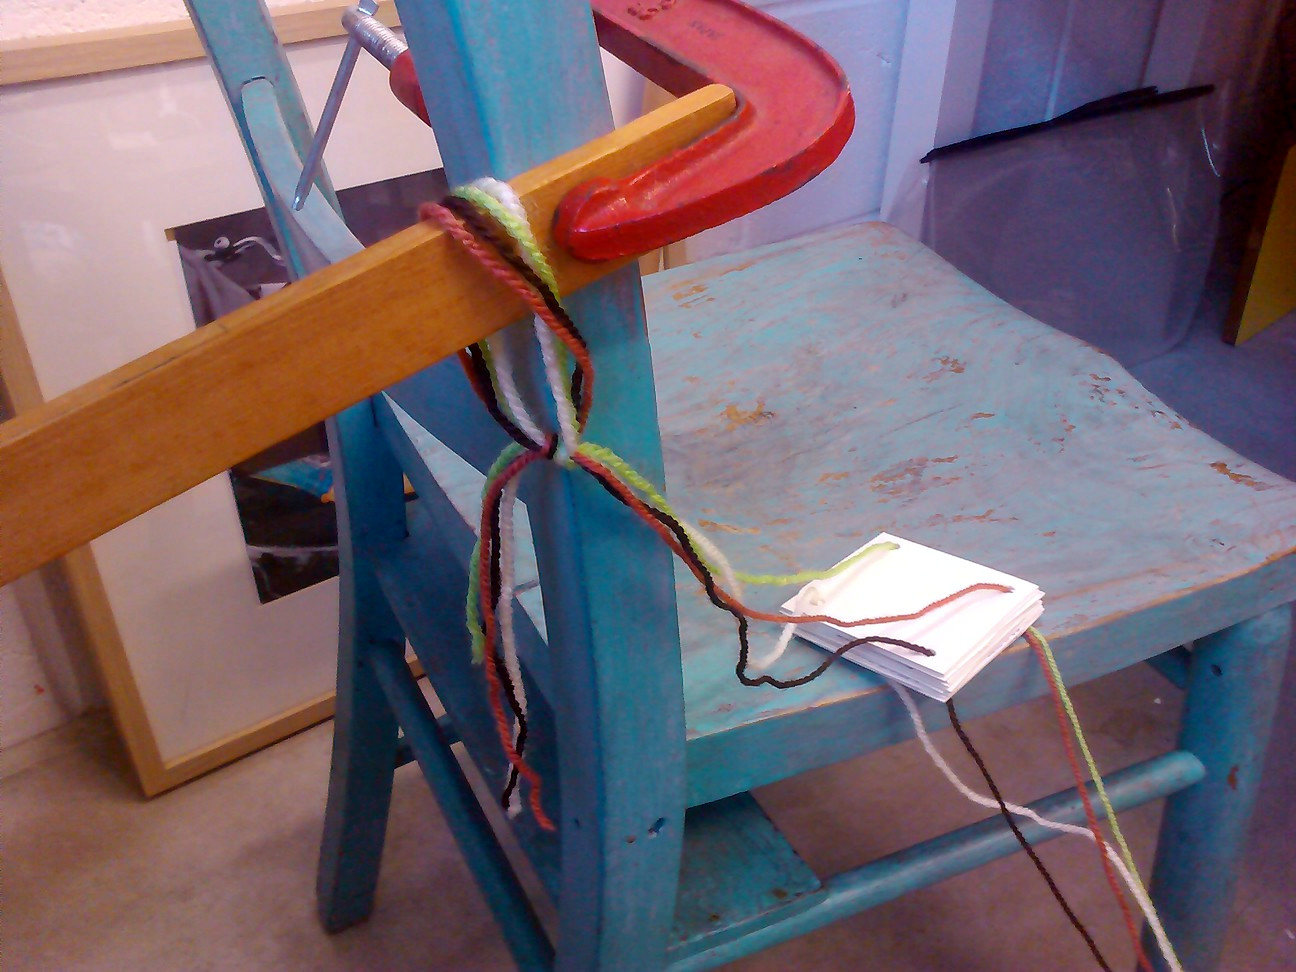
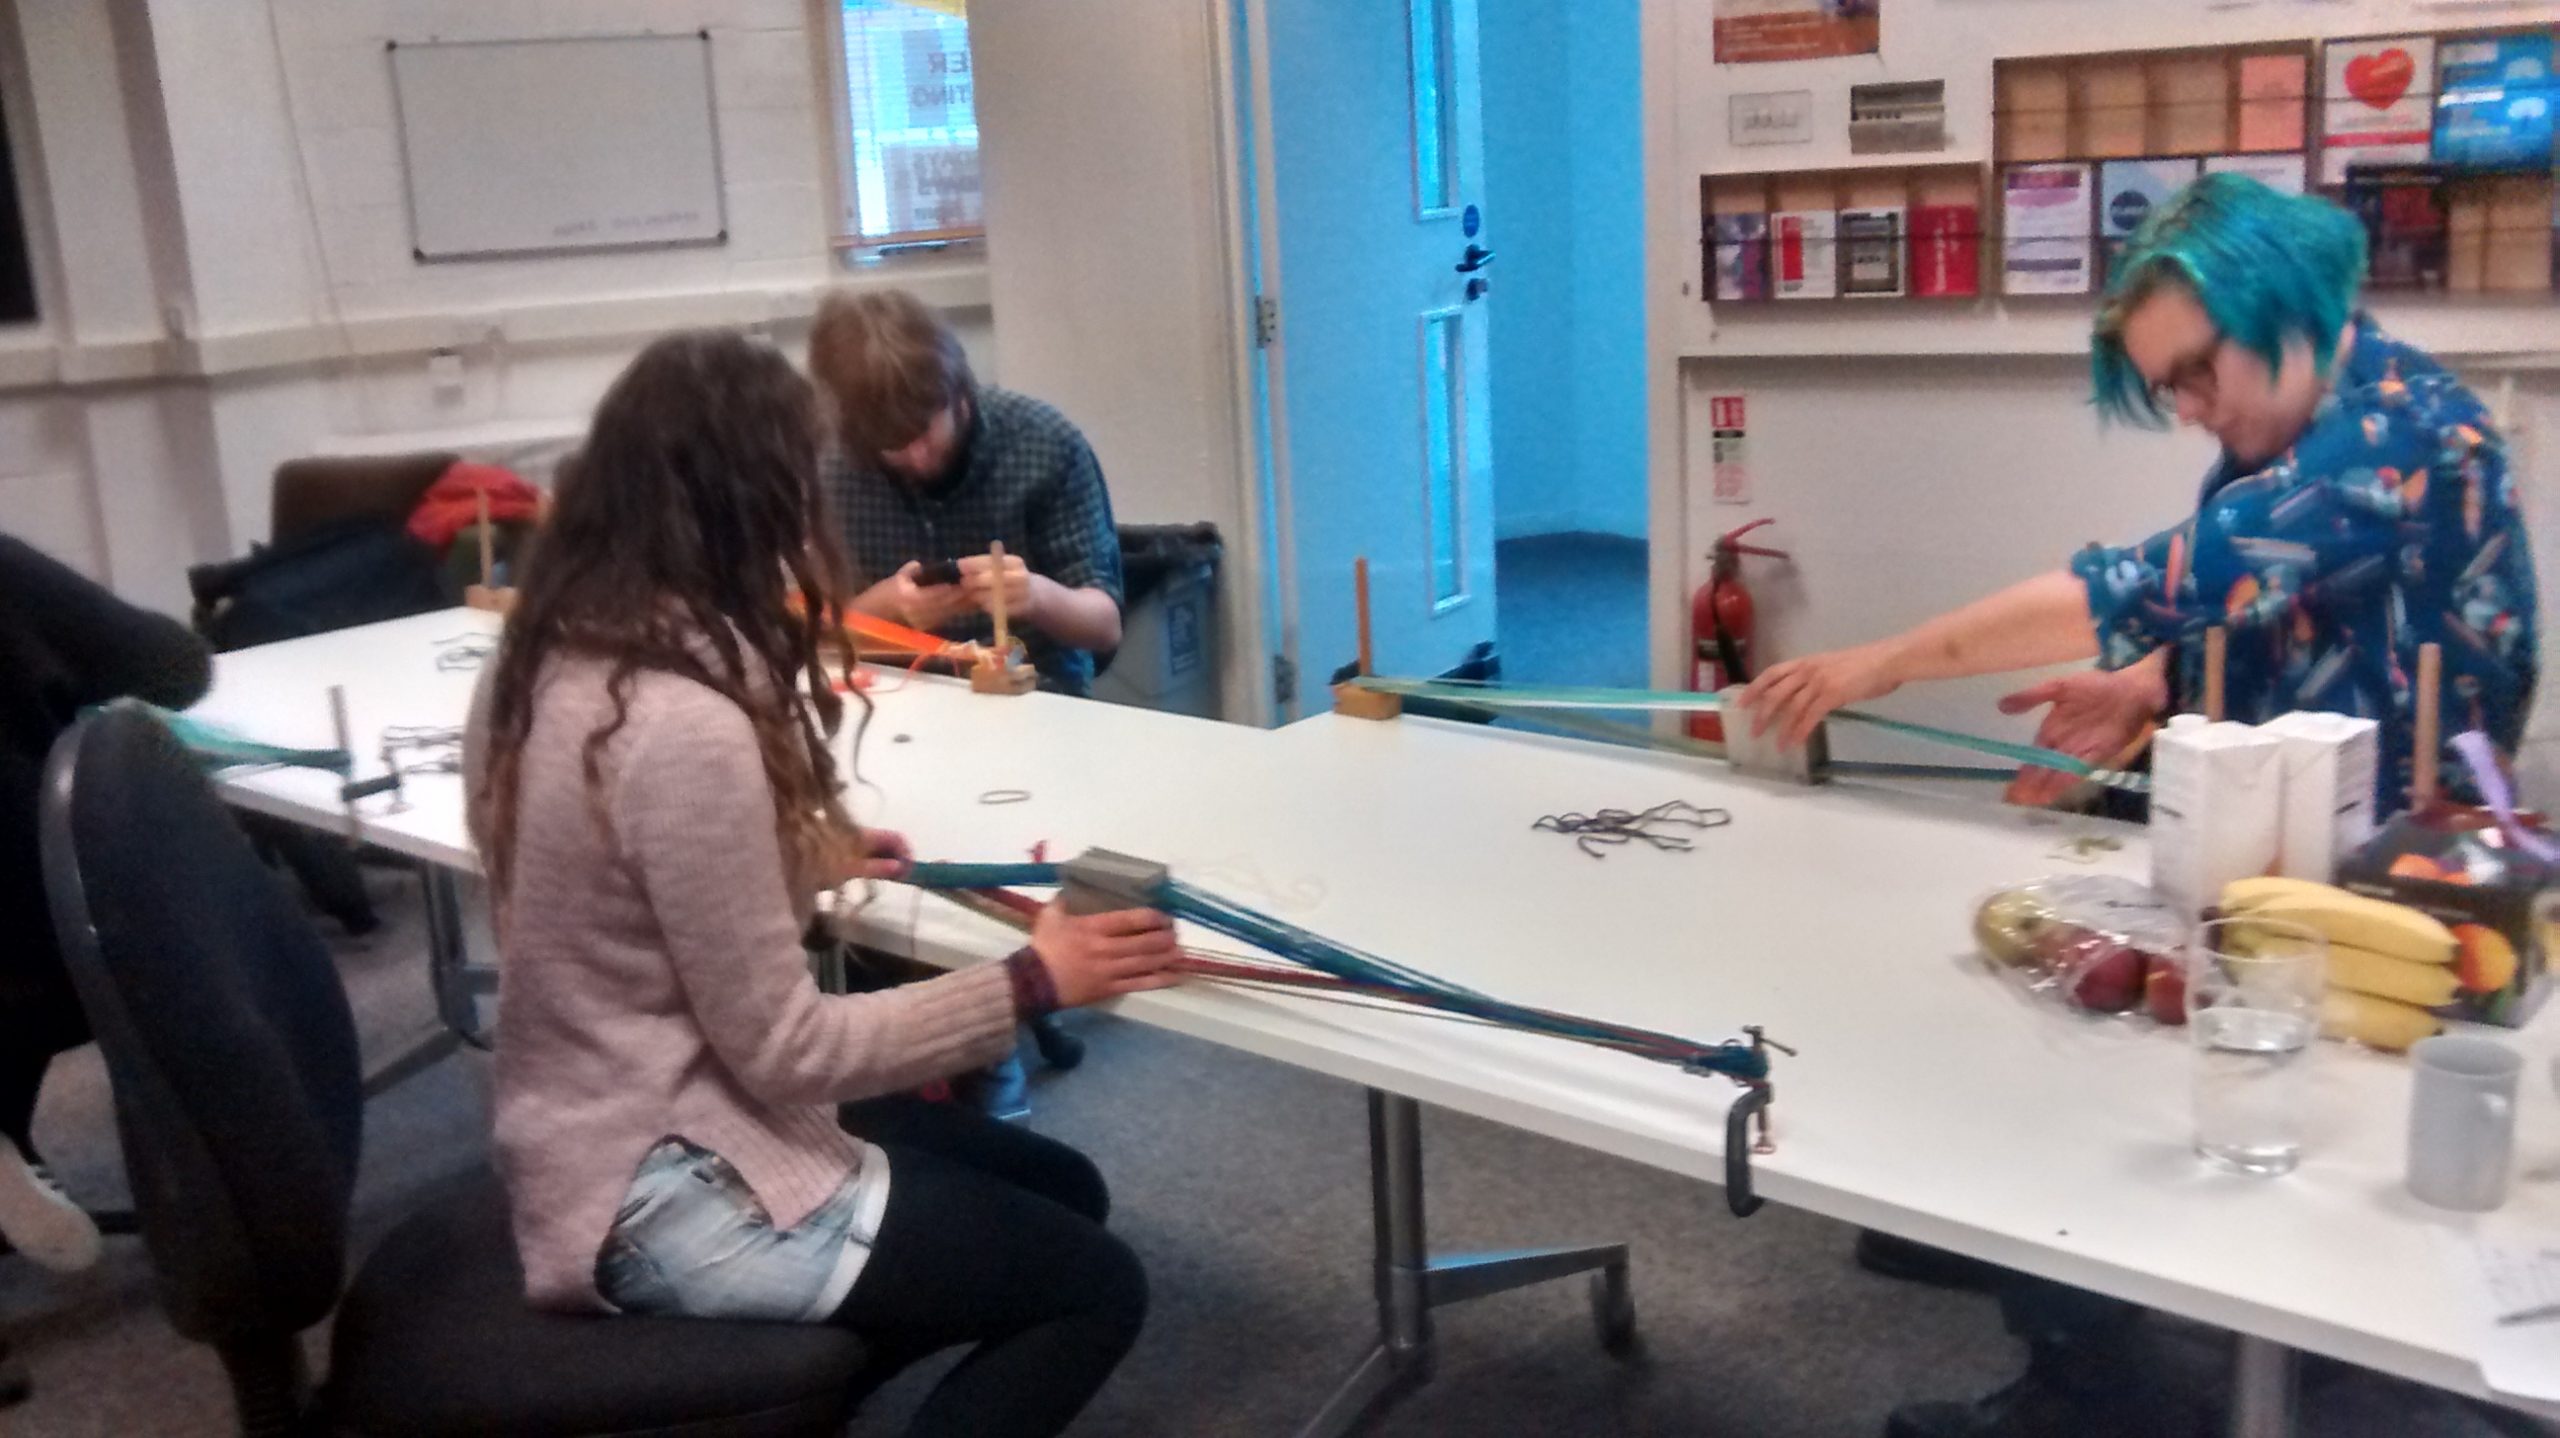
The second step is to prepare the warp yarn. You need four separate balls or cones of wool – it’s easiest to start with four different colours, although you can make more patterns with double faced weave (two colours opposite each other on the cards). Fluffy knitting wool works fine but can catch and be annoying sometimes, cotton is better. In order to help prevent the yarn getting tangled together which is probably the biggest problem with this job – it’s a good idea to set this up so the yarn passes through the back of a chair with the yarn on the floor like this – it restricts the distance the balls roll as you pull the yarn.
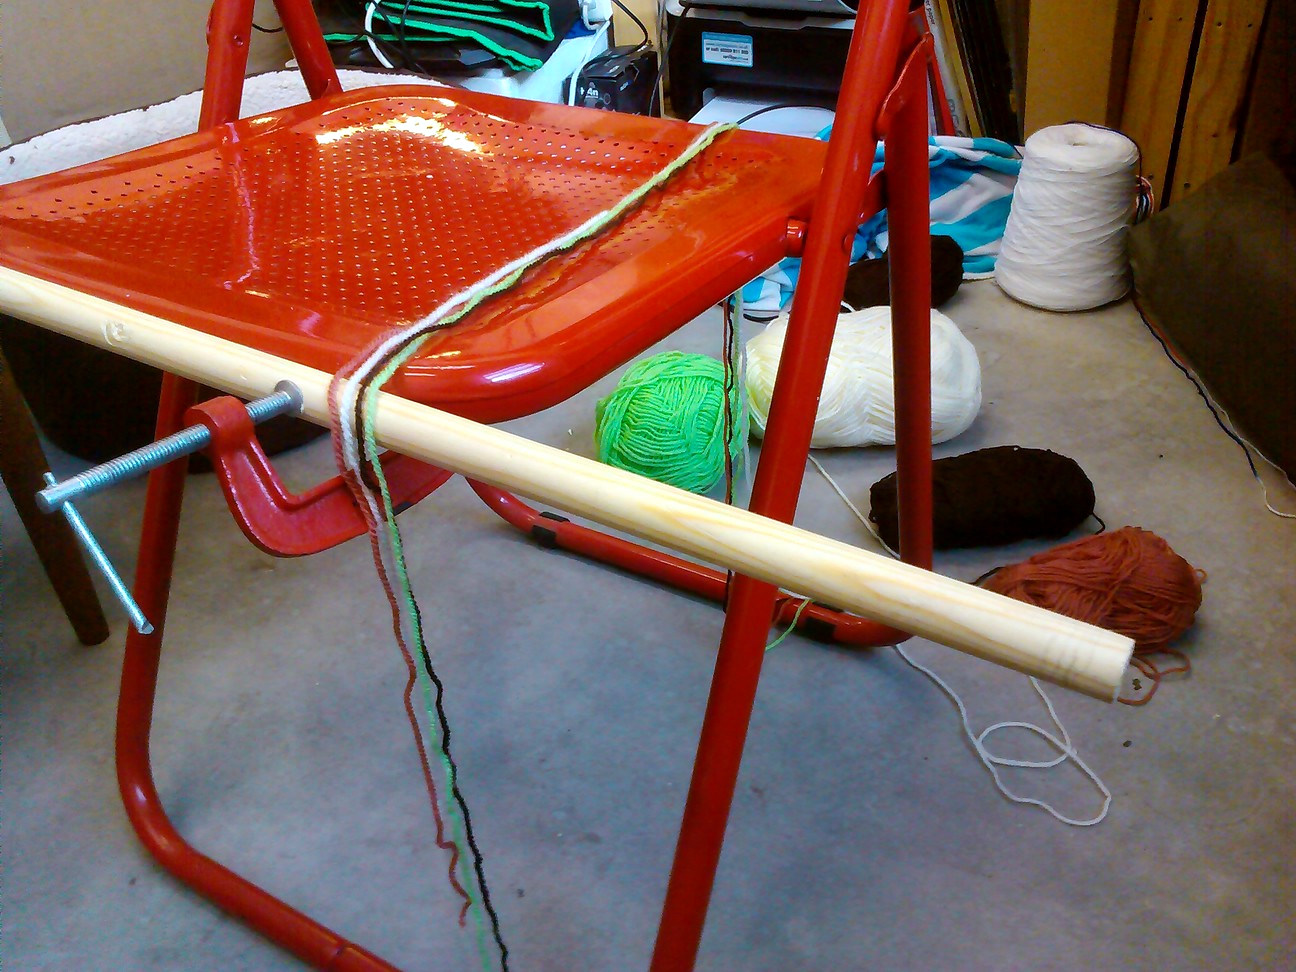
You need two sticks you can easily loop the warp over, I’m using a cut broom stick clamped to the chair here. The distance between them determines how long the final woven band will be, a metre or so is good.
Next you need to thread each of the four warp threads through the corners of the tablets – each thread needs it’s own corner so be careful not to mix them up. If the holes line up you can do them all at once, otherwise it’s one by one.
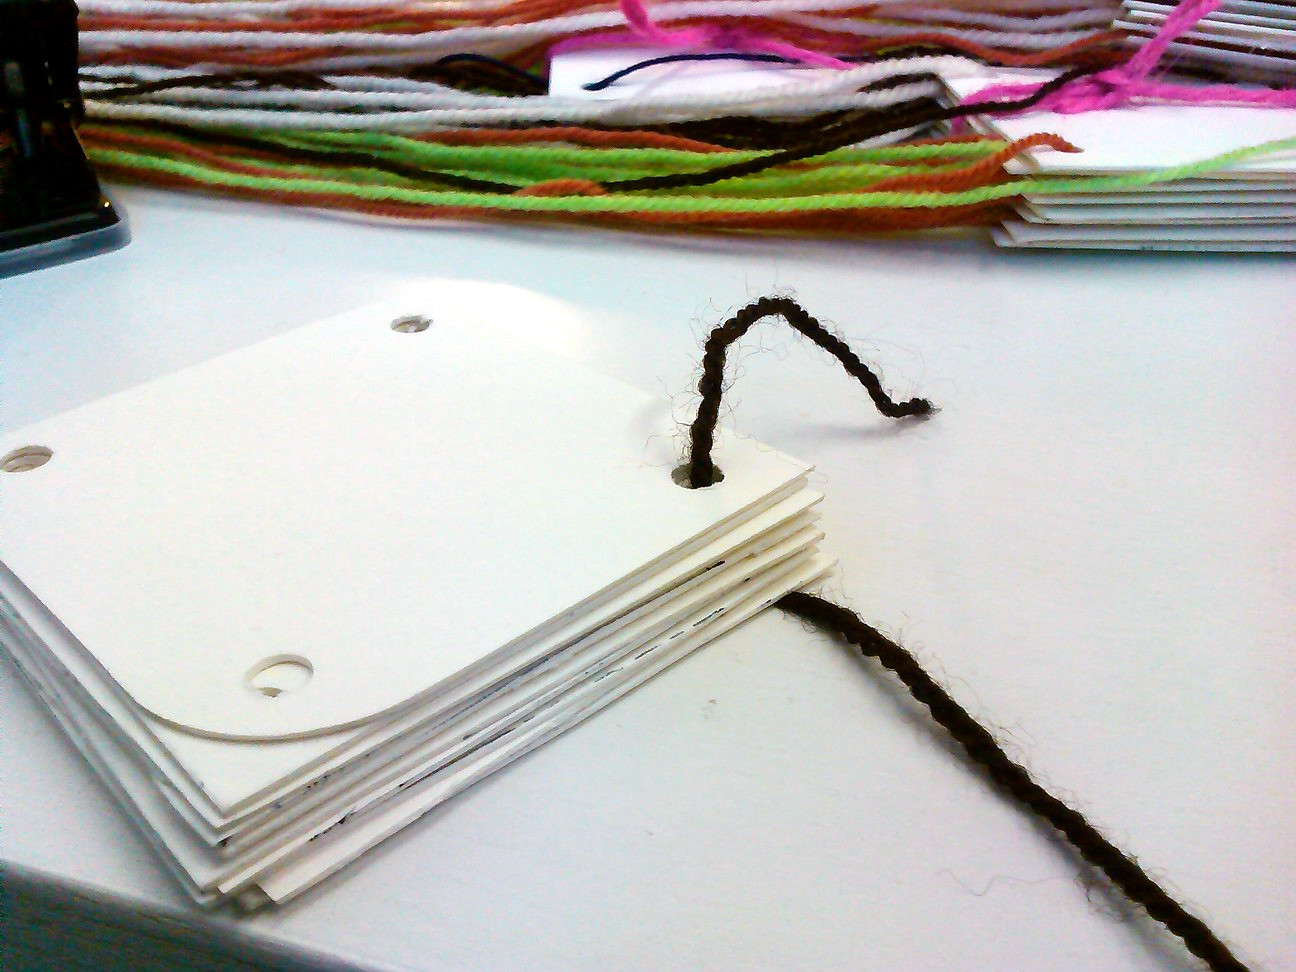
Here are the tablets with all the corners threaded.
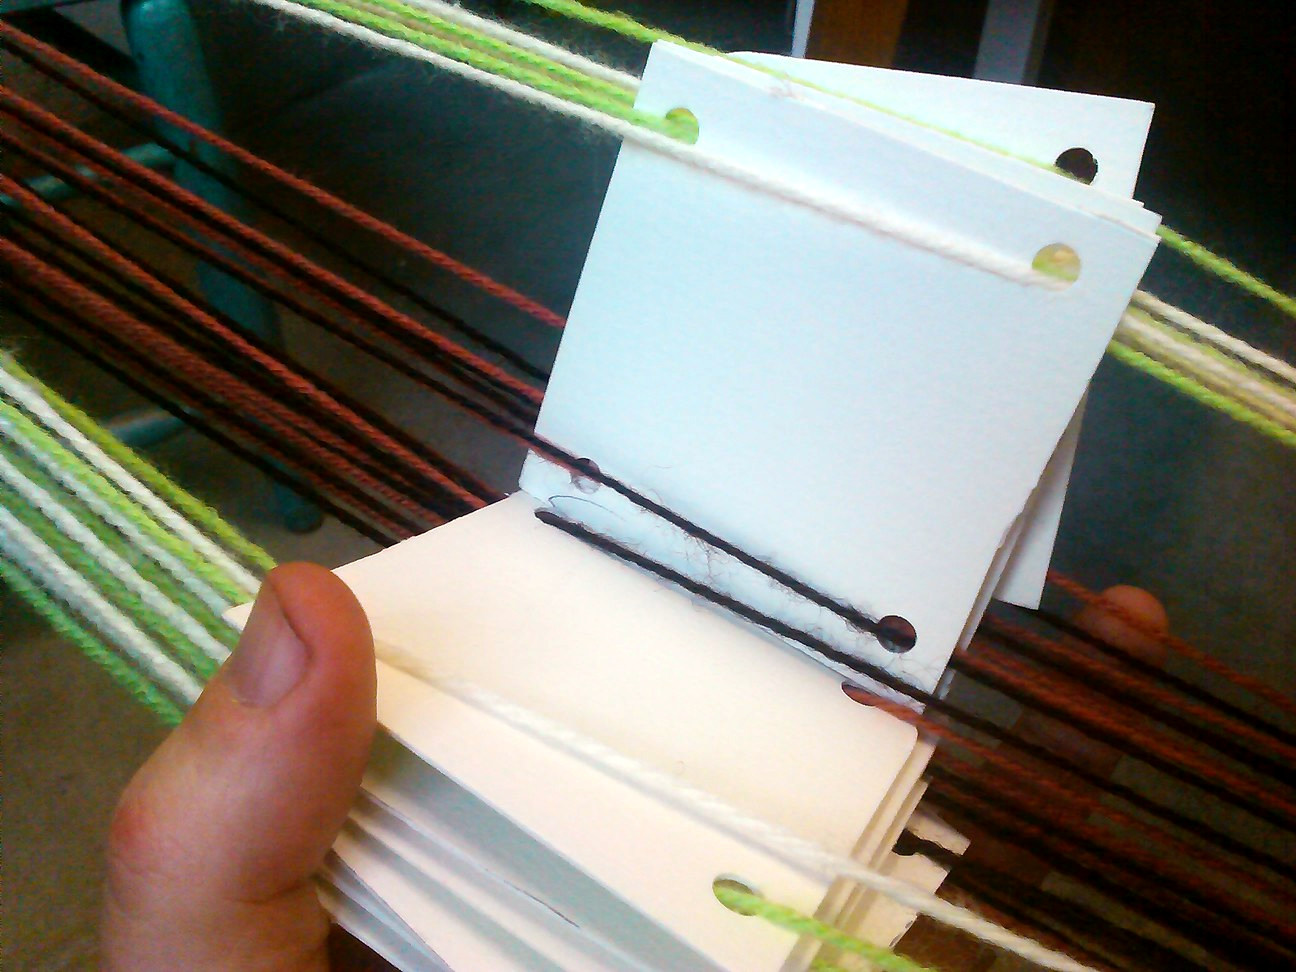
Now we tie the threads together looped over the warp stick furthest from the yarn, this knot is temporary.
Hook the other end of the warp over the stick on the other side, and leave one of the tablets half way along. Loop it back again leaving another tablet – go backwards and forwards repeating.
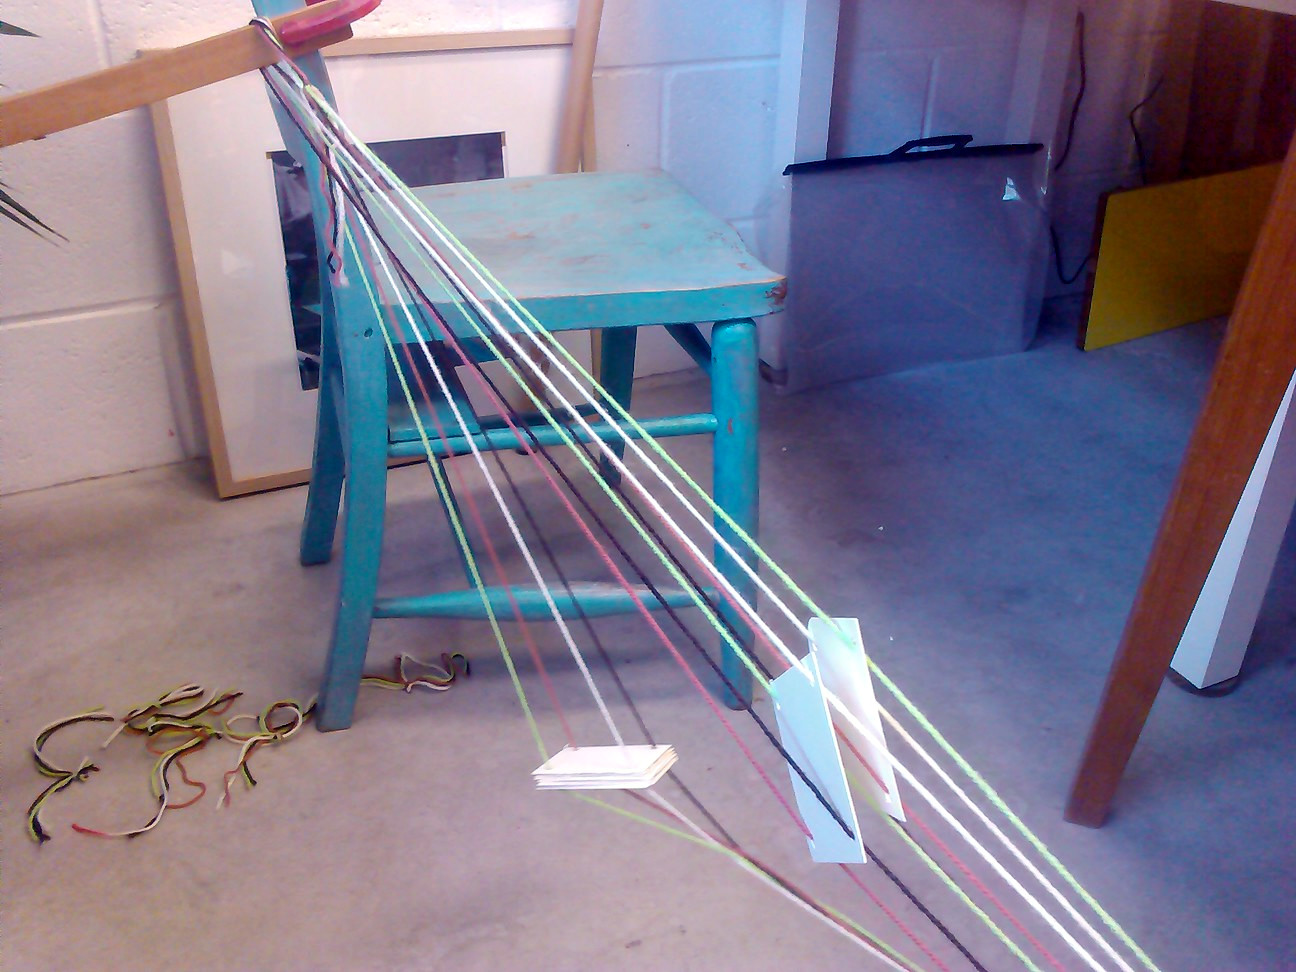
I can never manage to keep the tablets in order, and usually end up with a mess like this – don’t panic if you get a similar result!
When you have done all of the tablets, quickly check that every warp pass has a card associated with it and then cut the first knot and tie the last warp threads to the first.
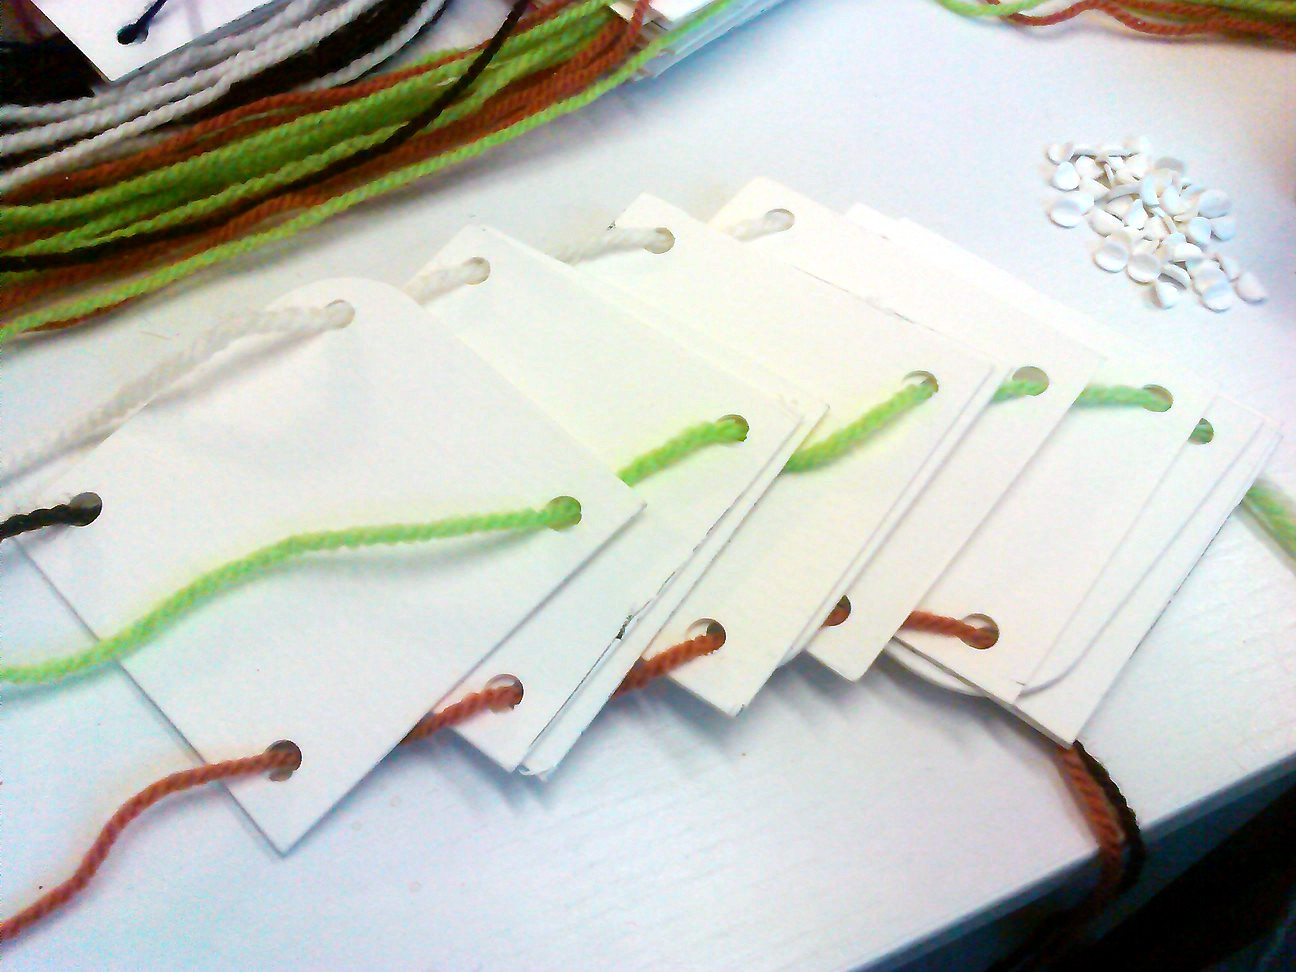
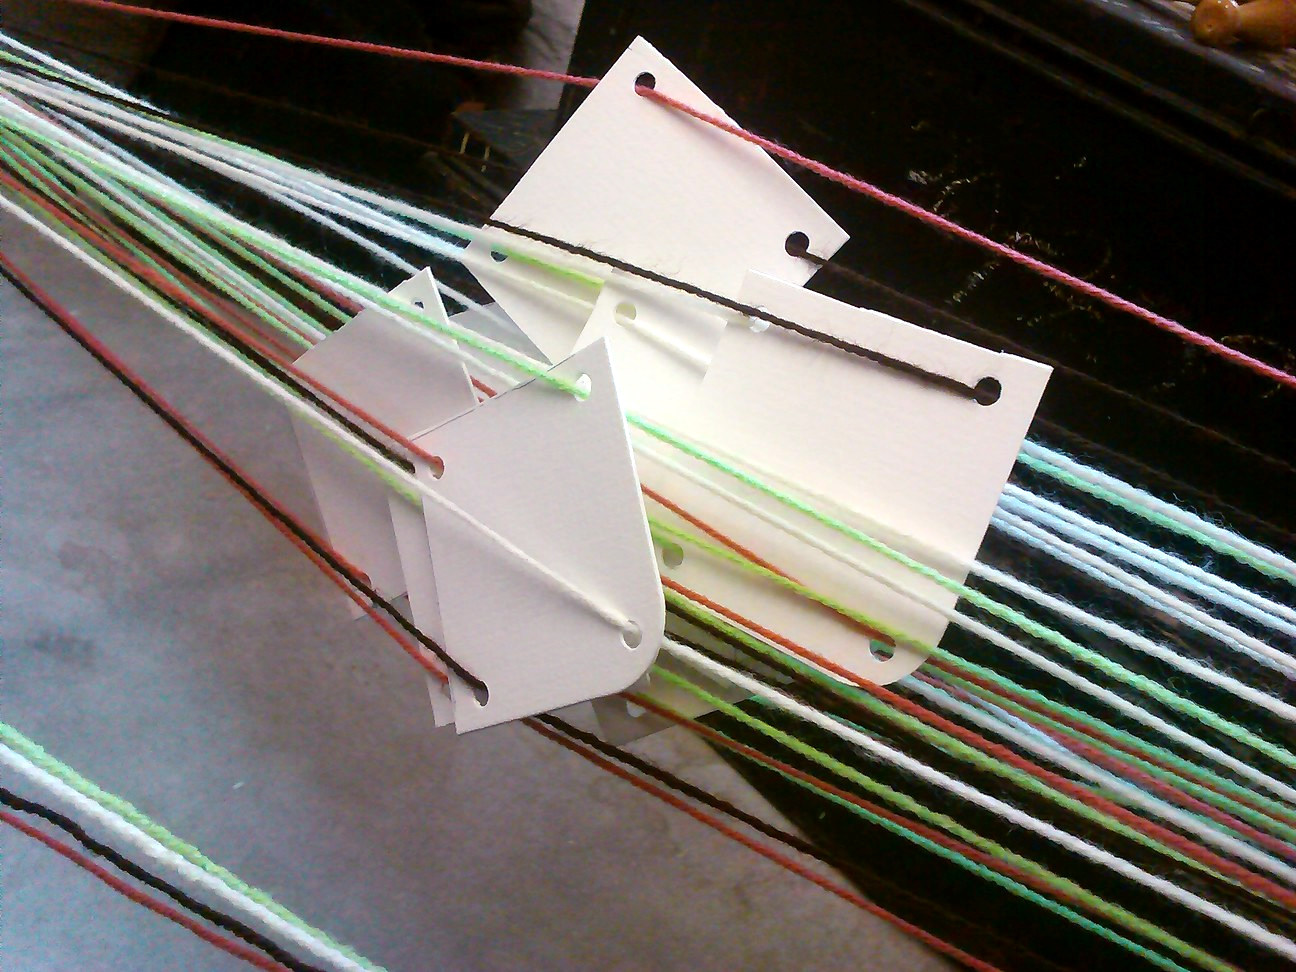
This gives you a continuous warp, which is good for adjusting the tension. Group all the cards together and arrange them so the colours are aligned – rotate them until the same colours are at the top and the bottom.
This is also a good point to check the twist of the tablets so they alternate in terms of the direction the threads are coming from. This is quite difficult to explain with text but these images may help. It’s basically a bit easier if they are consistent when you start weaving, then you can see how changing this alters the patterns as you go.

You can actually reorder and flip the tablets at any time, even after starting weaving – so none of this is critical. It’s handy to equalise the tension between the warp threads at this point though, so grab all the cards in alignment, put some tension on the warp and drag them up and down the warp – if the loops at either end are not too close this should get the lengths about the same.
Once this is done, tie all the tablets together to preserve their order and alignment.
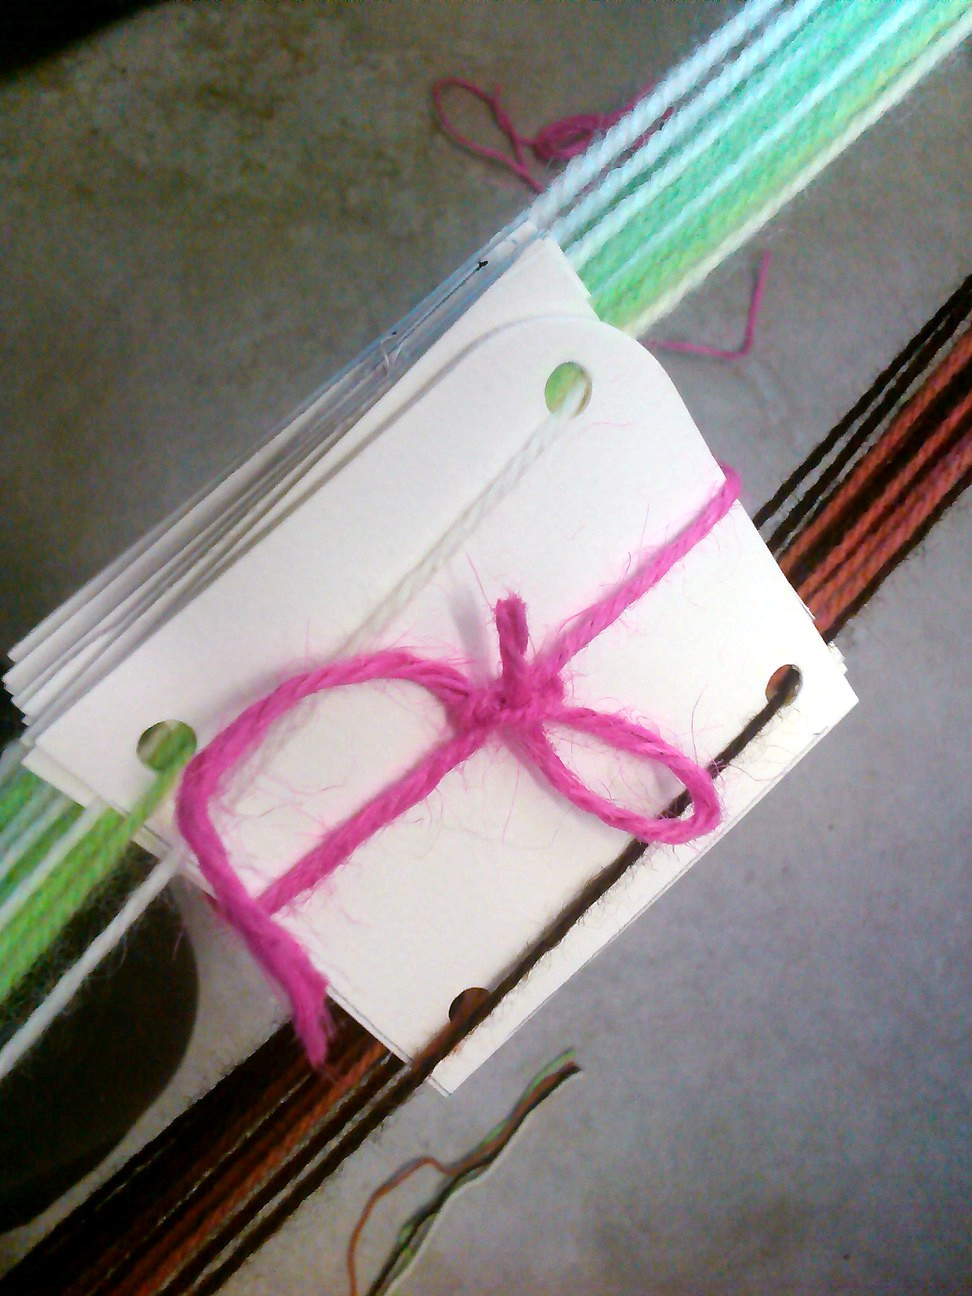
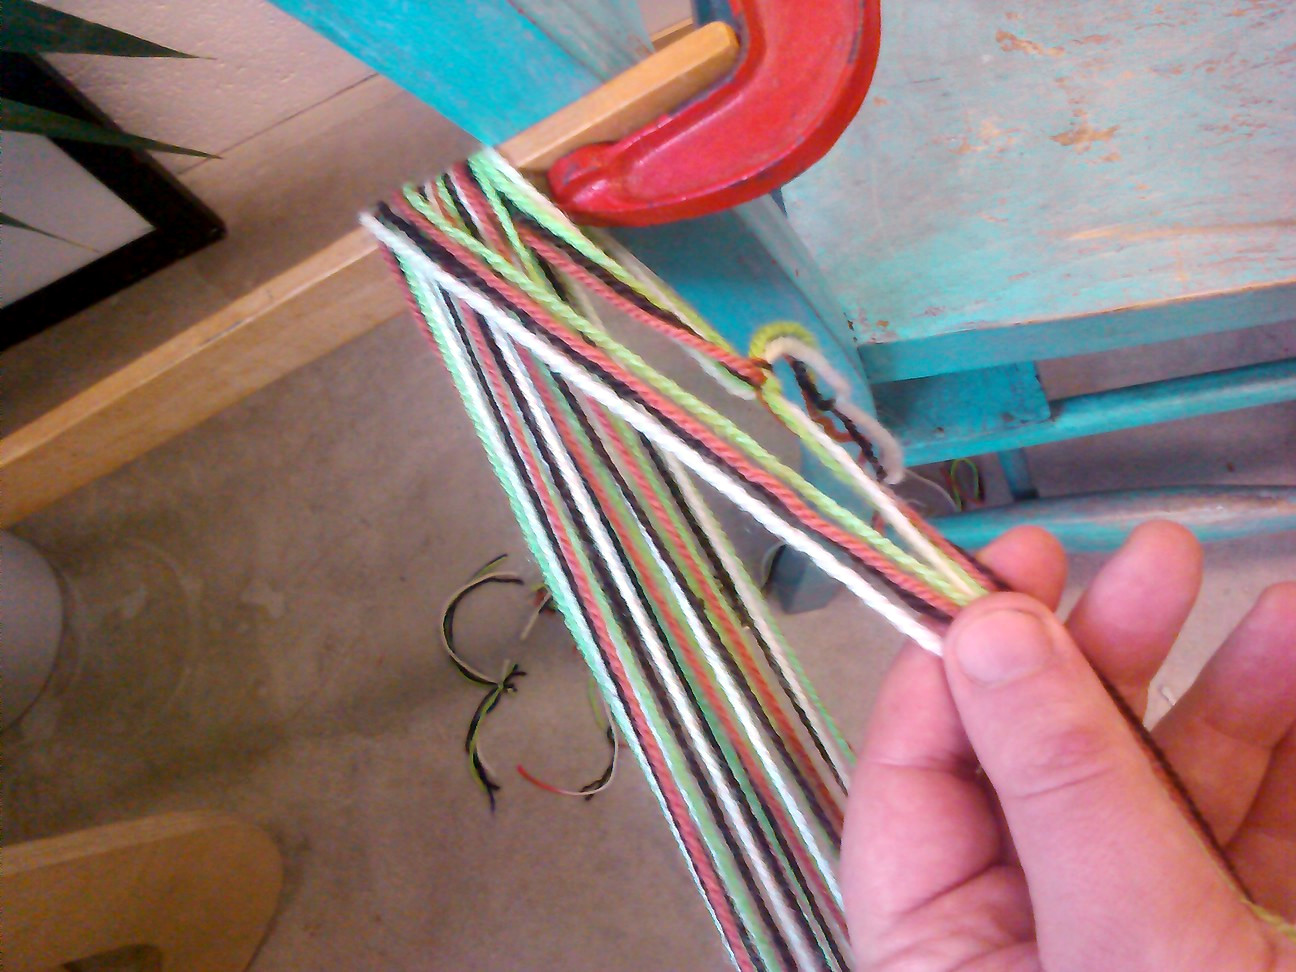
Then tie loops of strong cord around both ends of the warp.
Then you’re done – you can pull the ends off the sticks and start tablet weaving!
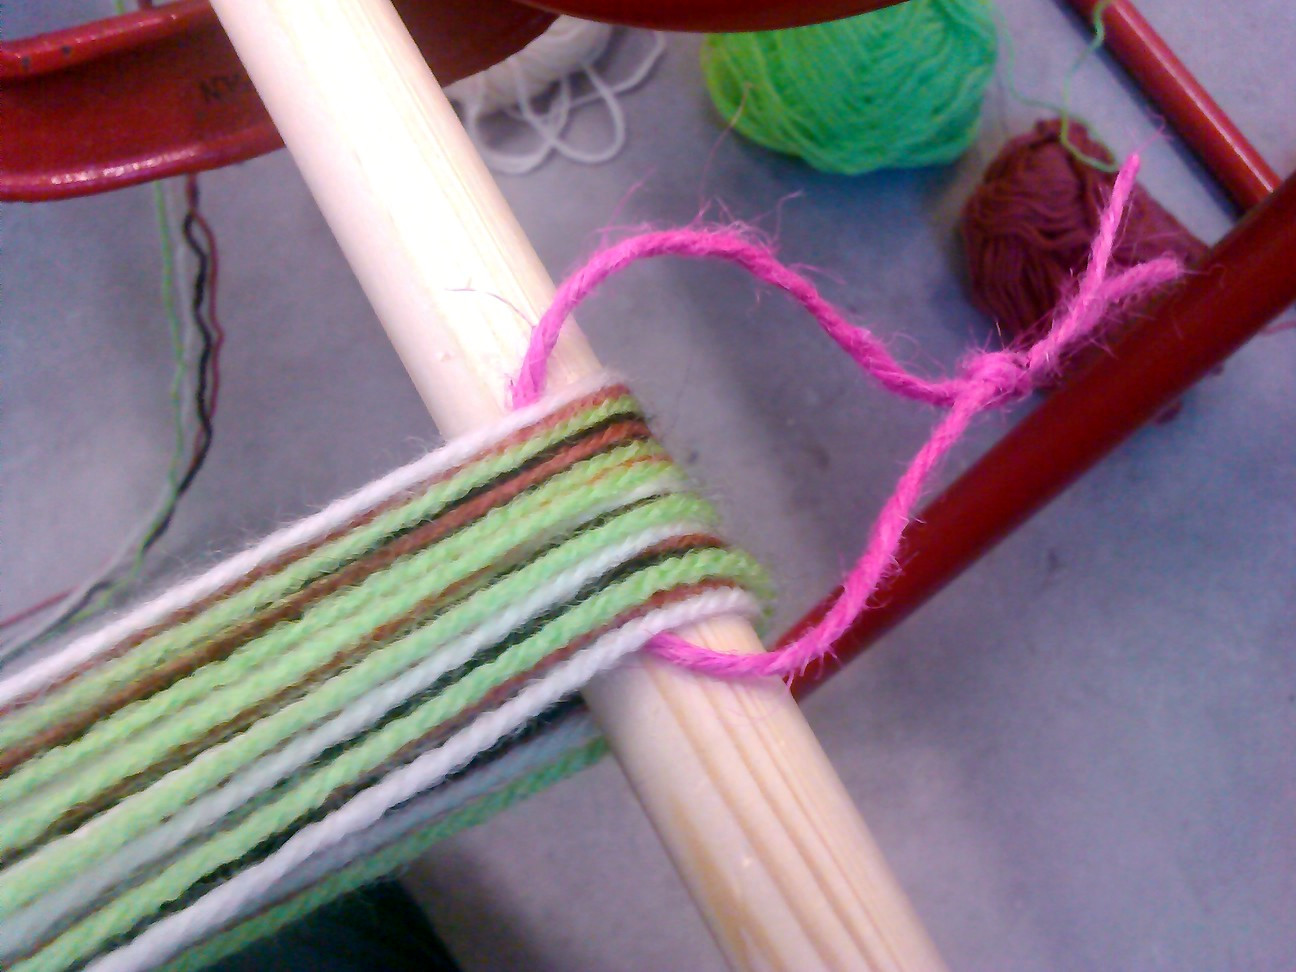
As I needed to transport the tablet looms I wrapped the warps (keeping the upper/lower threads separated) around cardboard tubes to keep the setup from getting tangled up. This seemed to work well:
If you find one of the warp threads is too long and is causing a tablet to droop when the warp is under tension, you can pull it tight and tie it back temporarily, after weaving a few wefts it will hold in place.
The two most important things I’ve learned about weaving – the older the technique the more forgiving it is to mistakes, and you can never have too many sticks.
Pixel Quipu
The graphviz visualisations we’ve been using for quipu have quite a few limitations, as they tend to make very large images, and there is limited control over how they are drawn. It would be better to be able to have more of an overview of the data, also rendering the knots in the right positions with the pendants being the right length.
Meet the pixelquipu!
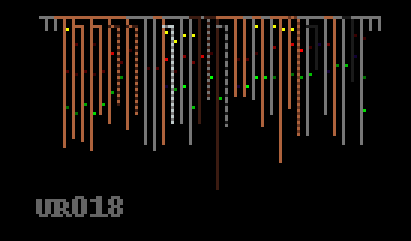
These are drawn using a python script which reads the Harvard Quipu Database spreadsheet file and renders quipu structure using the correct colours. The knots are shown as a single pixel attached to the pendant, with a colour code of red as single knot, green for a long knot and blue as a figure of eight knot (yellow is unknown or missing). The value of the knot sets the brightness of the pixel. The colour variations for the pendants are working, but no difference between twisted and alternating colours, also no twist direction is visualised yet.

Another advantage of this form of rendering is that we can draw data entropy within the quipu in order to provide a different view of how the data is structured, as a attempt to uncover hidden complexity. This is done hierarchically so a pendant’s entropy is that of it’s data plus all it’s sub-pendants, which seemed most appropriate given the non-linear form that the data takes.


We can now look at some quipus in more detail – what was the purpose of the red and grey striped pendants in the quipu below? They contain no knots, are they markers of some kind? This also seems to be a quipu where the knots do not follow the decimal coding pattern that we understand, they are mostly long knots of various values.
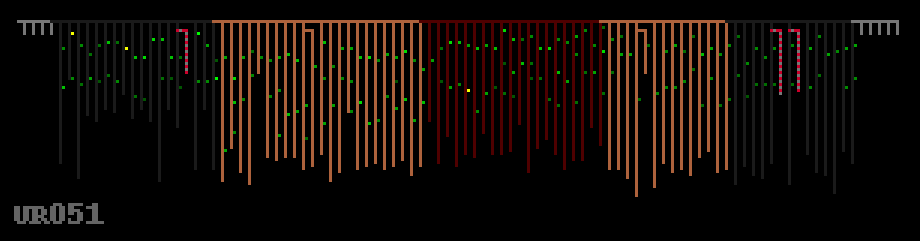
There also seems to be data stored in different kinds of structure in the same quipu – the collection of sub-pendants below in the left side presumably group data in a more hierarchical manner than the right side, which seems much more linear – and also a colour change emphasises this.
Read left to right, this long quipu below seems very much like you’d expect binary data to look – some kind of header information or preamble, followed by a repeating structure with local variation. The twelve groups of eight grey pendants seem redundant – were these meant to be filled in later? Did they represent something important without containing any knots? We will probably never know.

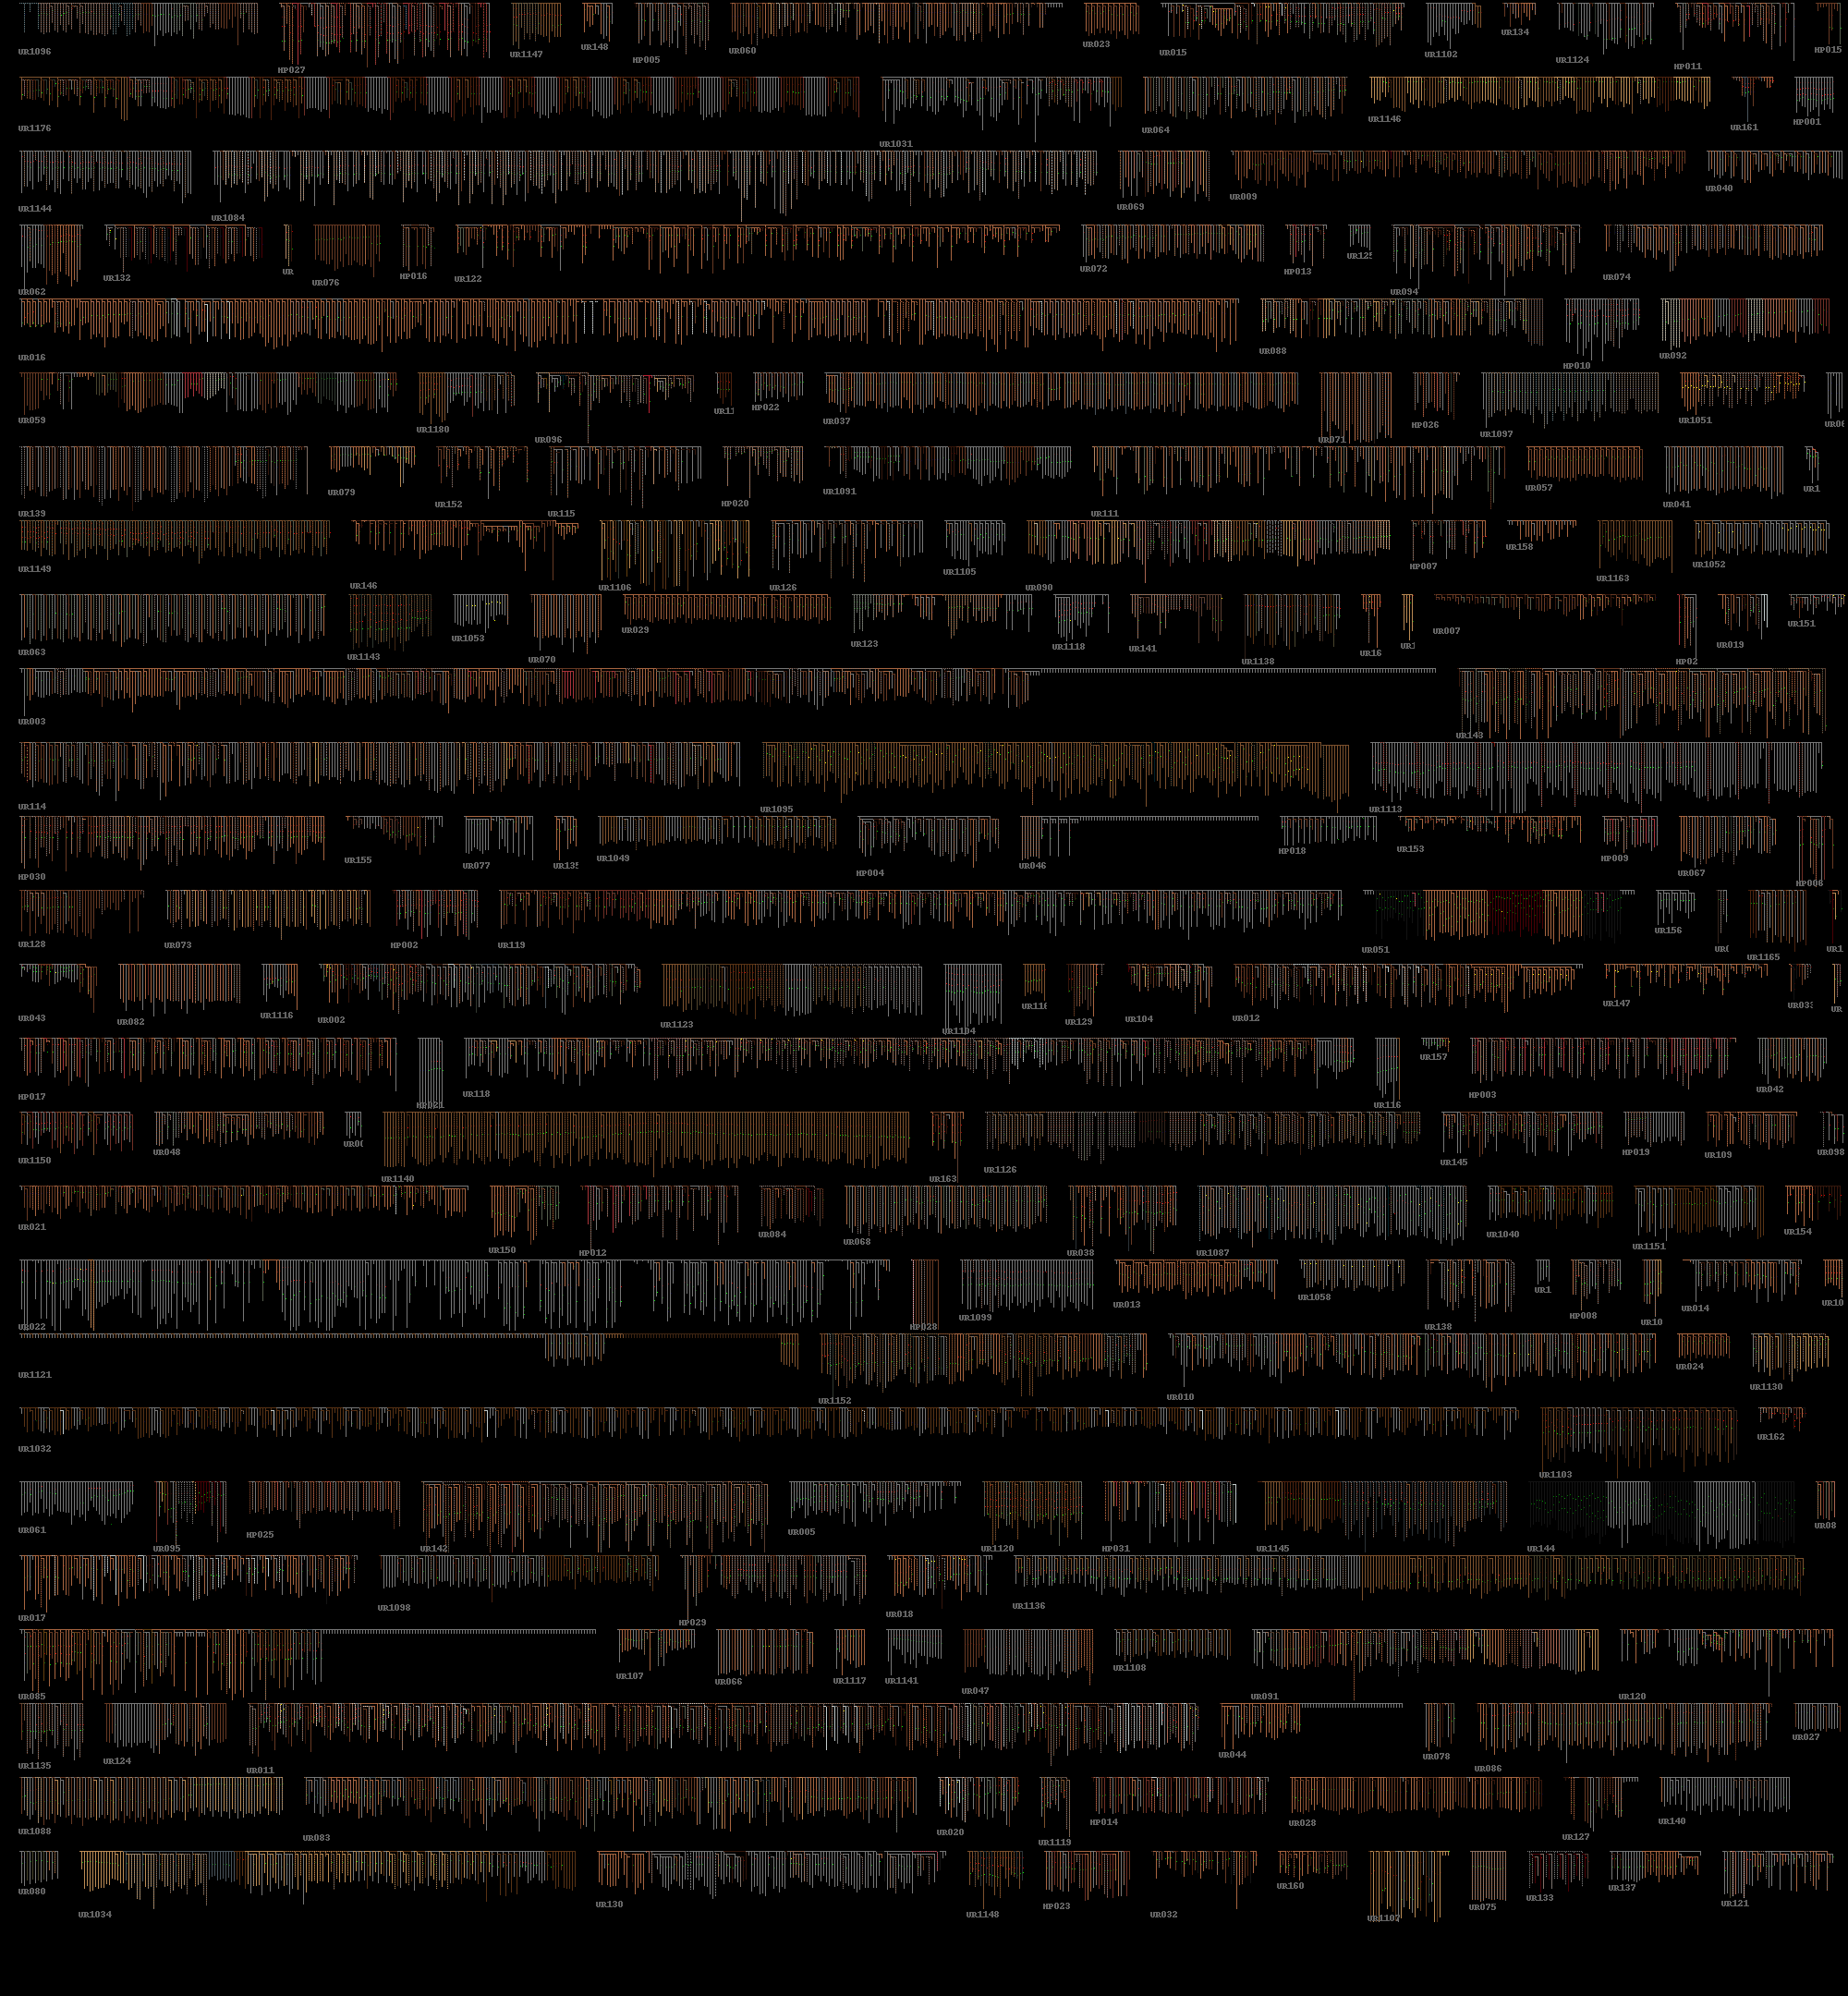
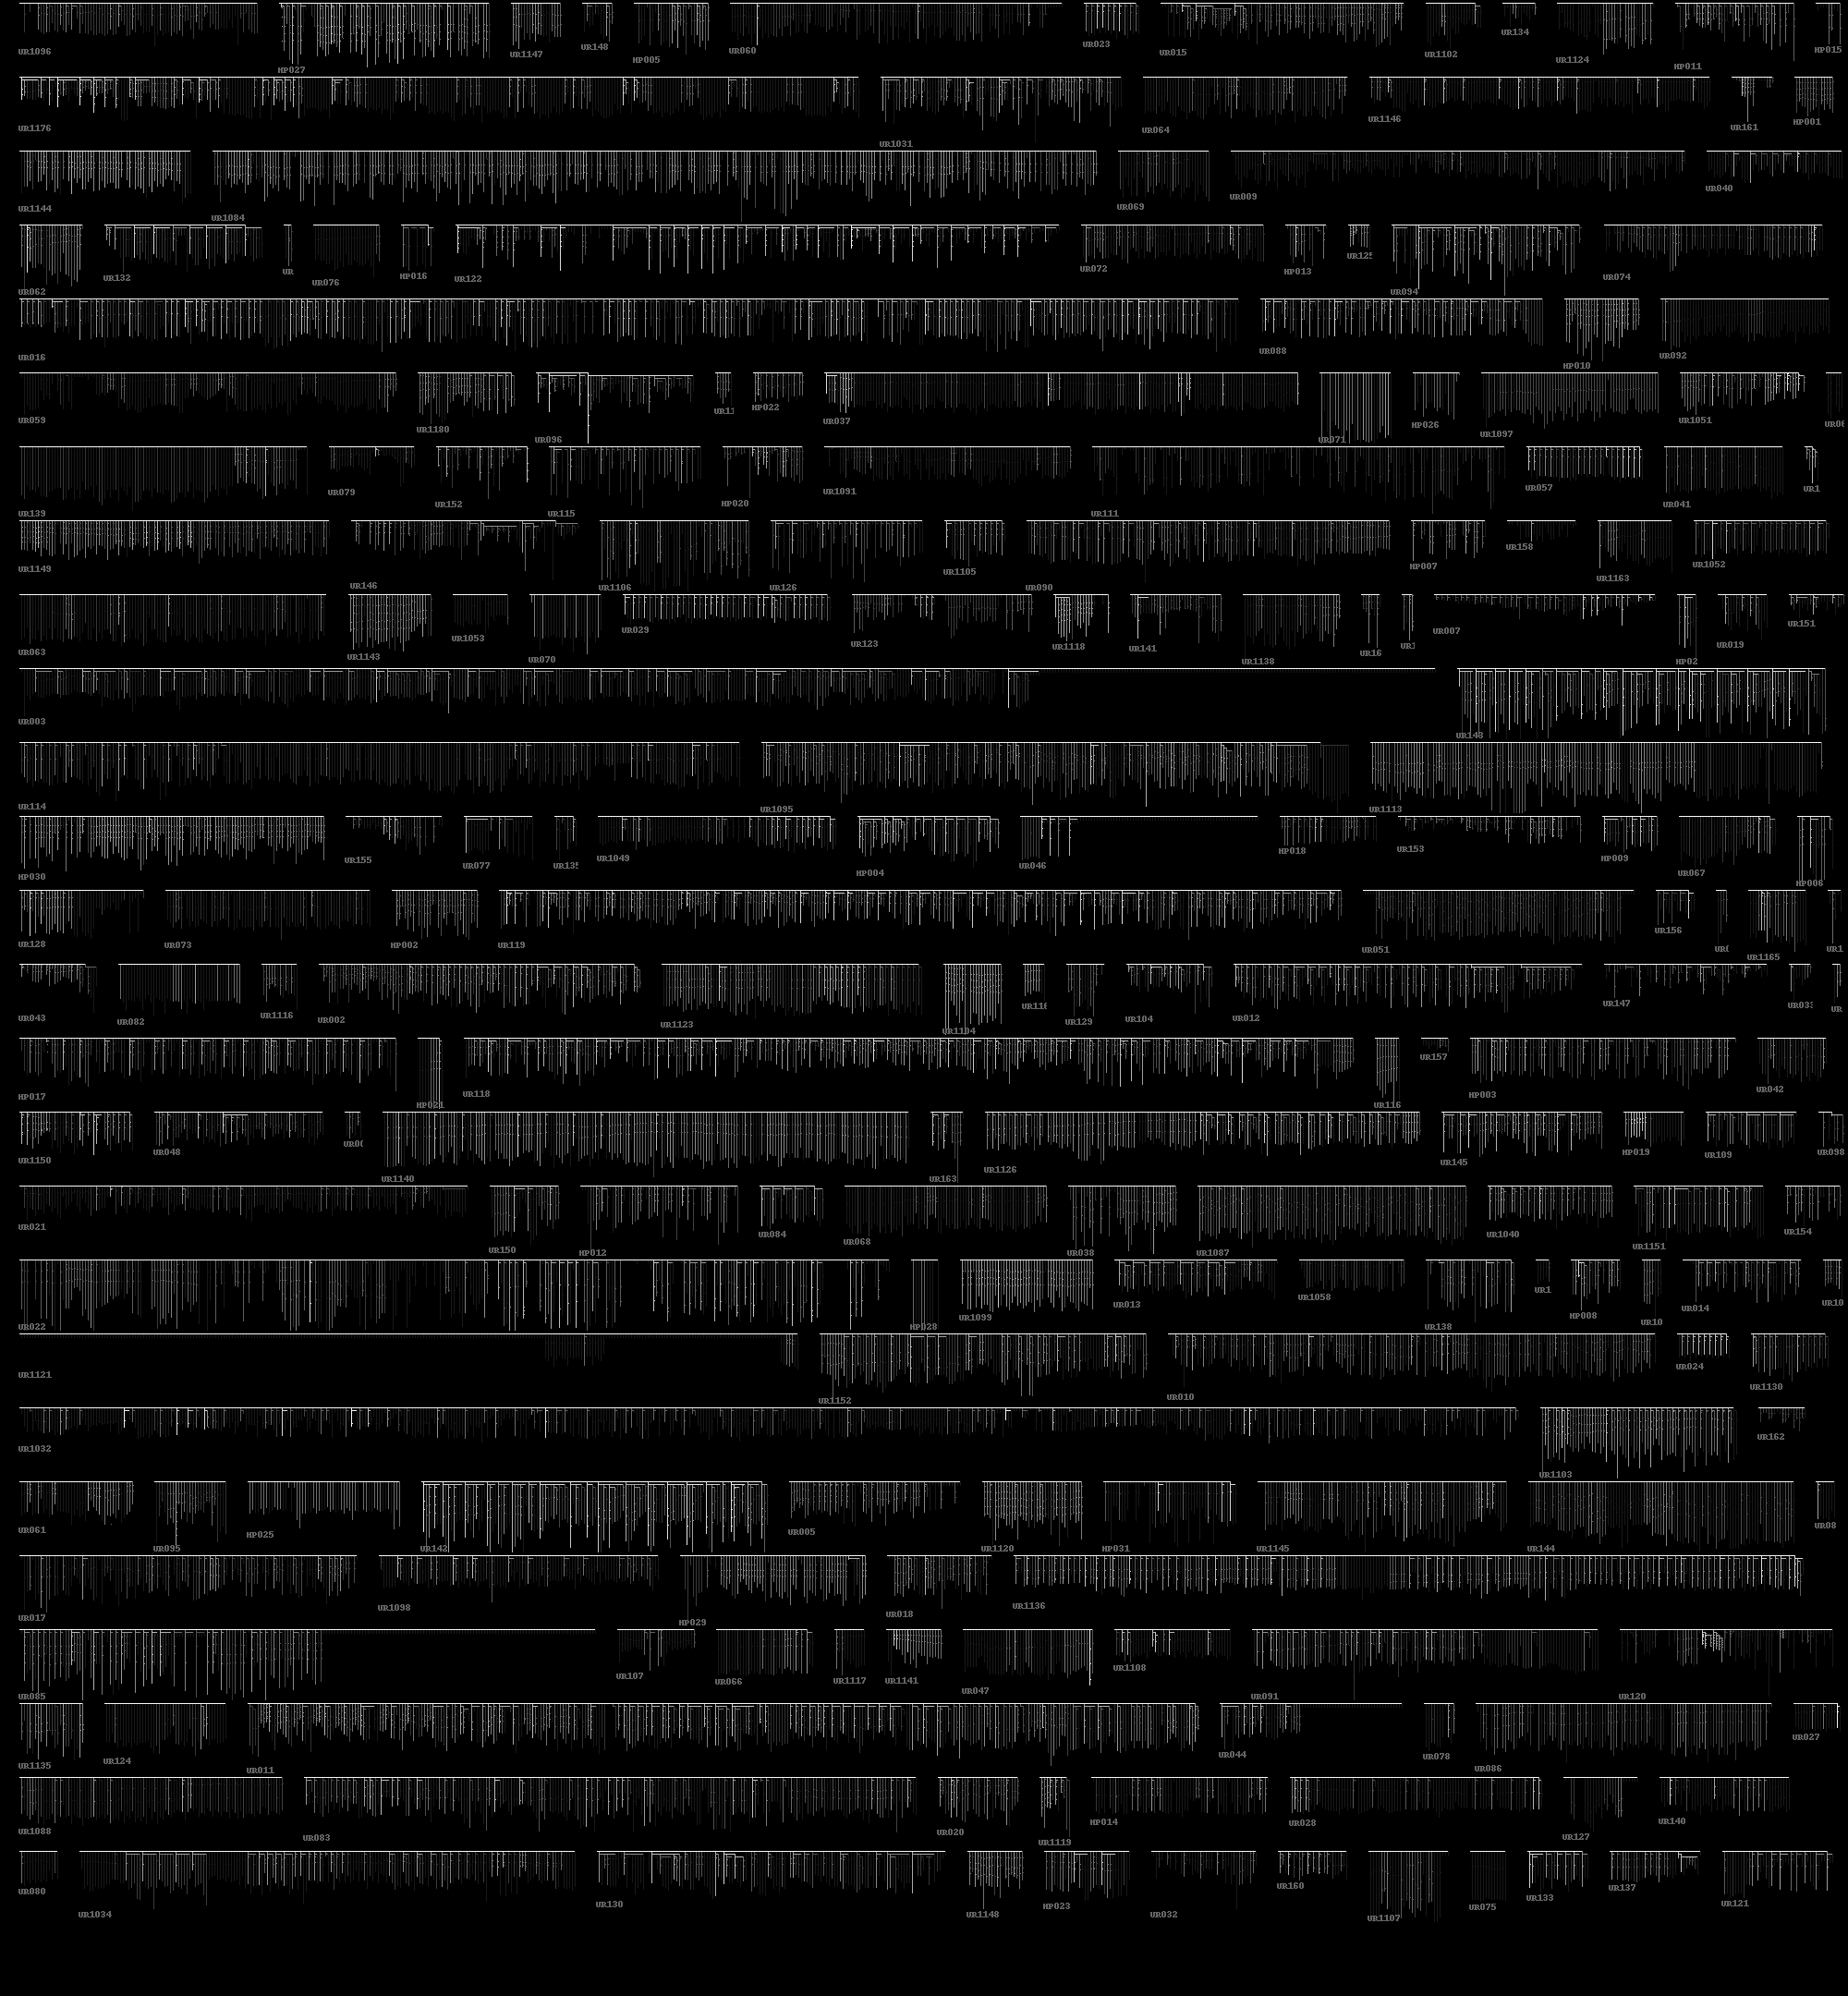
The original thinking of the pixelquipu was to attempt to fit all the quipus on a single page for viewing, as it represents them with the absolute minimum pixels required. Here are both pendant colour and entropy shown for all 247 quipu we have the data for:
A cryptoweaving experiment
Archaeologists can read a woven artifact created thousands of years ago, and from its structure determine the actions performed in the right order by the weaver who created it. They can then recreate the weaving, following in their ancestor’s ‘footsteps’ exactly.
This is possible because a woven artifact encodes time digitally, weft by weft. In most other forms of human endeavor, reverse engineering is still possible (e.g. in a car or a cake) but instructions are not encoded in the object’s fundamental structure – they need to be inferred by experiment or indirect means. Similarly, a text does not quite represent its writing process in a time encoded manner, but the end result. Interestingly, one possible self describing artifact could be a musical performance.
Looked at this way, any woven pattern can be seen as a digital record of movement performed by the weaver. We can create the pattern with a notation that describes this series of actions (a handweaver following a lift plan), or move in the other direction like the archaeologist, recording a given notation from an existing weave.
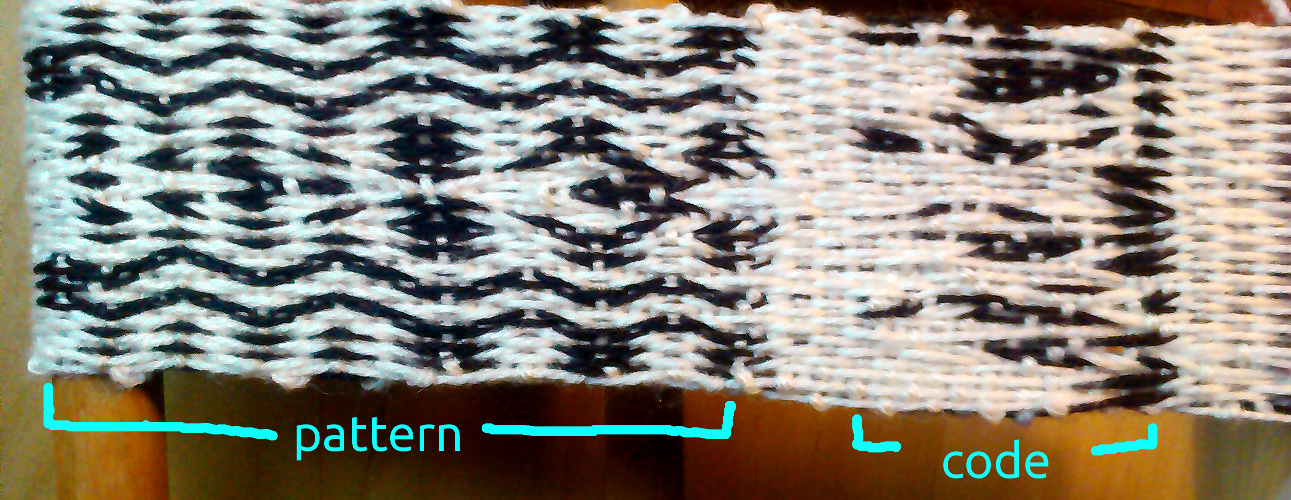
A weaving and its executable code equivalent.
One of the potentials of weaving I’m most interested in is being able to demonstrate fundamentals of software in threads – partly to make the physical nature of computation self evident, but also as a way of designing new ways of learning and understanding what computers are.
If we take the code required to make the pattern in the weaving above:
(twist 3 4 5 14 15 16)
(weave-forward 3)
(twist 4 15)
(weave-forward 1)
(twist 4 8 11 15)

(repeat 2
 (weave-back 4)
 (twist 8 11)
 (weave-forward 2)
 (twist 9 10)
 (weave-forward 2)
 (twist 9 10)
 (weave-back 2)
 (twist 9 10)
 (weave-back 2)
 (twist 8 11)
 (weave-forward 4))
We can “compile” it into a binary form which describes each instruction – the exact process for this is irrelevant, but here it is anyway – an 8 bit encoding, packing instructions and data together:
8bit instruction encoding:

Action  Direction  Count/Tablet ID (5 bit number)
0 1         2              3 4 5 6 7

Action types
weave:    01 (1)
rotate:   10 (2)
twist:    11 (3)

Direction
forward: 0
backward: 1
If we compile the code notation above with this binary system, we can then read the binary as a series of tablet weaving card flip rotations (I’m using 20 tablets, so we can fit in two instructions per weft):
0 1 6 7 10 11 15
0 1 5 7 10 11 14 15 16
0 1 4 5 6 7 10 11 13
1 6 7 10 11 15
0 1 5 7 11 17
0 1 5 10 11 14
0 1 4 6 7 10 11 14 15 16 17
0 1 2 3 4 5 6 7 11 12 15
0 1 4 10 11 14 16
1 6 10 11 14 17
0 1 4 6 11 16
0 1 4 7 10 11 14 16
1 2 6 10 11 14 17
0 1 4 6 11 12 16
0 1 4 7 10 11 14 16
1 5
If we actually try weaving this (by advancing two turns forward/backward at a time) we get this mess:
The point is that (assuming we’ve made no mistakes) this weave represents *exactly* the same information as the pattern does – you could extract the program from the messy encoded weave, follow it and recreate the original pattern exactly.
The messy pattern represents both an executable, as well as a compressed form of the weave – taking up less space than the original pattern, but looking a lot worse. Possibly this is a clue too, as it contains a higher density of information – higher entropy, and therefore closer to randomness than the pattern.
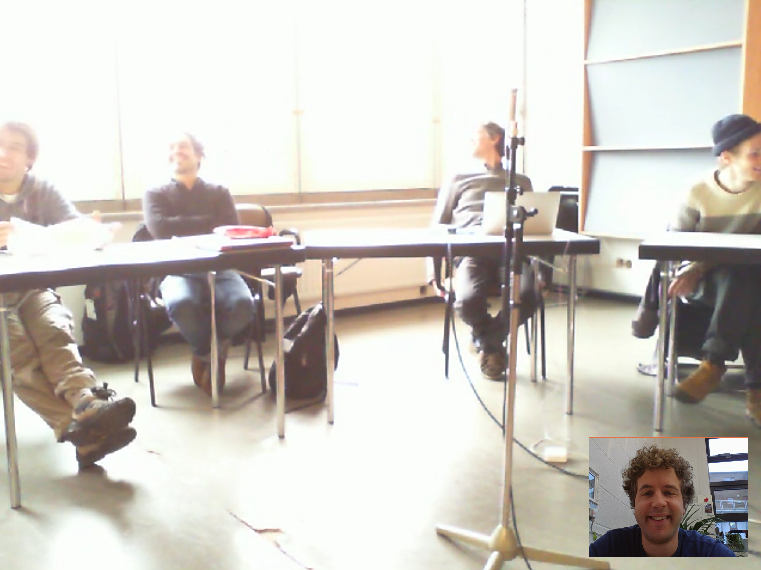
Quipu: further experiments in Düsseldorf
A report on further experimentation with Julian Rohrhuber and his students at the Institute for Music and Media in Düsseldorf during our coding with weaves and knots remote seminar this week.
As we have so little idea what the Inca are telling us in their Quipu, it seems appropriate to add a cryptanalysis approach to our toolkit of inquiry. One of the first things that a cryptanalyst will do when inspecting an unknown system is to visualise it’s entropy in order to get a handle on any structures or patterns in the underlying information. This concept comes from Claude Shannon’s work on information theory in the 40’s, where he proved that information obeys fundamental laws of physics. The concept that information and “cyberspace” may not be as intangible and otherworldly as we might believe (in fact is grounded in physical reality along with everything else) is one of the recurring themes of the weavingcodes project.
Shannon’s innovation was to separate the concepts of data quantity from information value, and he claims that information is equivalent to surprise – the more surprising a piece of data is, the more information it contains. Conversely a piece of information which we expect to hear by definition doesn’t really tell us very much. The potential for some data to be surprising (or more specifically it’s potential to reduce our uncertainty) can be measured statistically, with a quantity he called entropy, as it is analogous to states in thermodynamic systems.
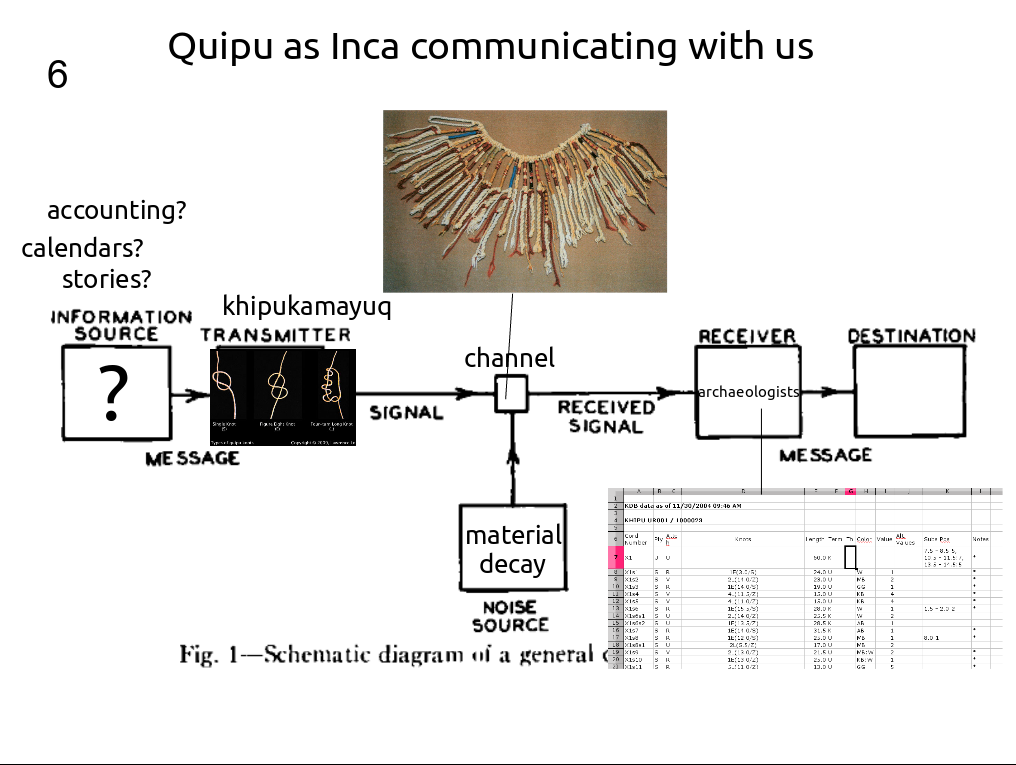
Shannon defined a generalised communication system, which is handy to give us a way of reasoning about our situation in relation to the Inca. Our main unknown is the source of the messages they are sending us, are they accounting information, calendars or stories? We know a bit more about the transmitters of the messages, the khipukamayuq – the knot makers and quipu keepers. At the time Shannon was working on information theory, he was part of the start of the movement away from analogue, continuous signals and towards digital signals – with advantages that they are highly resistant to noise and can be carried further and combined together to increase bandwidth. Quipu are also mainly comprised of digital information – the type of a knot, the number of turns it’s comprised of or the twist direction of a thread are all discreet (either one thing or another) and therefore highly robust to material decay or decomposition. We can still ‘read’ them confidently after 500 years or more without the digital signal they represent being degraded too badly, if only we could understand it. At the same time, none of us working on this have access to a real quipu, so our receivers are the archaeologists and historians who study them, and compile archives such as the Harvard Quipu Archive we are using.
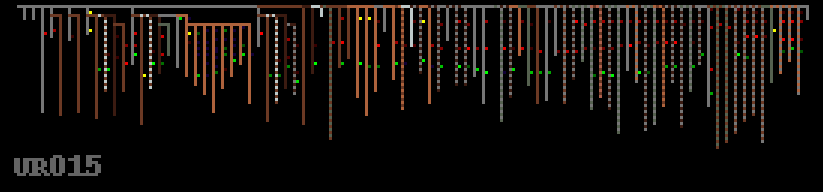
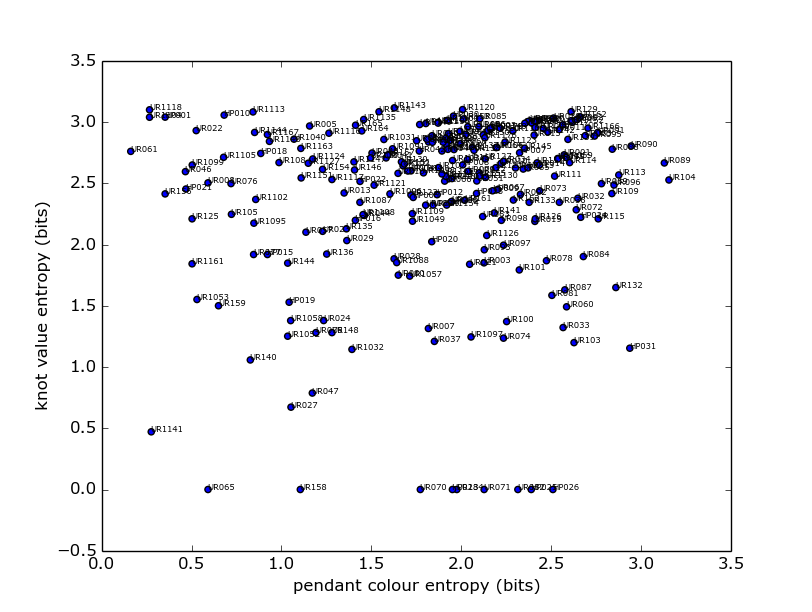
Although entropy is a very simplistic approach mathematically, it’s main use is to give us a tool for measuring the comparative information carrying potential of data which we have no idea about. Here are all the quipu in the Harvard database in order of average entropy bits they contain (only listing every other quipu ID):

This graph is calculated by making lists of all the discreet data of the same type, e.g. knot value, type, tying direction, pendant colours and ply direction (ignoring lengths and knot positions as these are continuous) – then calculating Shannon entropy on histograms for each one and adding them together.
We can also compare different types of information against one another, for example the main data we currently understand has some specific meaning are the knot values, partly derived from the knot type (long, single or figure of eight), which represent a decimal notation. If we compare the entropy of these we can expect them to have roughly similar average amounts of information:
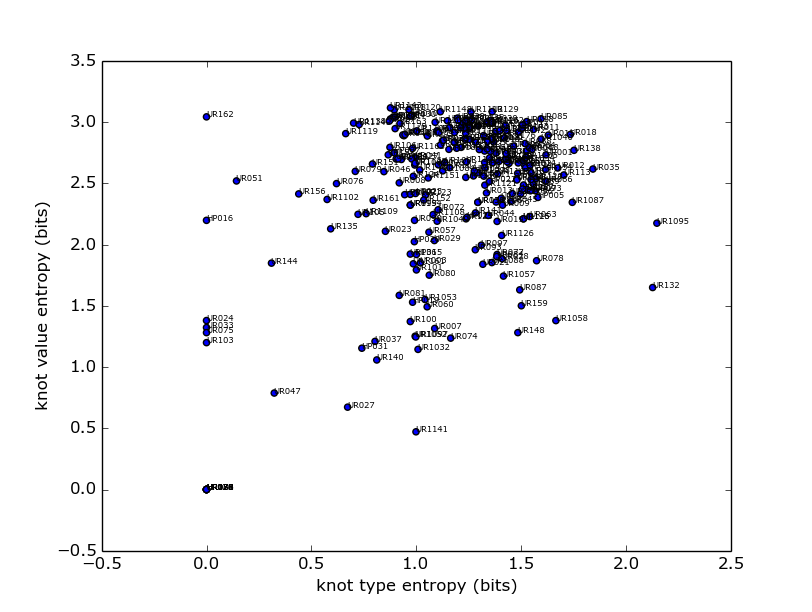
The meanings of colours, ply and structure are largely unknown. Here are the knot values compared with the colours:
And this is pendant ply direction compared with knot values for each quipu:
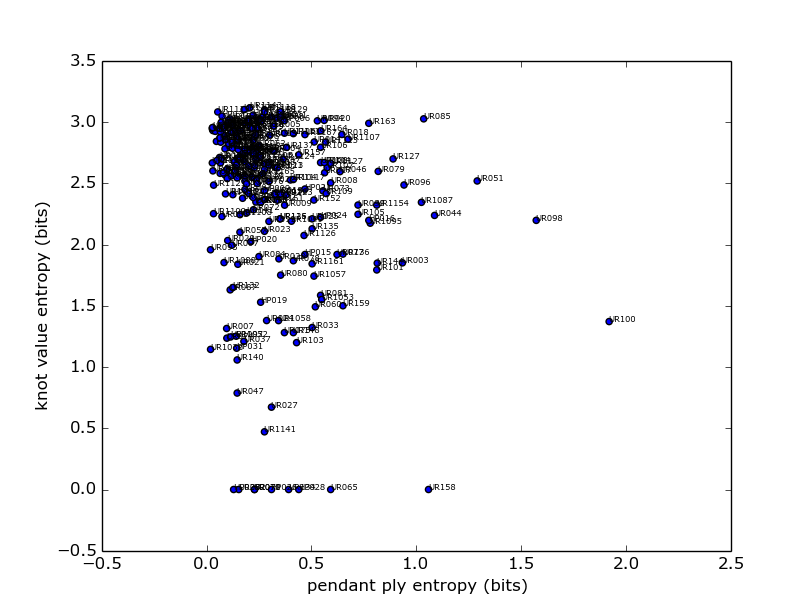
At this point the most useful aspect of this work is to give us some outliers to inspect visually and sonically – more on that soon.
Sonic pattern residency
I’m collaborating on a Sonic Pattern residency as part of the Inhabiting the Hack series, where four artists are invited to spend three days thinking about patterns in sound, textile, and technology. We started with a briliant half-day workshop on tablet weaving, lead by Sarah Williams. It was good to start a tech-focussed residency with some ancient tech, blowing our minds with the complexity which fell out from simple interactions between threads.
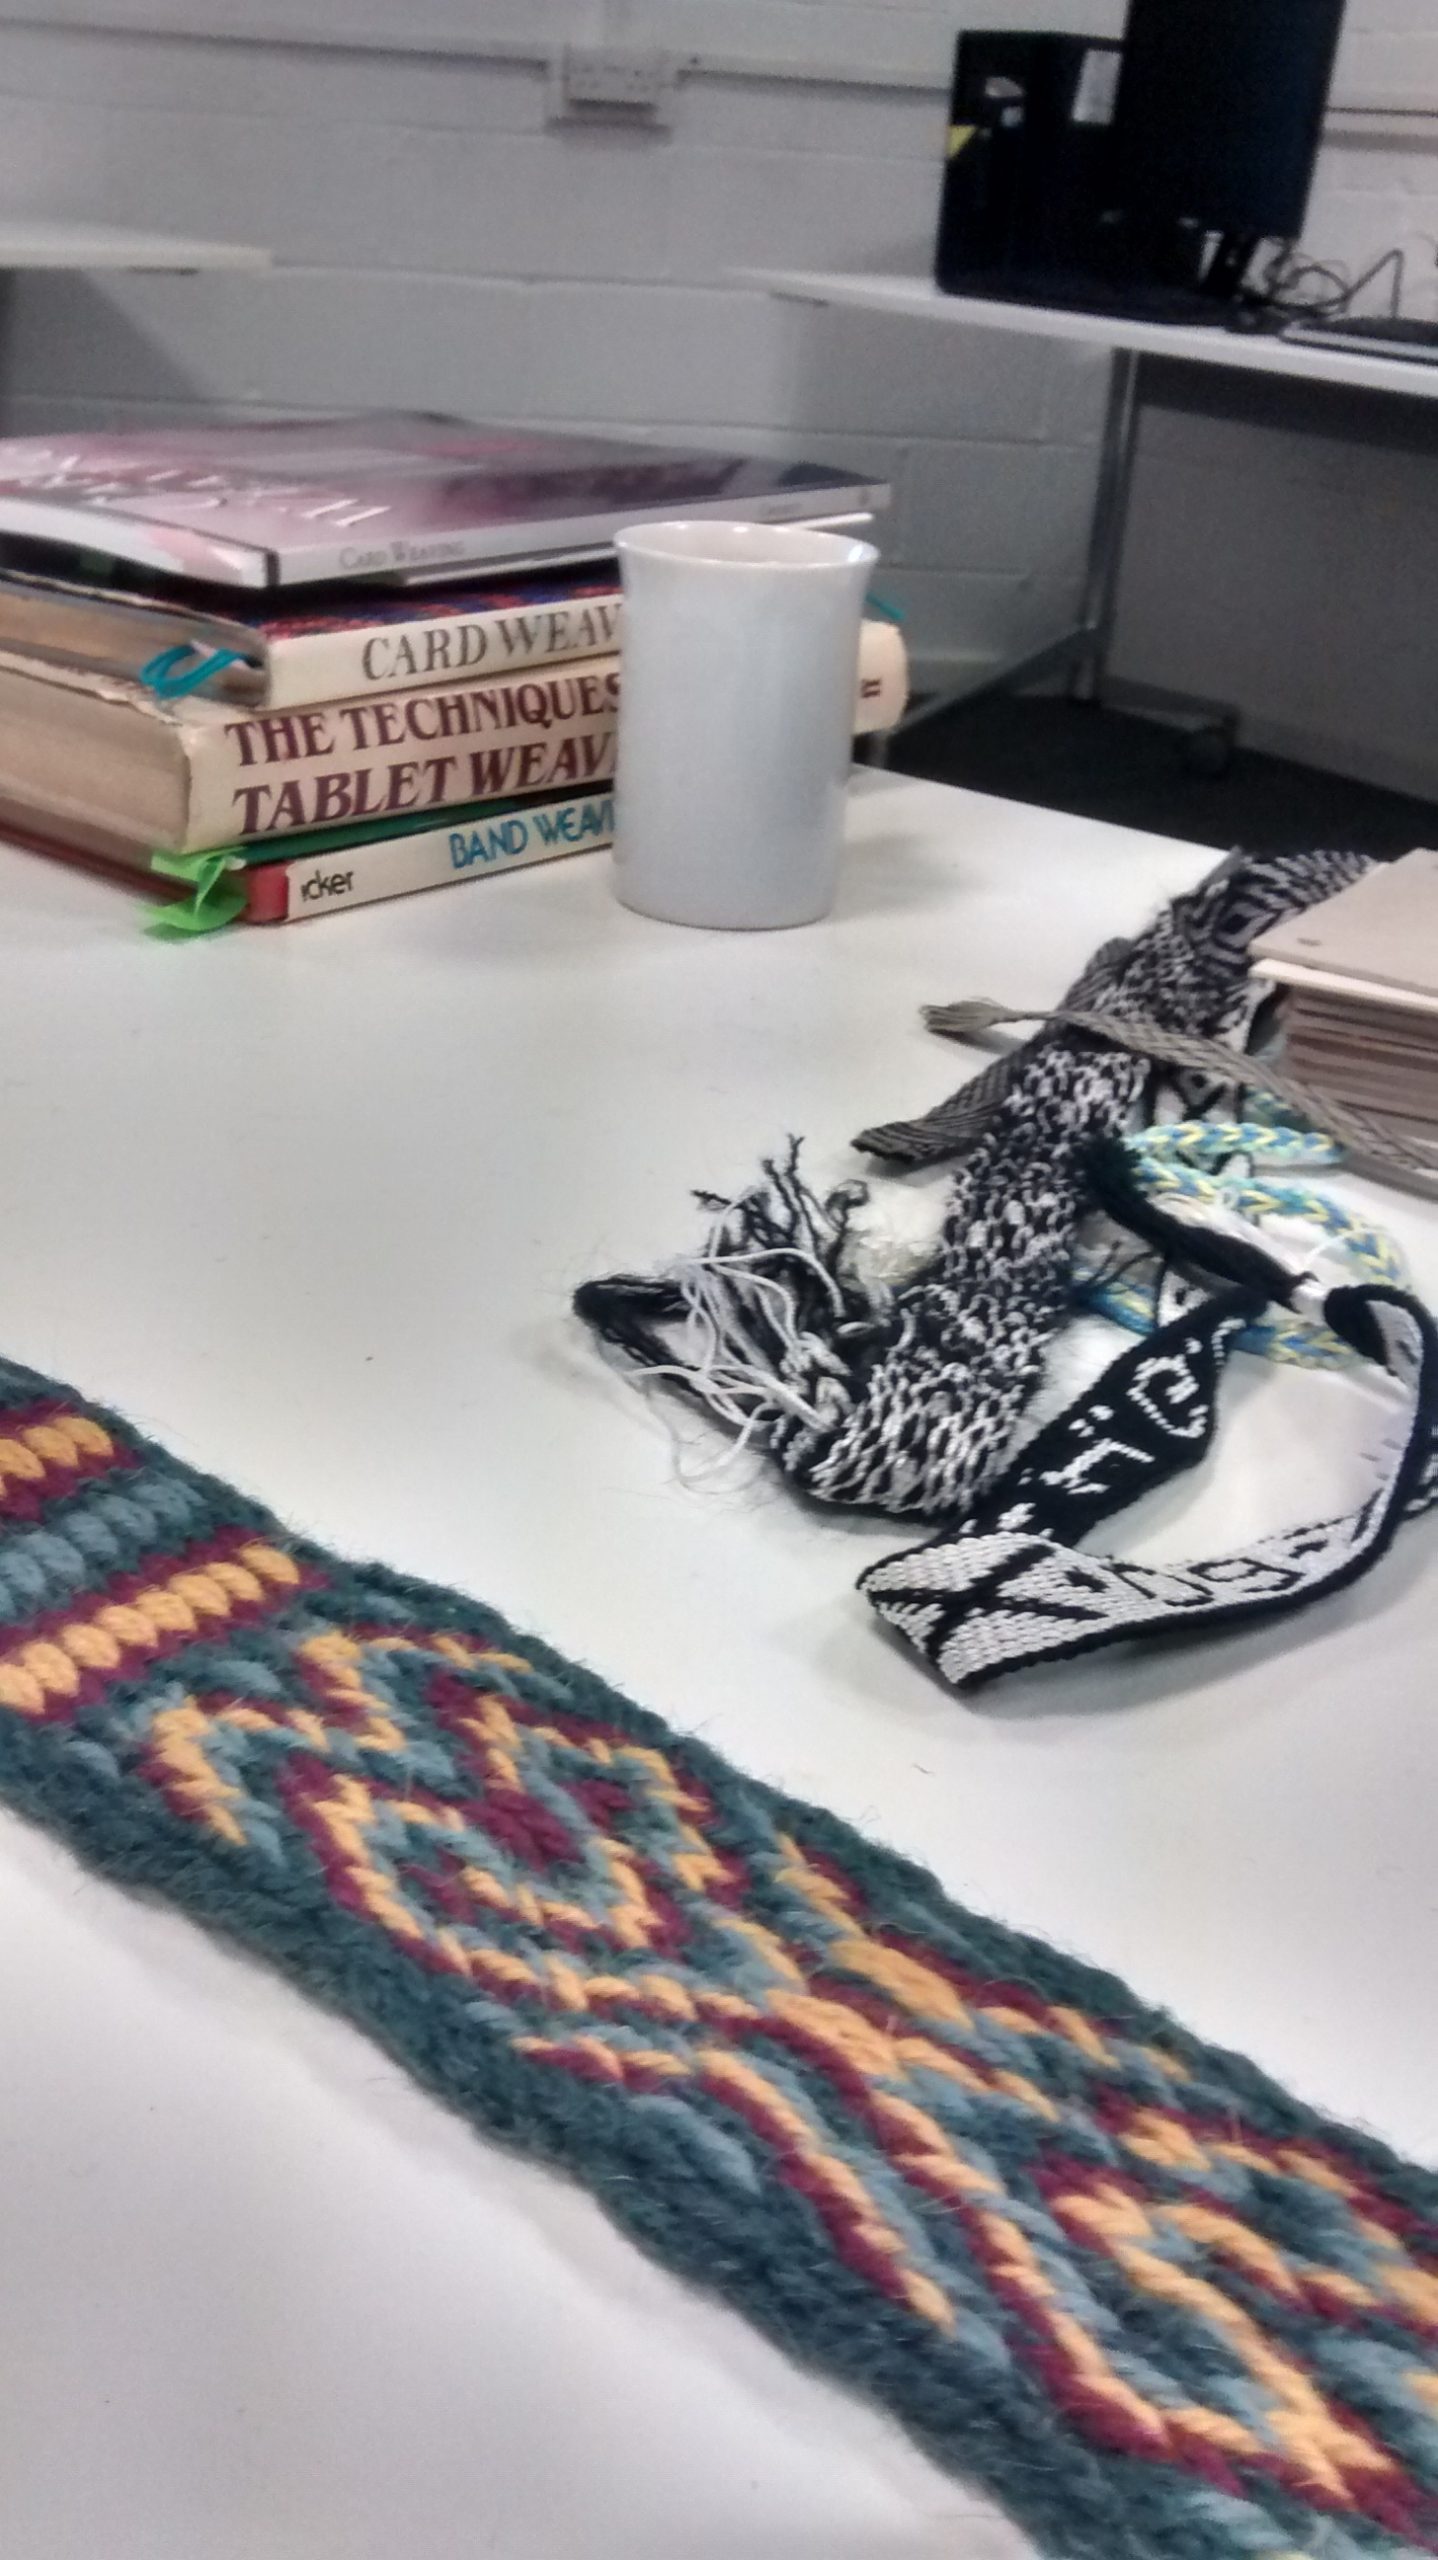

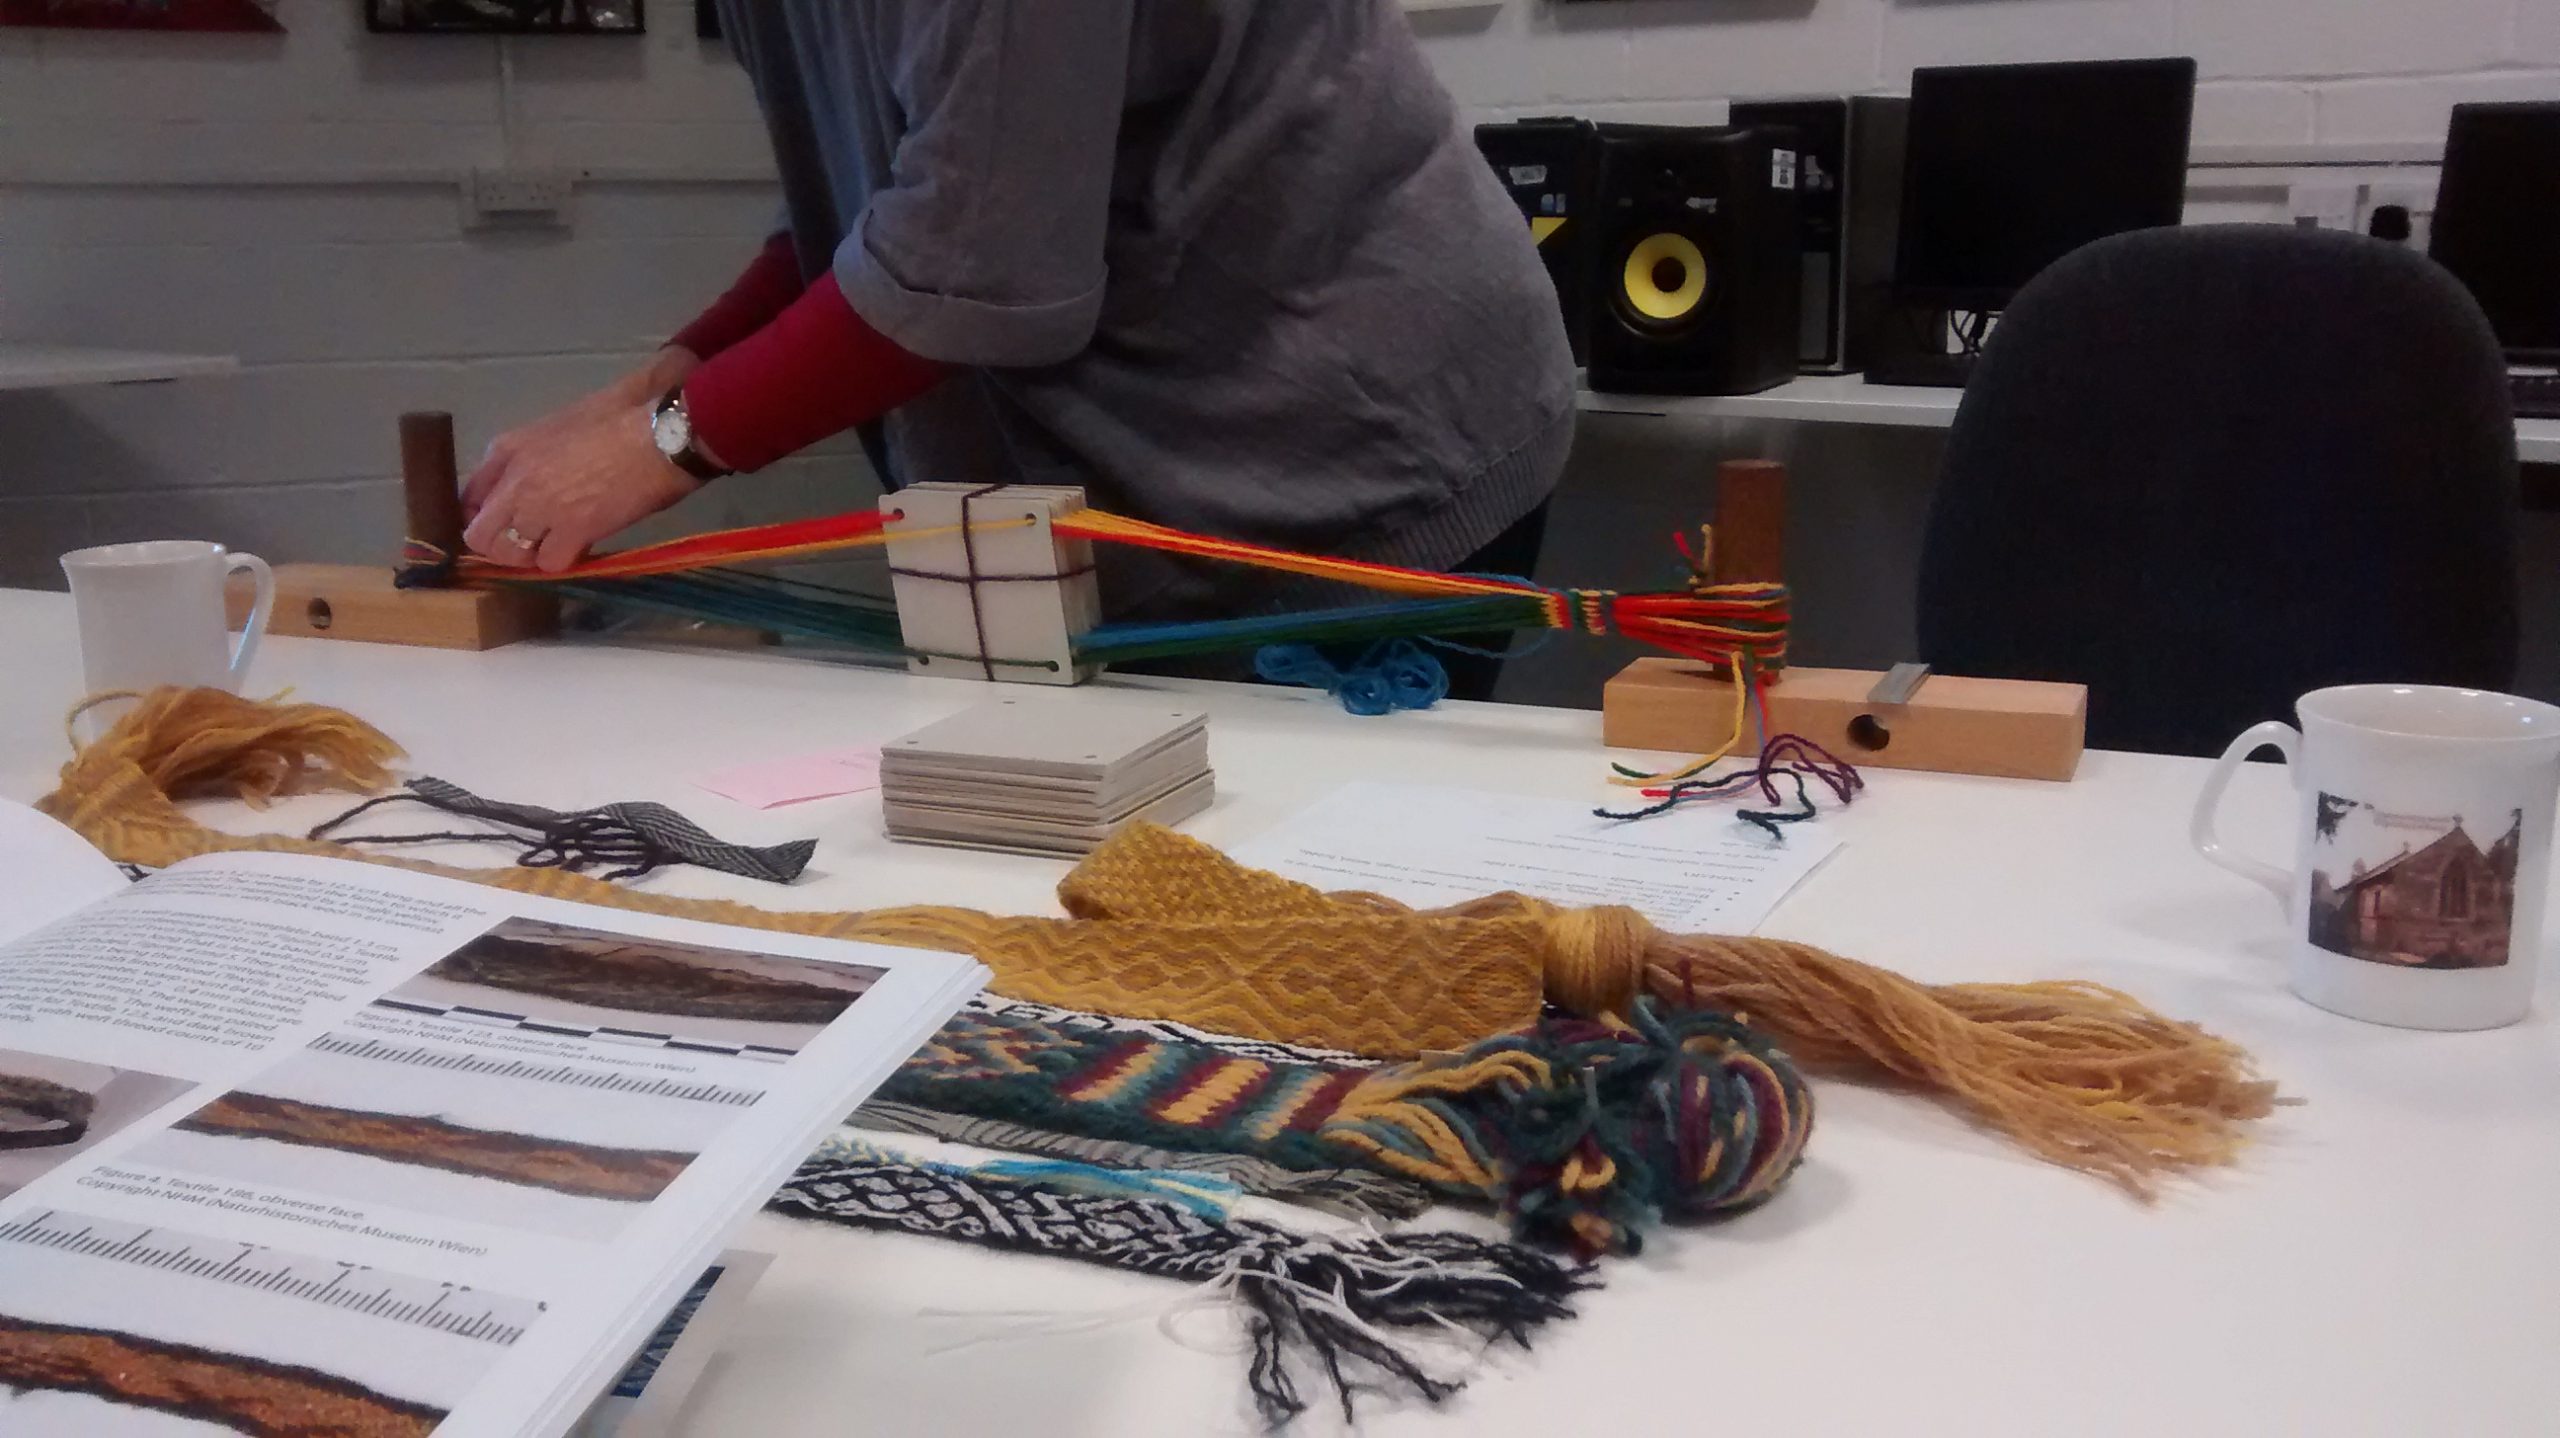
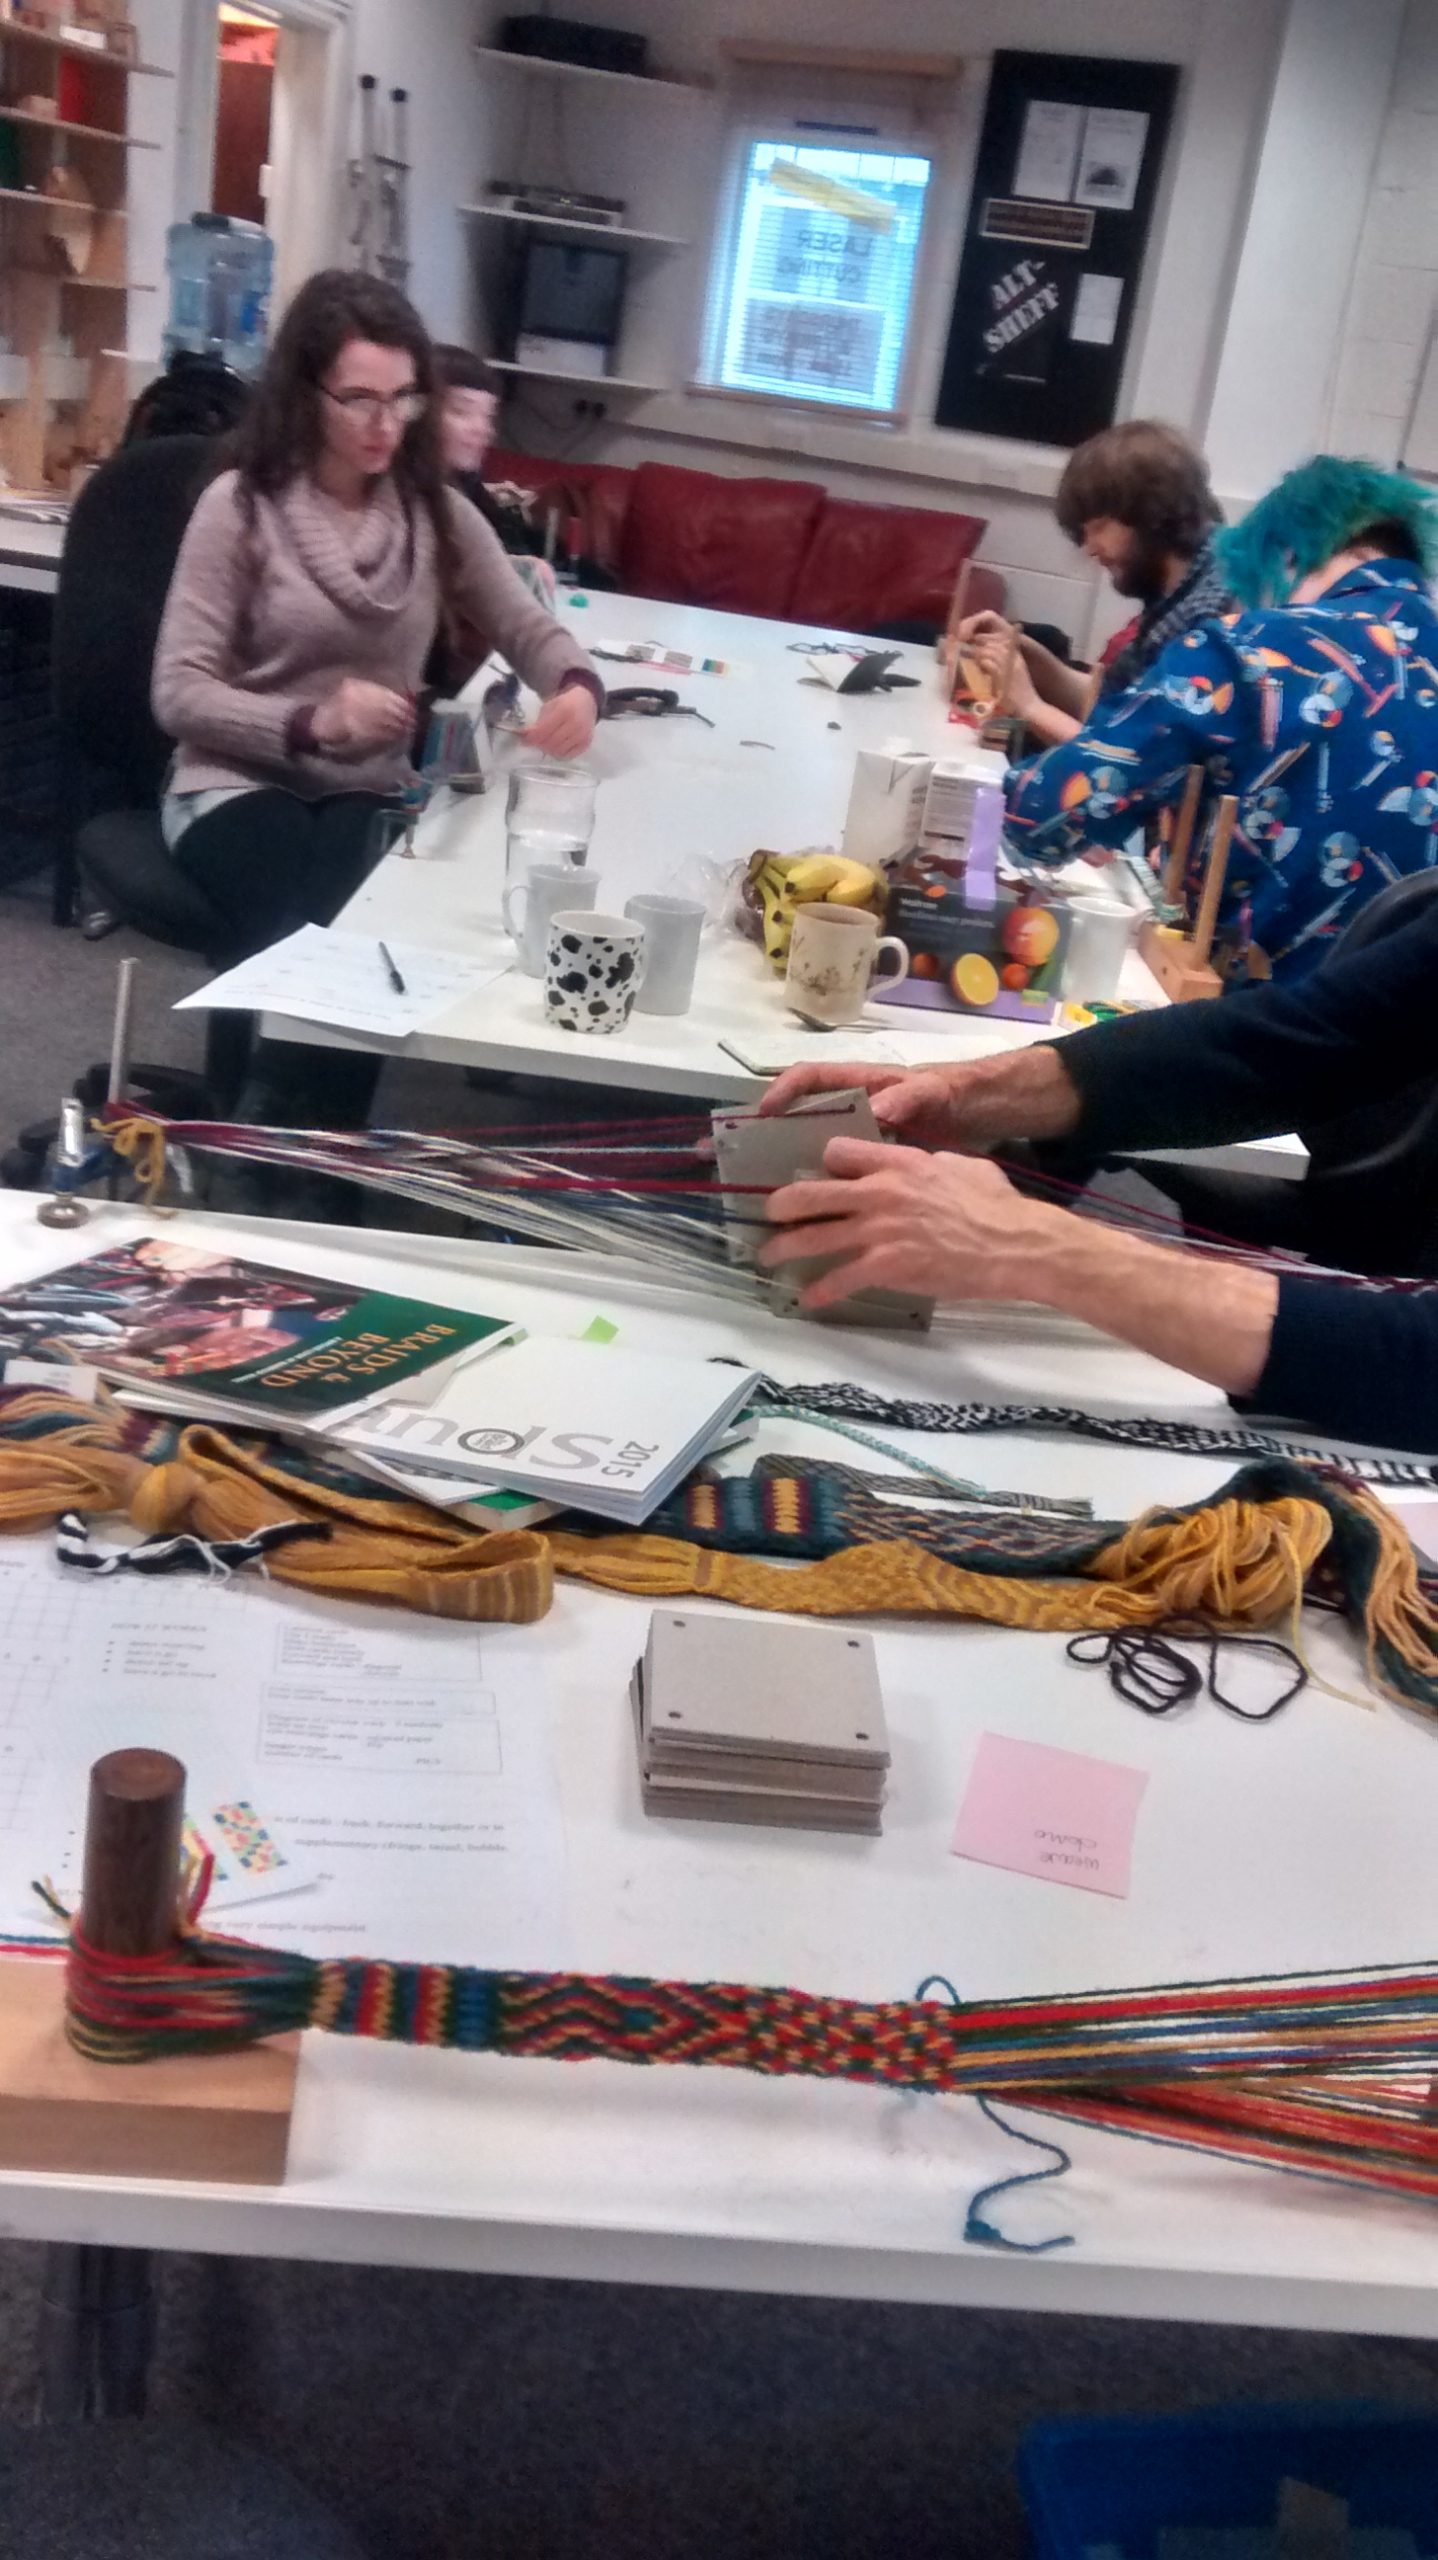
We first learned how to do the weaving, and then how to set up the warp, getting stuck in to the weaving first, and then get a feeling for how the threads themselves play their role in the cloth which emerges. Learning how to tablet weave backwards in this way worked well, and at some point Sarah noted how weavers generally seem to do things backwards. Instruction was around sitting position, tension, and how to establish a simple baseline to understanding what was going on, to avoid being scared off by the complexity. Learning Sarah’s techniques for how to warp up the tablets felt a little like taming a wild beast.
It turned out that Sarah is the Hon. Secretary of the association of Guilds of Spinners, Weavers and Dyers, which made it especially good to see how much she enjoyed the surprises which tablet weaving threw up even in our short workshop.
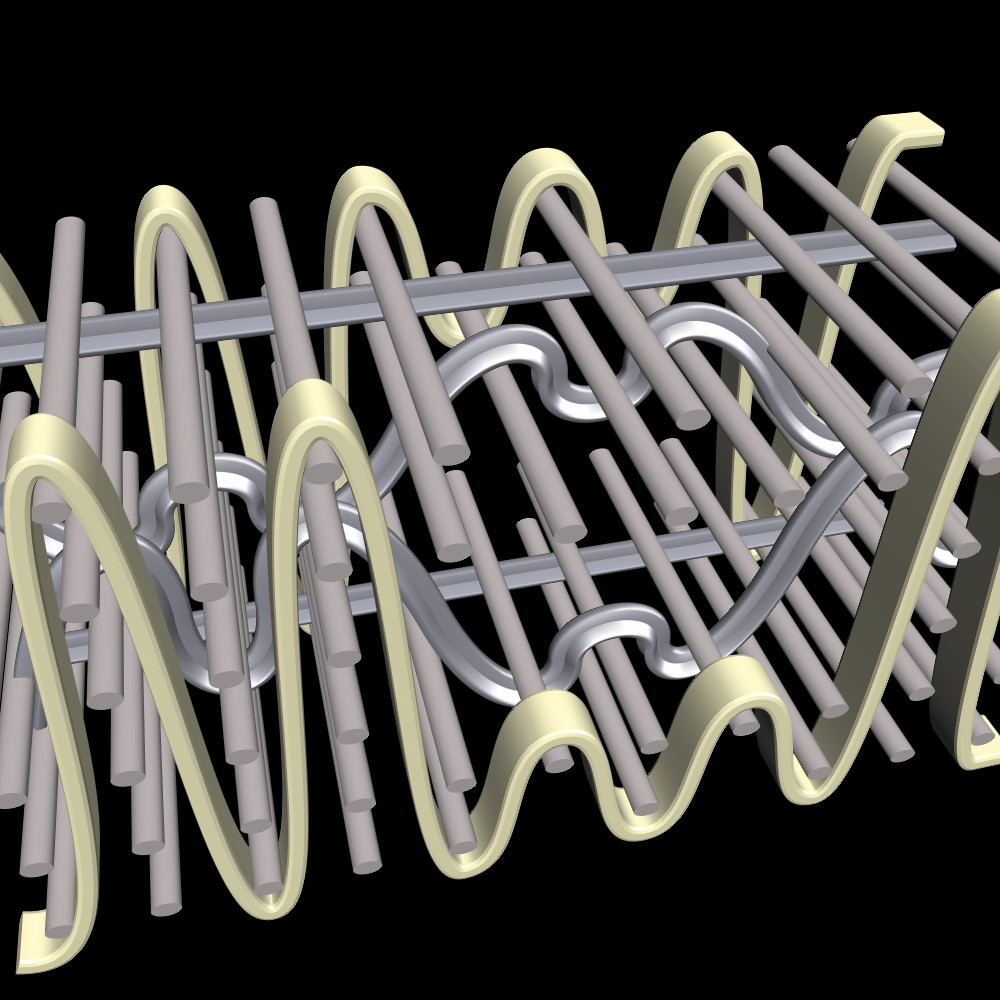
Procedural weave rendering
We’ve been working on new approaches to 3D rendering ancient weaves, using Alex’s new behavioural language (which describes a weave from the perspective of a single thread) as the description for our modelling. This new approach allows us to build a fabric out of a single geometric shape, where warp and weft are part of the same thread.

This is mix of tabby and 2:2 twill, created by this code:
warp 12 24 ++ [TurnIn] ++ threadWeftBy'' Odd (rot 3) ([Over,Under]) 12 12 ++ threadWeftBy'' Odd (rot 3) ([Over,Over,Under,Under]) 12 12
I’m still learning this language, but more on that soon. This line produces an large list of instructions the weave renderer uses to build it’s model, turning the thread and shifting it up and down as it crosses itself.
In the video in his last post Alex describes using this to mix two separate weaving techniques together, which is one of our main reasons for developing this language – existing weave simulations cannot replicate the weaving technology of the ancient Greeks who for example, combined tablet and warp weighted weaving in the same fabric.
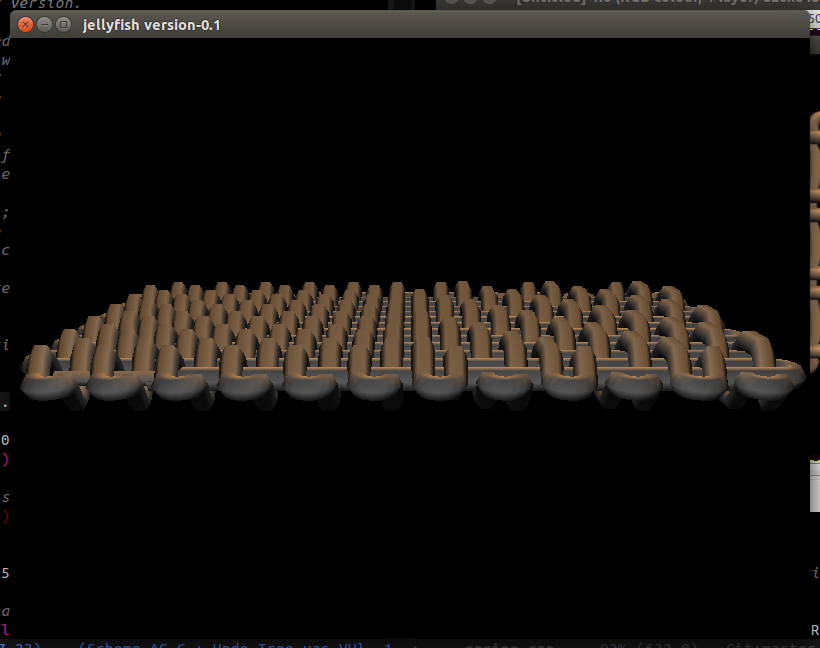
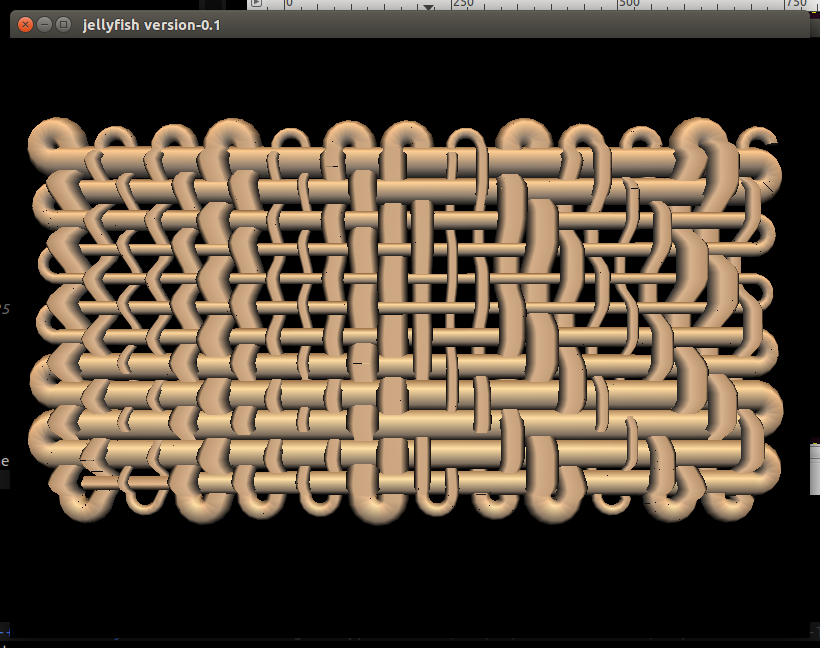
The second problem with weave simulations is shown by the following screenshot from a popular existing system:
Fabrics modelled in this way are considered to infinitely repeating sections with chopped off threads. There is no consideration for the selvedge at the edge of the fabric – which as we’ve shown in our past research is almost like a completely separate weave system of it’s own, and rarely considered by notation systems or modelling (and often left to the weaver to ‘livecode’). Here is a different view of the same fabric:
We can also now introduce other changes to the yarn structure, for example modifying the width using a sine wave.
I still have a few glitches to fix as you can see above, but here is a video of the development process from the first script, getting the polygons lined up, fixing the turning, adding over/under, reading Alex’s code and finally lining everything up.
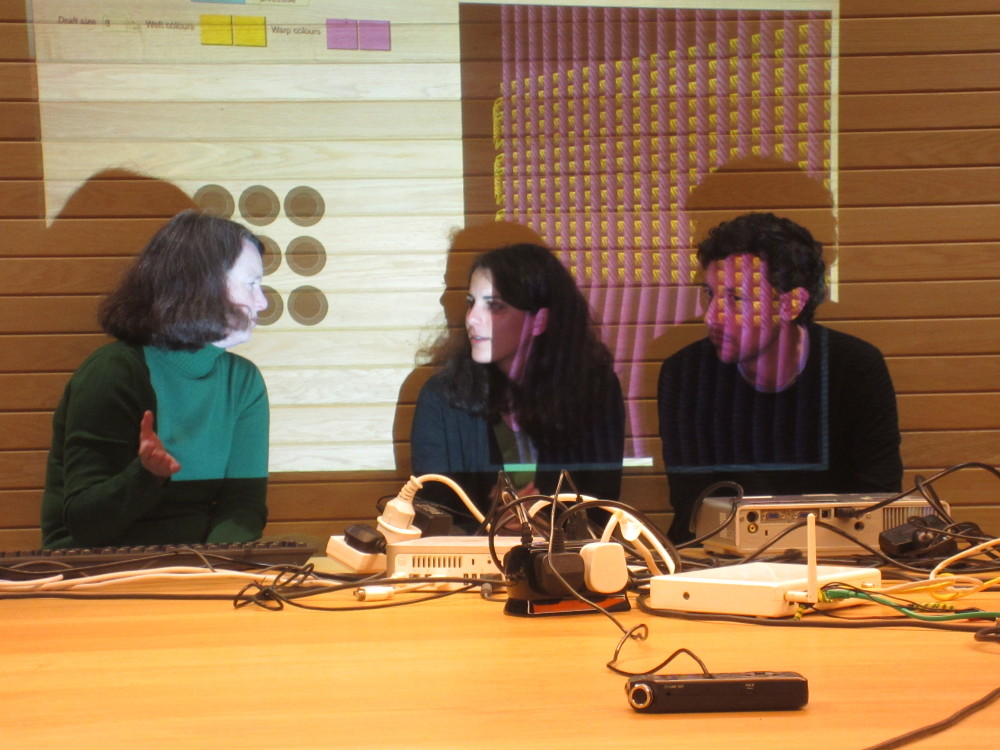
Weavecoding performance experiments in Cornwall
Last week the weavecoding group met at Foam Kernow for our Cornish research gathering. As we approach the final stages of the project our discussions turn to publications, and which ideas from the start need revisiting. While they were here, I wanted to give local artists and researchers working with code and textiles a chance to meet Ellen, Emma and Alex. As we are a non-academic research organisation I wanted to avoid the normal powerpoint talks/coffee events and try something more informal and inclusive.
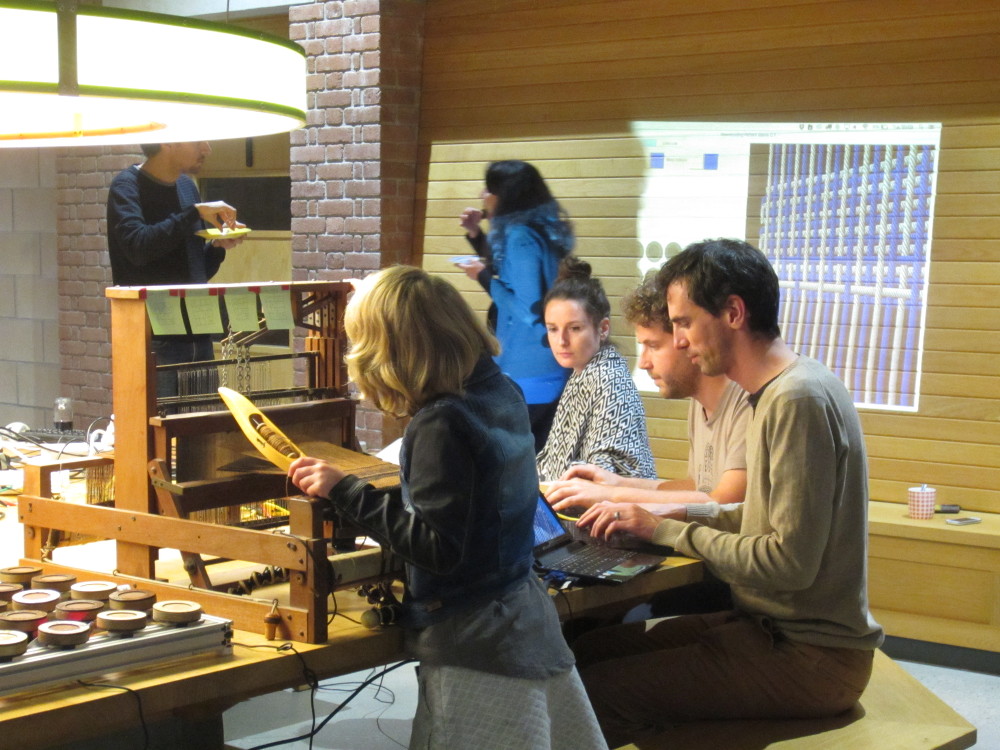
One of the original ideas we had was to combine weaving and coding in a performance setting, to both provide a way to make livecoding more inclusive with weaving, and at the same time to highlight the digital thought processes involved in weaving. Amber made vegetarian sushi for our audience and we set up the Jubilee Warehouse with a collection of experiments from the project:
- The newly warped table loom with a live camera/projection from underneath the fabric as it was woven with codes for different weaves on post-it notes for people to try.
- The tablet/inkle loom to represent ancient weaving techniques.
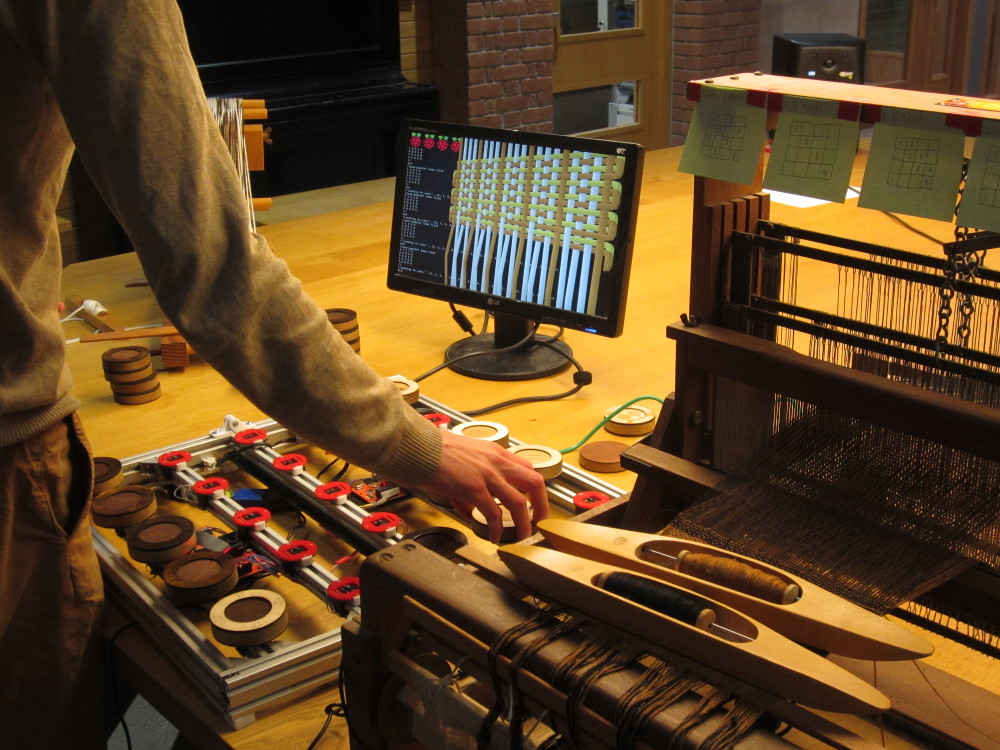
- The pattern matrix tangible weavecoding machine and Raspberry Pi.
- A brand new experiment by Francesca with a dancemat connected to the pattern matrix software for dance code weaving!
- The slub livecoding setup.
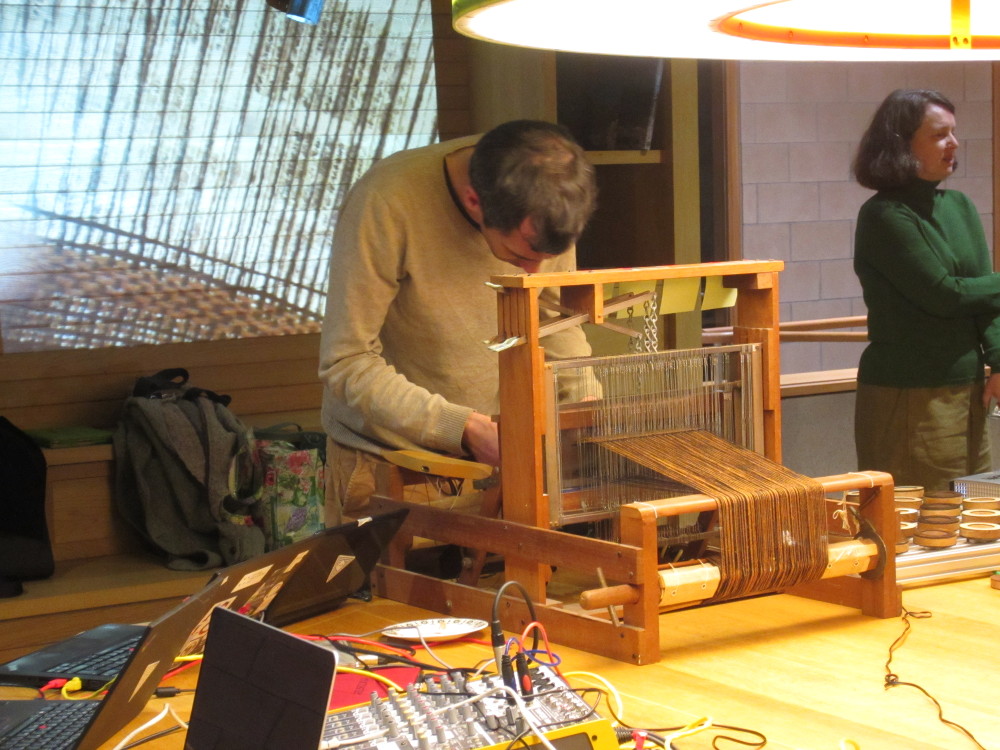
This provided an opportunity for people to try things out and ask questions/provide discussion starting points. Our audience consisted of craft researchers, anthropological biologists, architects, game designers and technologists – so it all went on quite a lot longer than we anticipated! Alex and I provided some slub livecoded music to weave by, and my favourite part was the live weaving projection – with more projectors we could develop this combination of code and weaving performance more. Thanks to Emma for all the videos and photos!