Quipu coding with knots seminar at the Institute for Music and Media Düsseldorf


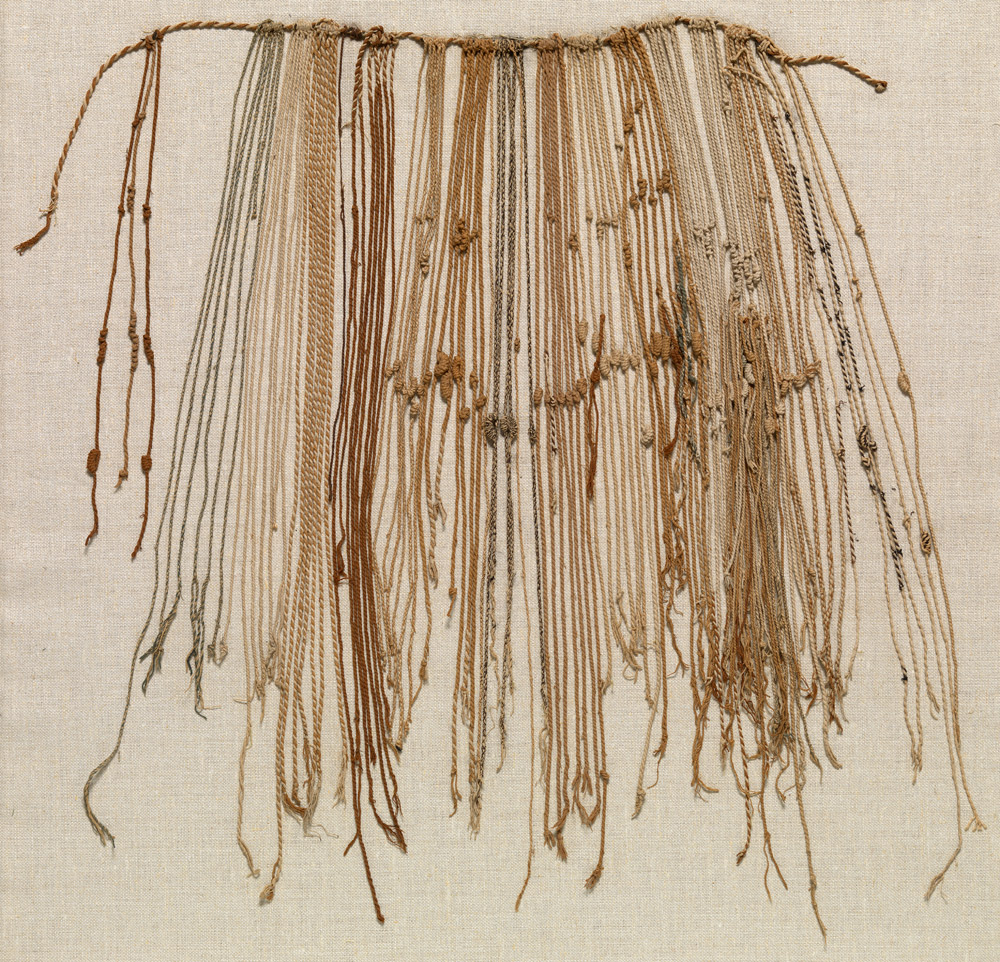
Renate Wieser and Julian Rohrhuber are the people who first introduced Ellen with Alex and me, and Julian is also officially a member of this project’s Steering Committee – so it’s great to be able to invite him to co-author this post on our ‘coding with knots’ seminar at the Institute for Music and Media in Düsseldorf. My teaching role there gives us an opportunity to look at one of the intriguing technology histories related to the weavingcodes project, the Inca quipu.

Yupana
A Spanish illustration of a Khipukamayuq (knot maker/keeper)


A close up of a small quipu showing undecyphered changes in colour, material and twist.

We decided to base the seminar around finding ways to understand the quipu and the data they contain in their knots. Much of this is still a mystery to archaeological research, and while we can’t be expected to make great breakthroughs in ‘cracking the code’ over a couple of days – there is value in bringing a cross-disciplinary approach to the problem as artists, musicians and programmers.

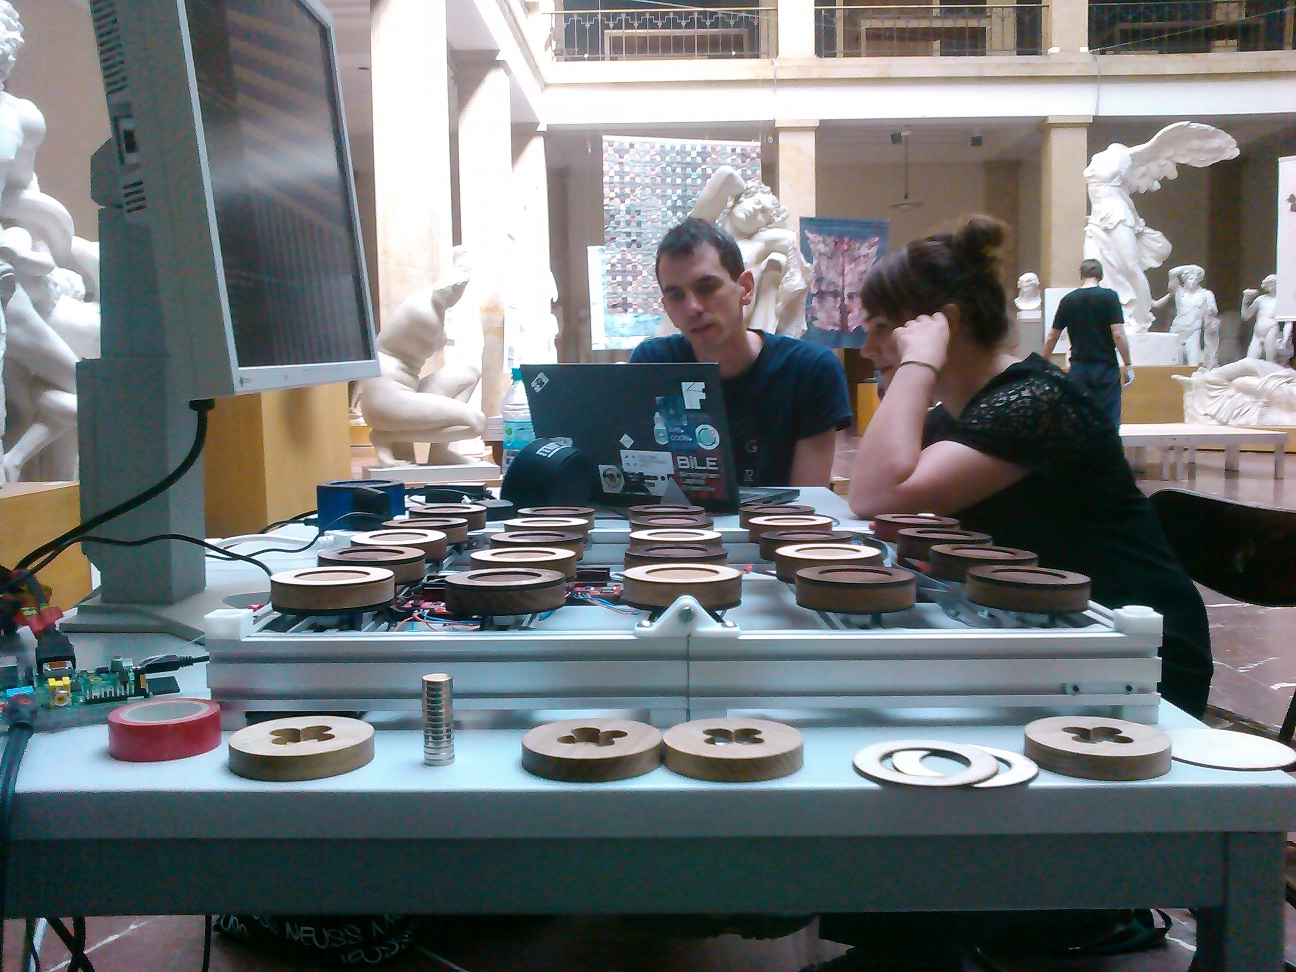
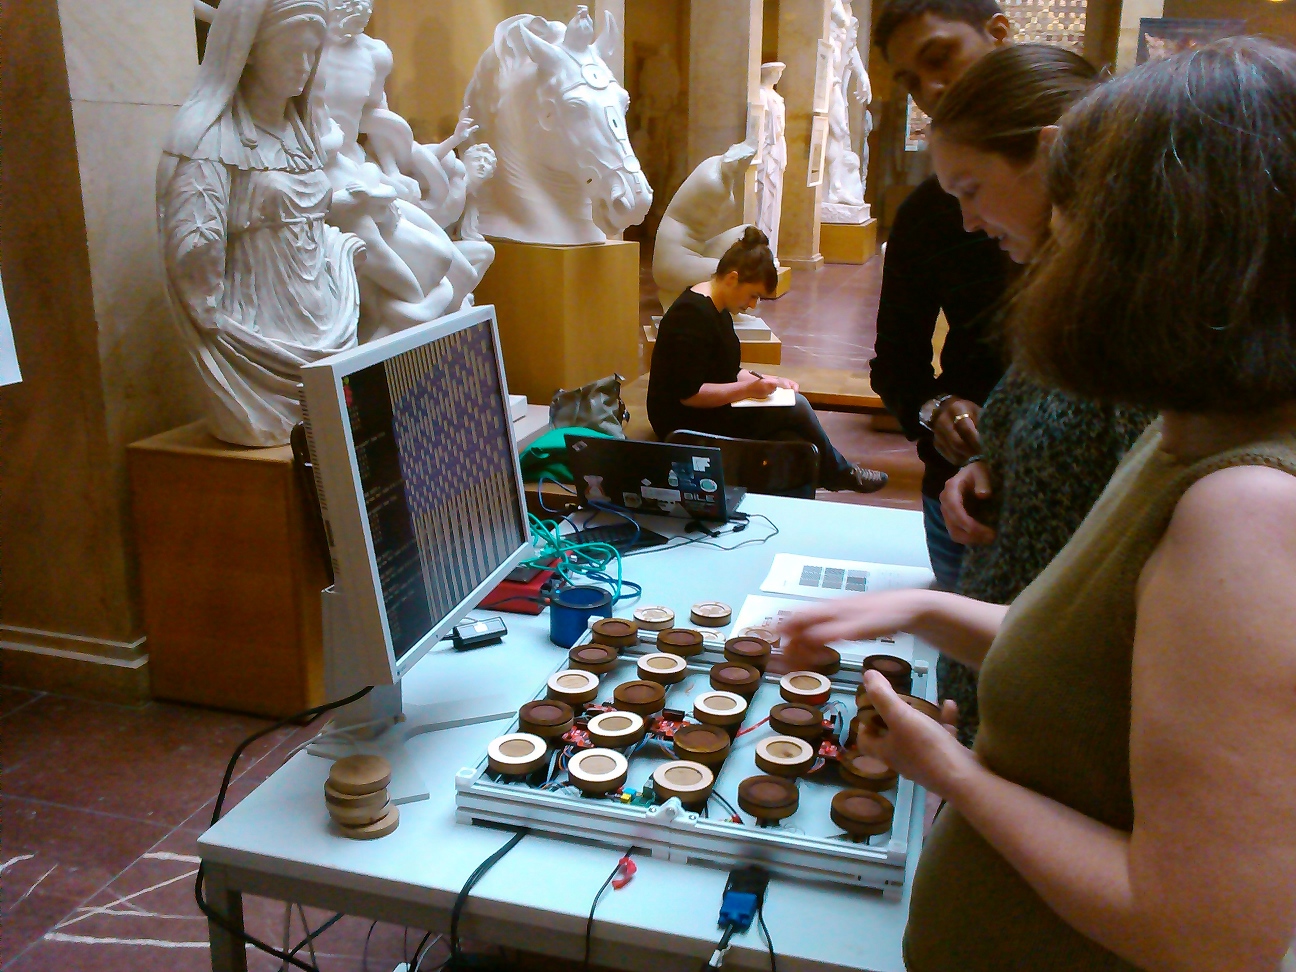
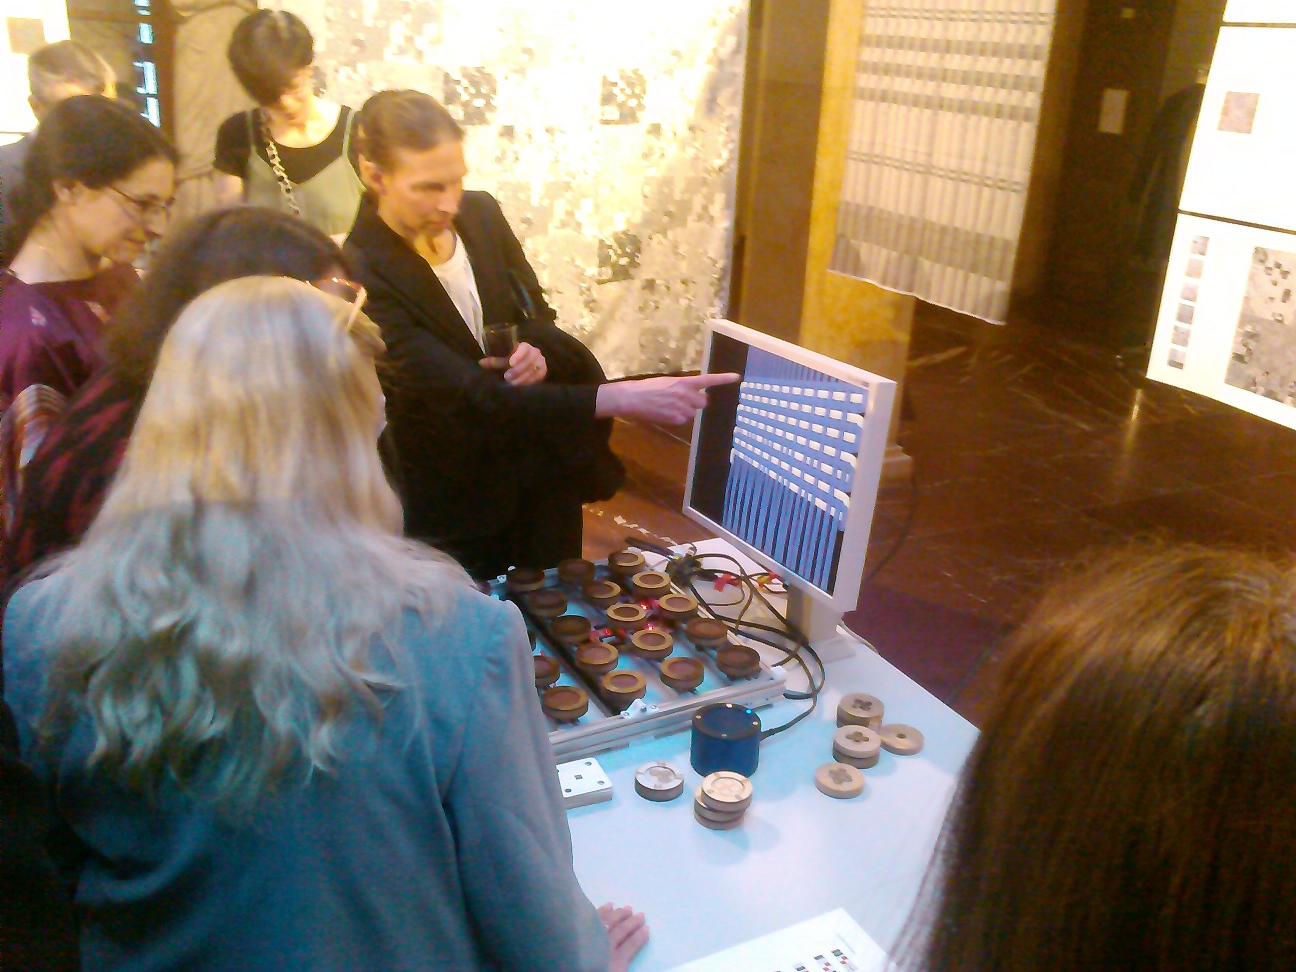
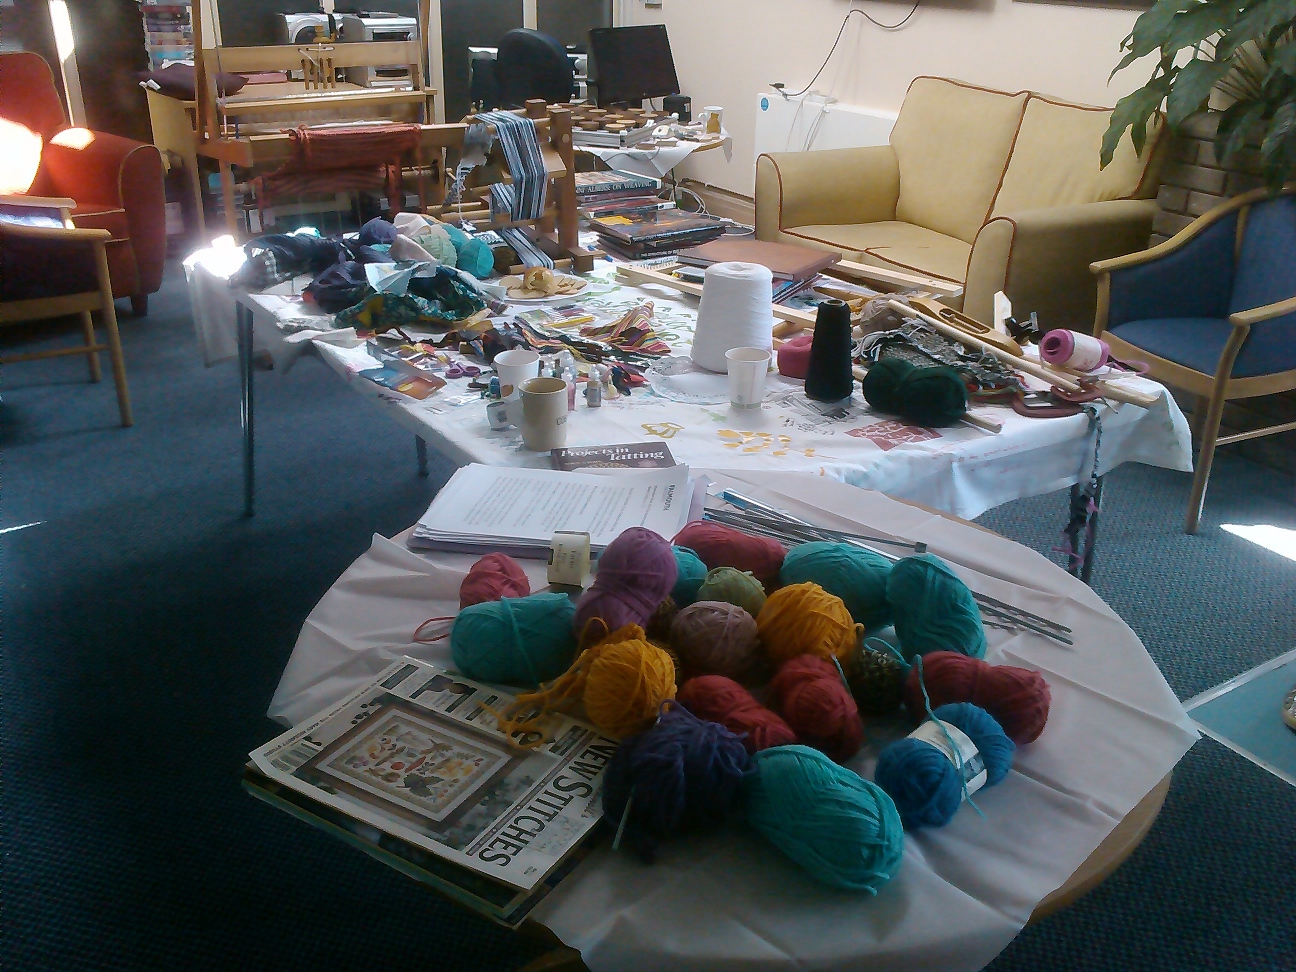
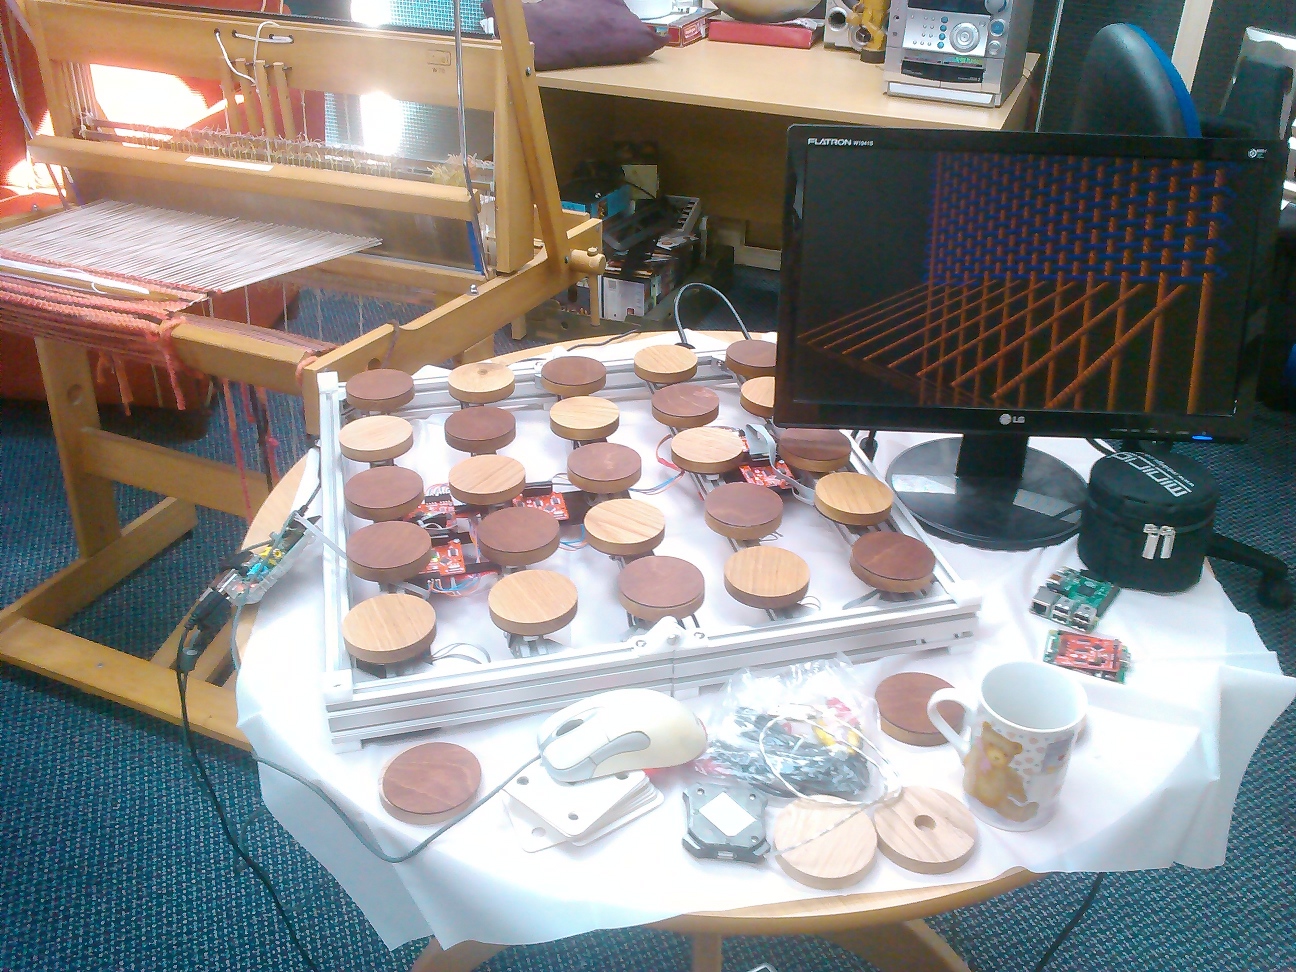
This was also to be our first experiment in remote teaching, with Dave working from Foam Kernow in Cornwall and using online tools to create a shared space with IMM in Düsseldorf. We could write quite a bit more about this aspect alone, for example it turned out that mirrors are critically important in this situation:

j5

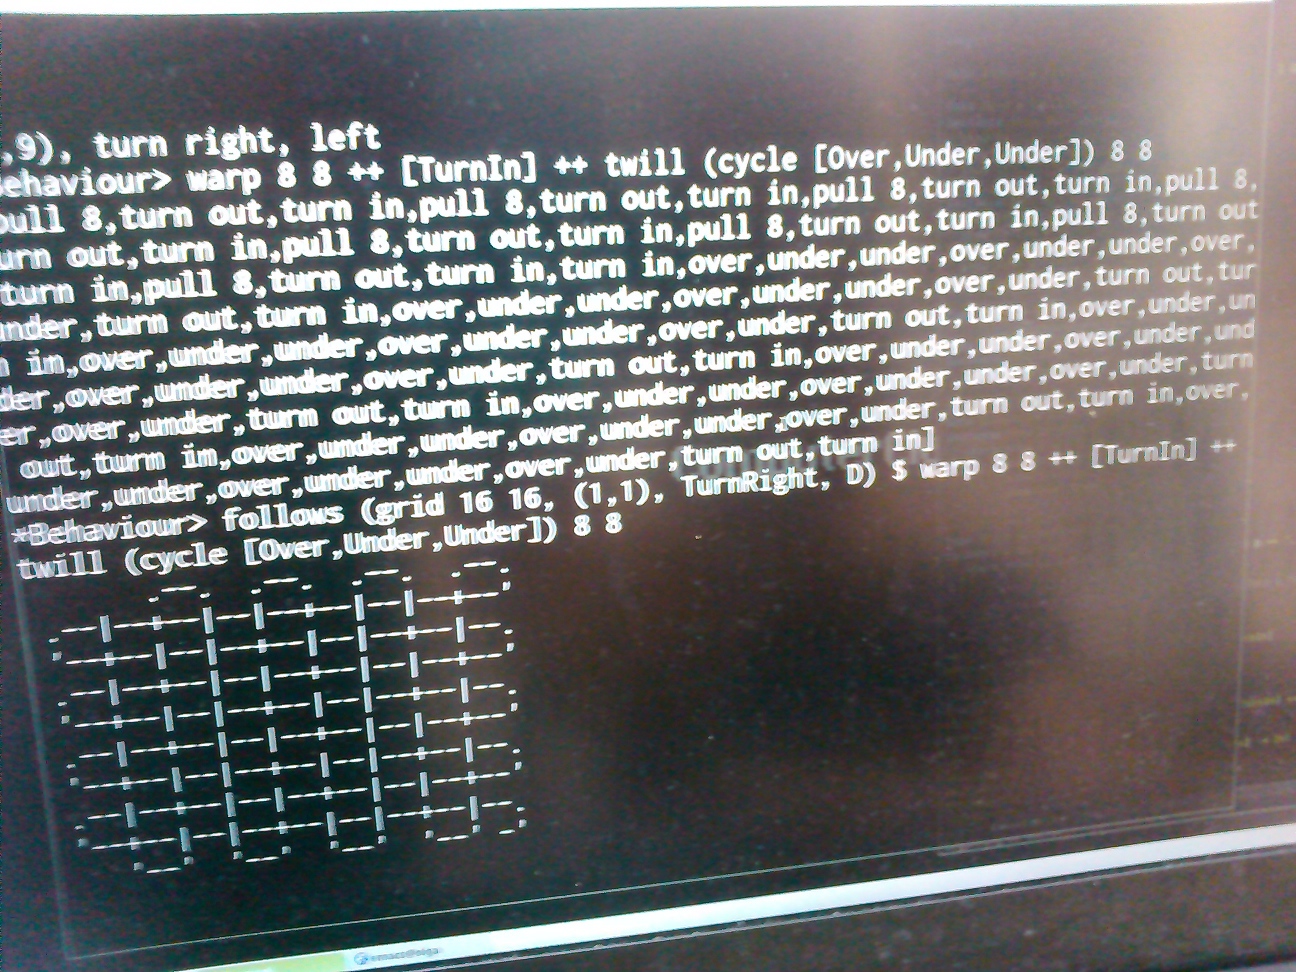
We had prepared a small ‘toolchain’ for the seminar, starting with the Harvard quipu database which currently provides data for 248 quipus. We also had python code for processing/analysis of this data, using graphviz for visualisation and a supercollider parser for the dot files used by graphviz so we could move on to sonifying them.

To start with Dave briefly introduced the Inca civilisation, some of their scientific achievements and very different understanding of time and how much of this culture remains in current societies in the region. We looked at the context in which we think quipus were used, as the basis of organisation (with threads) of a large empire with no money or other forms of written record. Moving on to our tools we explored graphviz, and experimented a little with improving the visualisation then moving in to the world of supercollider we explored the data provided by the dot files.

It turned out to be  too limiting to interpret only the graph drawing instructions  in supercollider, so we found we could include more complete information as ‘hidden data’ (twist, length of the pendants or type, value and spin of the knots). These extra data elements could be added in such a way as to make them silently ignored by graphviz for visualisation. This saved a lot of time needing to come up with another intermediate format.

Example small quipu (UR1138) rendered in graphviz, this should be seen more like schematic maps than realistic renderings.
Example small quipu (UR1138) rendered in graphviz, these should be seen more like schematic maps than realistic renderings. The knots are described in an ‘ASCII art’ style

We also needed some overview of the entire database, in order to search for interesting quipu to sonify. Various quipus have been partially understood, for example some possibly contain data structures for calendar information based on solar and lunar time. Others contain accounting data, with matching hierarchical records found in other quipus. The most mysterious are so called ‘narrative quipus’ which don’t seem to fit the decimal system at all, meaning the knots don’t line up neatly in rows for reading in term of units, tens, hundreds and thousands.

When the significance of the structure of a specific medium is unknown, sonification can be a way to gain new insight. There are various reasons for this, which have partly to do with the way understanding is coupled with perception, partly also simply with the fact that listening  takes time and this is time we spend with absorbing a texture and its potential internal connections.

But there are very many different sonification approaches in a sonification laboratory – which one to choose? In the seminar we discussed for a while the general problem,  namely how to understand graphs as time series, which is not always easy: many different non-trivial paths are possible. The quipus have a very distinct shape: a rather long series of small graphs, each of which have a couple of potentially relevant, but very different dimensions (such as color, number, length). Because sonification is particularly good at giving insight into parallel serial data, our first sketch was to treat the series of pendants from one end of the primary cord to the other, as a series in time (as you would do with a text).

The current state of research makes it plausible that the colours used in quipus are of significance, but it is so far unclear of what. The shades of colours are subtle, as is their possible meaning. To start with, we sonified the colour pattern of the quipu UR004  in a very simple way: a series of very short sine tone chords represent the red, green and blue components:

This causes tones of grey to sound like a single tone, and the difference between components stands out as distance between separate partials. A rather simplistic sketch as it is, it nevertheless revealed a surprisingly rich rhythmic structure, which would be easy to overlook visually. This gave us some confidence that we should pursue this direction a little further.

The next day we began by going back to the data formats, and Dave included a number of data dimensions to the graphviz files. Especially interesting were arrays of colours, which represent alternating coloured threads, and some binary opposed properties, like ply and knot orientation. Some more reading about the interpretations of archaeological findings, we found two promising quipus which made us curious. The paper by Juliana Martins on the astronomical analysis of an Inca Quipu pointed to two interesting candidates from Leymebamba (UR006 and UR009), which we began to work on in the afternoon.

Here is a first result (UR006):

You can hear in this example that each short sound event (about 1/10 of a second an shorter as we go down the subsidiaries) has a number of independent timbral properties. Here is an overview of what “quipu dimension” is mapped onto which sound dimension:

colour sine tone spectrum of three partials
branching level duration between sound grains (inter onset duration)
colour sine tone spectrum composed of three partials
pendant length duration of each sound grain (relative to inter onset time)
pendant attach (verso or recto) pan position left or right channel
pendant ply (S or Z) envelope shape (audible as “inversion effect”)
unknown values are usually interpreted as neutral (pan) or low (colour)

The moments of audible acceleration result from areas with many pendants that have subsidiaries (side branches). In various dimensions rhythmic patterns appear, which partly coincide and partly remain independent. Also, in some moments, we can hear sudden changes of the overall pattern, indicating a transition into a different logic.


Coding with knots: Inca Quipu

This week I’m teaching at IMM Düsseldorf with Julian Rohrhuber which has given me a chance to follow up a bit on Inca Quipu coding with knots, a dangling thread from the weavecoding project. Quipu are how the Incas organised their society, as they had no written texts or money – things like exchanges (for example from their extensive store houses) were recorded via knots. Researchers have been able to decode the basic numeric system they used, but 20% of the quipu seem to follow a different set of rules, along with extra information encoded via thread material, twist direction, colour and other knot differences. I’ve written a python program for converting the Khipu Database Project excel charts into graphviz files for visualising:

quipu5

The knots are described in ascii art, with S and Z relating to the ply and knot ‘handedness’ direction they are tied in:

O : a single knot 
O/O : two single knots tied in S direction (it's rotated 90 degrees :)
(\\\\) : a long knot of value '4' tied in the Z direction
/8 : end (figure of 8) knot tied S direction

The pendant nodes also have labels describing their ply direction and the side the attach on, so “S R” is S ply & recto attached.

The hardest part of this has been a bit of more recent media archeology to figure out the colour values, I’ve had to cross reference the original Ascher-Ascher Quipu Databooks published in 1978 which contain their own colour system which more or less maps to the NBS-ISCC Munsell colour chart originally proposed in 1898. Luckily that site provides hex colour values – hopefully they are vaguely accurate, the current lookup table is here:

colour_lookup = {
    "W": "#777777",
    "SR":  "#BF2233",
    "MB" : "#673923",
    "GG" : "#575E4E",
    "KB" : "#35170C",
    "AB" : "#A86540",
    "HB" : "#5A3D30",
    "RL" : "#AA6651",
    "BG" : "#4A545C",
    "PG" : "#8D917A",
    "B" : "#7D512D",
    "0B" : "#64400F",
    "RM" : "#AB343A",
    "PR" : "#490005",
    "FR" : "#7F180D",
    "DB" : "#4D220E",
    "YB" : "#BB8B54",
    "MG" : "#817066",
    "GA" : "#503D33"
}

Weavecoding Munich

Ellen’s exhibition in Munich was always going to be a pivotal event in the weavecoding project – one of the first opportunities to expose our work to a large audience. The Museum of casts of classical sculptures was the perfect context for the mythical aspects of weaving, overlooked by Penelope and friends with her subversive woven/unwoven work, we could explore the connections between livecoding and weaving.

IMG_8477 2

Practically we focused on developing the tangible weavecoding exhibit for events later in the week, as well as discussing the many languages we have developed so far for different looms and weaving techniques. One of our discoveries is that none of the models or languages we have created seem sufficient in themselves – weaving could be far too big to be able to be described or solved from a single perspective. We’ve tried approaches describing weave structures from the actions of the weaver, setup of the loom and structure of the fabric – perhaps the most promising is to explor the story of weaving from the perspective of the thread itself.

IMG_20150510_062737

IMG_20150508_153211

One of the distinctive things about weaving in antiquity is how multiple technologies were combined to form a single piece of fabric, weaving in different directions, weft becoming warp, use of tablets vs warp weighted weaving. To explain this via the path of a single conceptual thread crossing through itself may make this possible to describe in a more flexible, declarative and abstracted manner than having to explain each method separately as if in it’s own world.

IMG_20150508_152045

IMG_20150509_100421

The pattern matrix has now been made into good shape for explaining the relationship between colour and structure in pattern formation. For the first time we also used all 4 sensors per block on the bottom row which meant we could use a special “colour” block that the system recognises from the normal warp/weft ones and use it’s rotation to choose between 8 preset colour settings. This was quite a breakthrough as it had all been theoretical before.

IMG_20150508_194220

Adding this more complex use of the magnetic patterns meant that Alex could set up the matrix as a tangible interface for his tidal livecoding software meaning Ellen could join us for a collaborative slub weavecoding performance on the Saturday evening. The prospect of performing together was something we have talked about since the very beginning of the project, so it was great to finally reach this point. The reverb in the museum was vast, meaning that we had to play the space a lot, and provide ‘music for looking at sculptures by’:

Ellen Harlizius-Klück – Textile MATRIX

Next week the weaving codes project assembles in the Museum für Abgüsse Klassischer Bildwerke in Munich. We’ll be working for a few days surrounded by these characters to get us in a classical mood:

antike8

The museum is hosting Ellen’s ‘Textile Matrix’ exhibition, a crossbreeding of logical science, religion, crafts and visual arts. The word ‘matrix’ originates from the latin word for mother or uterus, but today is predominantly used in mathematics, science and technology. Her work, as much of the weavingcodes project, provides new perspectives on connections between modern digital technology and ancient weaving.

Alex, Ellen, Emma and I will be in residency in the museum from the 6th May and I’ll be reporting our activities here as usual. On the 9th there will be talks and slub will be performing a special livecoding gig. On the 10th we will be presenting the work we have been doing during the residency and inviting people to participate in a citizen science event, exploring mathematics, weaving, music and code – including the brand new pattern matrix tangible weavecoding device.

Pattern matrix – putting it together

Here is a member of staff at Miners Court trying some tangible weave coding in the midst of our crafts area – at the moment it’s simply displaying the weave structure on the simulated warp weighed loom with a single colour each for warp and weft threads, the next thing is to get ‘colour & weave’ patterns working.

DSC_1064

The pattern matrix is the second generation of tangible programming device from the weavecoding project. It’s been built as an open hardware project in collaboration with Falmouth University’s Makernow fablab, who have designed and built the chassis using many 3D printed parts and assembled the electronics using surface mount components (far beyond my stripboard skills).

Here you can see the aluminium framework supporting the AVR based row controller boards with the Raspberry Pi in the corner. The hall effect sensors detect magnetic fields – this picture was taken before any of the wiring was started.

IMG_20150408_105446

The row controllers are designed to read the sensor data and dispatch it to the Raspberry Pi using i2c serial communication running on their atmega328 processors. This design was arrived at after the experience of building flotsam which centralised all of the logic in the Raspberry Pi, resulting in lots of wiring required to collect the 128 bits of information and pass it to the GPIO port on the Pi. Using i2c has the advantage that you only need two wires to communicate everything, processing can be distributed and it can be far more modular and extendible in future. In fact we plan to try different sensors and configurations – so this is a great platform for experimenting with tangible programming.

This video shows the current operation of the sensors and row controllers, I’ve programmed the board with test code that displays the state of the magnetic field with the status LED, making sure that it can tell the orientation of the programming block:

The row controllers have a set of multiplexers that allow you to choose between 20 sensor inputs all routed to an analogue pin on the AVR. We’re just using digital here, but it means we can try totally different combinations of sensors without changing the rest of the hardware.

After getting the first couple of rows working and testing it with elderly people at our Miners Court residency there were a couple of issues. Firstly the magnets were really strong, and I worried about leaving it unattended with the programming blocks snapping together so violently (as we plan to use it in museum settings as well as at Miners Court). The other problem was that even with strong magnets, the placement of the blocks needed to be very precise. This is probably to do with the shape of the magnets, and the fact that the fields bend around them and reverse quite short distances from their edges.

To fix these bugs it was a fairly simple matter to take the blocks apart, remove 2 of the 3 magnets and add some rings to guide placement over the sensors properly:

IMG_20150418_114347

Future Thinking for Social Living: Weavecoding in assisted housing

Our work on weavecoding is now reaching out to other uses and projects. One is Future Thinking for Social Living, run by Magda Tyżlik-Carver and Fiona Hackney.

This research project aims to look at the relationship between wellbeing, home, making and technology and is centred on Miners Court, who provide assisted housing in Redruth in Cornwall. As well as a range of flats and accommodation, the residents have shared communal areas with a variety of activities throughout the week. Along with Christiane Berghoff, Robin Hawes and Lucie Hernandez we set up camp with a lot of materials for knitting, crochet and weaving as well as some Raspberry Pis and the all new pattern matrix tangible weavecoding device.

miners

The Future Thinking for Social Living project is set up to research how we can think more critically about home and community, and with particular focus on the future. From discussions with the staff at Miners Court – specific issues they are interested in are how to make better use of communal spaces, and how can they get more men involved with crafts and shared activities.

I’m also interested in how we can use these settings for artists residencies – how does working with people like this affect a design process, does working in such a place – and using it as way to start conversations (rather than being too much in ‘teacher mode’) affect the people living there positively? Also the weavecoding project provides some ideas in bridging gaps, both between technology and people – but also across gender gaps, mixing textiles with electronics for example.

miners2
Here is the new magnetic pattern matrix, running the 3D Raspberry Pi warp weighted loom simulation (more on this soon!) with a nice 4 shaft loom in the background.

On Monday and Tuesday we spent a long time talking, weaving, knitting and making cups of tea of course (and a bit of time debugging magnets on my part). I’ve found helping people weave with tablets on the inkle loom is a good way to get talking, as this seems new to even people who are experienced with crafts. It also appeals to people with mathematics or design background who normally are uninterested in knitting and other crafts, and seems gender neutral perhaps for the same reasons. It also helps to talk about the history of what we are weaving with, the fact that this is an ancient technique and yet there are so many surprises – I can’t really predict to them what will happen e.g. to the pattern when we change rotation direction, and this seems to be important.

What we have yet to do (but a few weeks to experiment yet) is bridge the technology gap. Many of them have an immediate reaction of distaste to computers, as most of them have them but report that they have become unusable or feel that they are not designed well with their needs in mind. Partly the situation of having some circuit boards getting tangled up in the more familiar materials and using the Raspberry Pi simulation to show what is happening on the loom next to it is a start. One interesting thing is that neither the Pi nor the AVR boards look enough like ‘a computer’ for it to stand out too much (which also part of the Pi’s role in the classroom) – this was more so after plugging it into their large TV and getting rid of the monitor. As it gradually gets into a working state, I’d like to first try using it to demonstrate well known weaves – e.g. plain, twill and satin.

Working in this environment on the pattern matrix between weaving with different people has already had an effect on it’s design process. One initial observation resulted in reducing the magnet strength – I hadn’t even considered before that having them snap together too forcefully would be a problem for some people. Such things are obvious in these kinds of settings.

Some loose threads

Midway through the weavecoding project and our researches have thrown up a whole load of topics that either don’t quite fit into our framework, or we simply won’t have time to pursue properly. Here are some of the tangents I’ve collected so far.

Coding with knots: Khipu

One of the cultures I’m increasingly interested in are the Incas. Their empire flourished to up to 37 million people, without the need of money or a written language. We know that some numeric information was stored using Khipu, a knot based recording system which was used in combination with black and white stones to read and calculate. Two thirds of the quipus we have are un-translated, and do not fit into the known numeric coding system – what information do they hold?

quipu

Harvard University provides a Khipu Database Project with many surviving examples documented – I’m hoping to run a workshop soon to look through some of this data in a variety of ways.

Tablet weaving NAND gates

Image2
Diagram thanks to Phiala’s String Page – the only place I’ve seen tablet weaving explained properly.

There are logic gates in tablet weaving logic. I haven’t fully figured this out yet, but I noticed modelling tablet weaving that you end up basically mapping the combinations of the weaving actions (such as turn direction) and colour as truth tables.

Top face colour based on top left/top right hole yarn in a single card and turn direction (clockwise/counter clockwise)

TL Yarn : TR Yarn : Turn : Top face colour
--------------------------------------------
Black   : Black   : CCW  : Black
Black   : Black   : CW   : Black
Black   : White   : CCW  : Black
Black   : White   : CW   : White
White   : Black   : CCW  : White
White   : Black   : CW   : Black
White   : White   : CCW  : White
White   : White   : CW   : White

Things get stranger when you include twist and combinations of actions with multiple cards. Would it be possible to compile high level programming languages into weaving instructions for carrying out computation? Perhaps this is what the untranslatable quipus are about?

Nintendo made a knitting machine

We could really do with some of these, unfortunately they never went beyond prototype stage.

nintendo

Asemic writing

Asemic writing is a post-literate written form with no semantic content. Miles Visman programs procedural asemic languages and hand weaves them. I think this may be an important connection to livecoding at some point.

aw001

New tangible weavecoding device – pattern matrix

We’re starting construction of version 2 of the flotsam tangible programming device, specialised to weaving – and henceforth known as the ‘pattern matrix’. This will be tested during May at our upcoming performance/workshop/residency at Munich’s Museum für Abgüsse Klassischer Bildwerke (Museum of Casts of Classical Sculpture) with the Coding weaves project, and then for later use in Cornwall (more on that part soon).

1

The first thing we are exploring is removing the need for physical plugs – although I like them a lot, they are problematic for people as it takes time to learn how to align the blocks in the current prototype. In order to get around this, and maintain the cheapness of the programming blocks themselves we’re looking at using magnetism to represent information. We can use blocks with no connections, painted white and black on different sides and detect their orientation and position via a magnet in the centre.

Initially this idea came from thinking about reed switches with Francesca, and playing with mobile phone magnetometers on the UAV project led to us investigating Hall effect sensors (the building blocks of magnetometers). We had a bit of a testing workshop with Andy from the Falmouth University makernow fablab who are helping with construction of this project.

halleffect

Hall effect sensors allow us to detect the polarity of nearby magnetic fields – and seem to be restricted enough in range that they can be very precise. Even with fairly weak magnets we found we could put the sensors right next to each other (see above) and still determine the difference between two opposed or aligned fields.

For the warp/weft weave pattern structure we only need 1 bit of information to be detected, but for future extensibility for the yarn colour programming setup it’s important to be able to read more (4 bits are encoded in the flotsam blocks).

Our plan is to try putting 4 sensors in a square which adds an intriguing possibility of rotating the blocks to change their meaning, as well as flipping them. The great thing is that this gets very close to tablet weaving in terms of the notation and the actions required. We can also represent all 16 states with only 4 blocks – if negative is 0 and positive is 1, and we read the code as binary clockwise from top left:

Starting state [0,1,5,6]
- -   + -   + -   - +
- -   - -   - +   - +

Rotate clockwise [0,2,10,12]
- -   - +   - +   - - 
- -   - -   + -   + +

Horizontal flip [15,11,10,12]
+ +   + +   - +   - - 
+ +   + -   + -   + +

Rotate counter-clockwise [15,13,5,6]
+ +   + -   + -   - + 
+ +   + +   - +   - +

Vertical flip [0,4,5,6]
- -   - -   + -   - + 
- -   - +   - +   - +

Here is Andy’s design for the PCB we’ll use under each of the 25 board locations:

hallboard

3D warp weighted loom simulation

One of the main objectives of the weavecoding project is to provide a simulation of the warp weighted loom to use for demonstrations and exploration of ancient weaving techniques. Beyond the 4 shaft loom dyadic calculator we need to show the actual process of weaving to explain how the structures and patterns emerge. Weaving is very much a 3D process and these visualisations fail to show that well. It also needs to be able to be driven by the flotsam tangible livecoding hardware so running on a Raspberry Pi is another requirement.

Sketch and rendering

I’ve decided to make use of the Jellyfish procedural renderer to build something fast and flexible enough, while remaining cross platform. Jellyfish is a lisp-like language which compiles to a vector processing virtual machine written in C++, and approaches speeds of native code (with no garbage collection) while remaining very creative to work with, similar to fluxus livecoding. Previously I’ve only used it for small experiments rather than production like this, so I’ve needed to tighten up the compiler quite a bit. One of the areas which needed work (along with function arguments which were coming out backwards!) were the conditional statements, which I removed and replaced with a single if. Here is the compiler code at the lowest level which emits all the instructions required:

;; compiler code to output a list of instructions for (if pred true-expr false-expr)
(define (emit-if x)
  (let ((tblock (emit-expr (caddr x))) ;; compile true expression to a block
        (fblock (emit-expr (cadddr x)))) ;; compile false expression to block
    (append
     (emit-expr (cadr x)) ;; predicate - returns true or false
     (emit (vector jmz (+ (length tblock) 2) 0)) ;; if false skip true block
     tblock
     (emit (vector jmr (+ (length fblock) 1) 0)) ;; skip false block
     fblock)))

Then I can implement cond (which is a list of different options to check rather than one) as a purely syntactic form with a pre-processor function to create a series of nested ifs before compiling them:

;; preprocessor to take a cond list and convert to nested ifs 
(define (preprocess-cond-to-if x)
  (define (_ l)
    (cond
      ((null? l) 0)          ;; a cond without an else returns 0 
      ((eq? (caar l) 'else)  ;; check for else clause to do
          (cons 'do (pre-process (cdr (car l)))))
      (else (list 'if (pre-process (caar l)) ;; build an if
          (cons 'do (pre-process (cdr (car l))))
                  (_ (cdr l)))))) ;; keep going
  (_ (cdr x))) ;; ignores the 'cond'

Here’s an example of the if in use in the loom simulation at the ‘top’ level – it gets the current weaving draft value for the weft and warp thread position and uses it to move the weft polygons forward or back (in the z) a tiny amount to show up on the correct side of the warp.


(define calc-weft-z
    (lambda ()
        (set! weft-count (+ weft-count 1))
        (set! weft-z
              (if (> (read-draft) 0.5)
                  (vector 0 0 0.01)
                  (vector 0 0 -0.01)))))


One of the reasons I’m writing about all these levels of representation is that they feel close to the multiple representations present in weaving from draft to heddle layout, lift plan, fabric structure and resulting pattern.